Digital noise reduction for AM radio
One of my hobbies is amateur radio, which uses ionospheric reflection to allow radio waves to travel a great distance. At these frequencies amplitude modulation is still used for voice communications. Under ideal circumstances received signal quality is often better than a conventional telephone line but often it is challenging to understand what others are saying.
One common issue is sources of electromagnetic noise that can cause interference. Although man made sources exist, lightning in the atmosphere is an almost universal source of electromagnetic interference. Even though it is stil possible to understand the other party it can be quite hard on the ears. A single lightning strike often makes a sound like a loud "pop" but multiple frequent lightning strikes is referred to as a "crash" due to the noise it makes.
A simple technique to address this is to use bandpass filtering to change the received audio. A typical radio would allow audio in the range of 0 Hz-2800 Hz to be received. Human voice rarely uses the entire range at a single point in time. By restricting the range to something like 100 Hz-2000 Hz you can effectively raise the intelligibility of human speech when noise is present. This comes at a cost of audio fidelity. This technique is simple but only goes so far.
Advanced techniques rely on characteristics of human voice to implement dynamic filtering of audio. For example, it's practically impossible for a human voice to produce a large range of simultaneous pure tones. I actually own hardware devices that are designed to filter out noise based on principles like this, but have been interested in doing so with a regular computer for some time.
I'm unlikely to one-up existing experts in the field, so my goal was to adapt something that was already existing to my purposes. In my case the audio from my radio is already connected to my computer using the soundcard's microphone port. So what I need is something that can take unprocessed audio and emit processed audio. The first project I looked at is called RRNoise. This seemed extremely promising. It is apparently reliant on a training dataset to be effective, so I was able to retrain it on noise sampled from the radio spectrum. However, this did not work. After processing audio the final result had basically nothing at all. Barely anything was discnerable, not even human speech.
There exists a project called WDSP which seems to fit all of my needs. I was able to get it to compile and spent about 3 hours trying to write a simple example program to get it to work. I was able to get it functioning but eventually came to the conclusion it wasn't suitable for the following reasons
- My soundcard outputs real valued samples (PCM) whereas the library expects I-Q data
- The WDSP library is designed to implement a complete software defined radio, which far exceeds my needs
- There are multiple issues with the library seemingly having missing function headers
While I was able to get audio to pass through the WDSP library it wasn't really satisfactory. So I gave up on that and looked elsewhere. The KiwiSDR project is a combination of a hardware design plus a suite of software to make a browser accessible software designed radio. It has numerous noise reduction options, some of which work quite well.
It just so happens that the KiwiSDR project has a noise reduction option called "WDSP LMS". The headers on this indicate it is actually derived from the WDSP project in a roundabout manner
// Automatic noise reduction
// Variable-leak LMS algorithm from Warren Pratt's wdsp package
// github.com/TAPR/OpenHPSDR-PowerSDR/tree/master/Project%20Files/Source/wdsp [GNU GPL v2.0]
// github.com/g0orx/wdsp
// github.com/NR0V/wdsp
// (c) Warren Pratt wdsp library 2016
//
// via the Teensy-ConvolutionSDR project: github.com/DD4WH/Teensy-ConvolutionSDR [GNU GPL v3.0]
// (c) Frank DD4WH 2020_04_19
//
So this is actually a C++ implementation of the least mean squares filter that is part of WDSP. This turned out to be much easier to work with. It is not available as a standalone component or program however. So I eventually located this file which is apparently the complete implementation I needed. It took a while but what I was able to do was able to extract out all the necessary values from other headers to get this into a standalone implementation that I could compile with just gcc.
Results
In order to test how well this works I needed to have a sample set of audio I could try it on. I recorded a conversation in the amateur 20 meter band while a lightning storm was present locally. This gave me an audio file that obviously had human voice present but was very difficult to listen to. It's difficult to present this result graphically, but this spectrogram attempts to show the difference
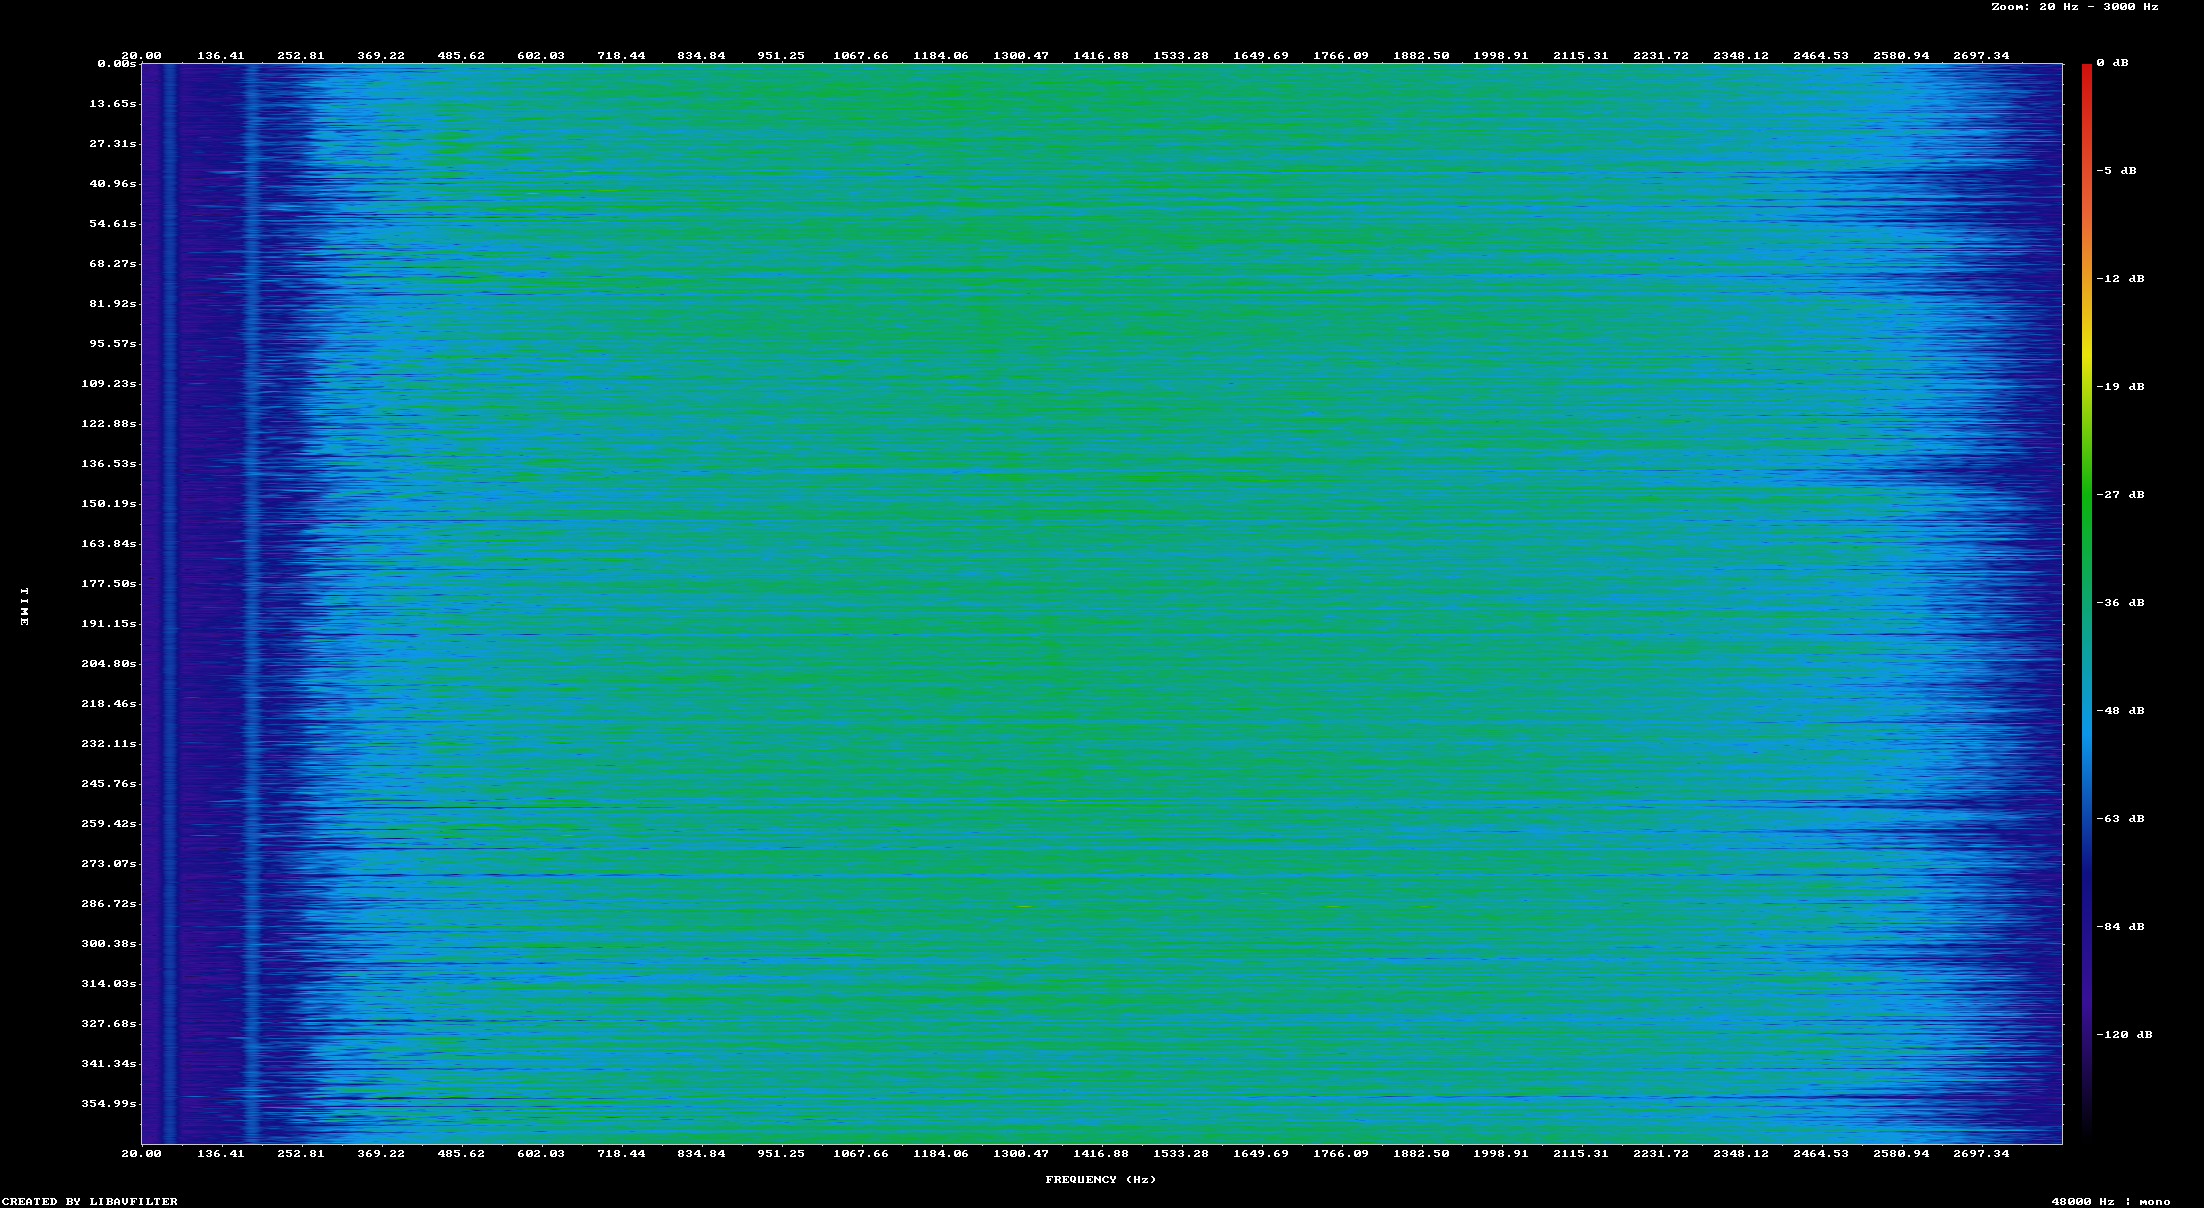
Before noise reduction
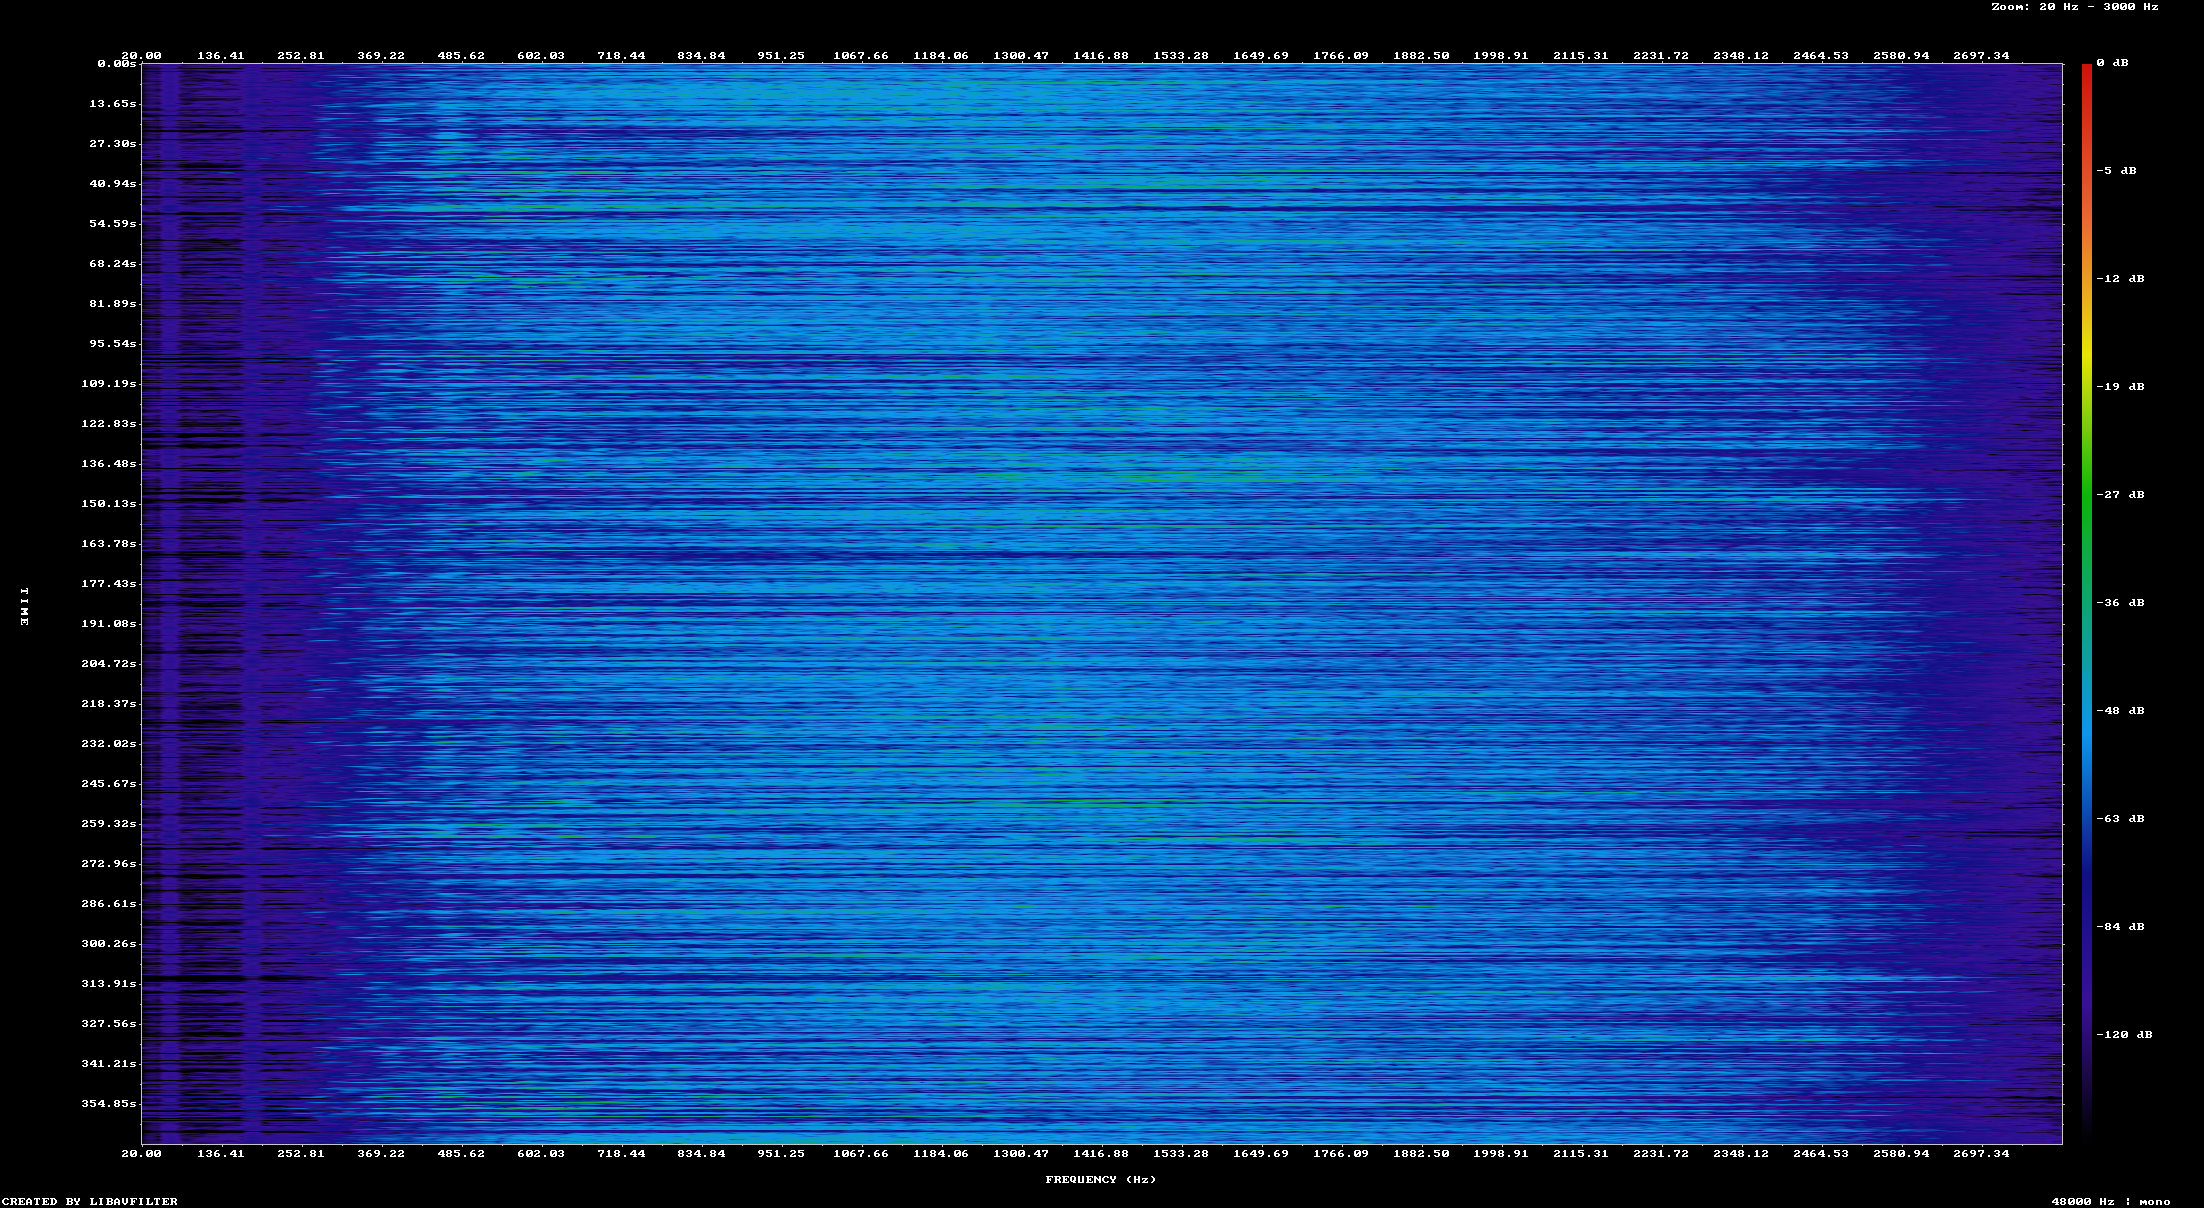
After noise reduction
Although this does not show much difference at all, it becomes a little bit easier to listen to. This particular signal is actually quite weak, so noise reduction is only so useful. I recored another voice signal that was strong but had the presence of significant noise.
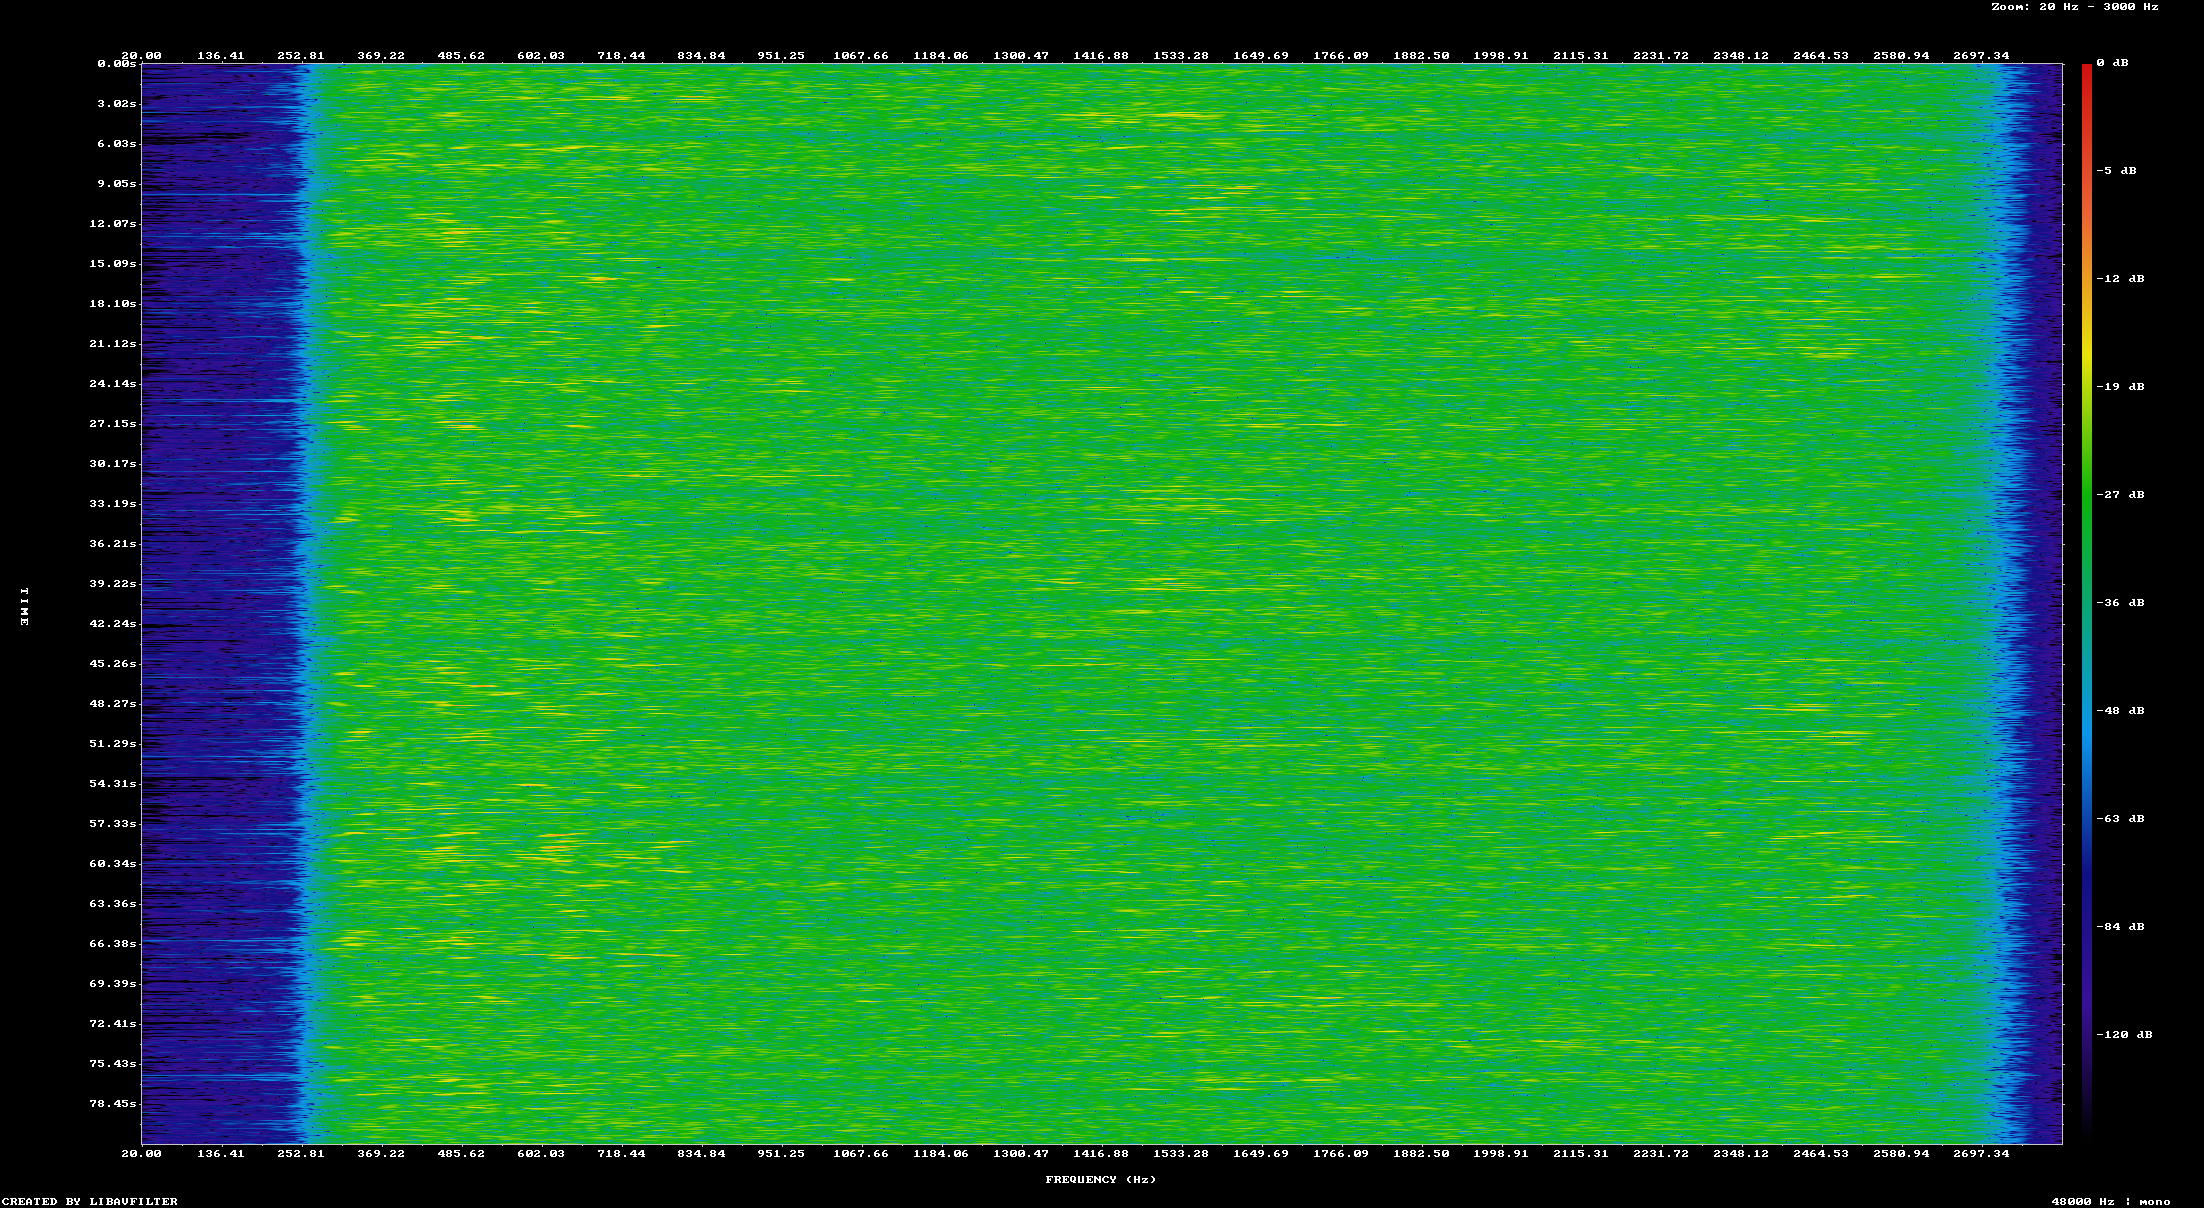
Before noise reduction
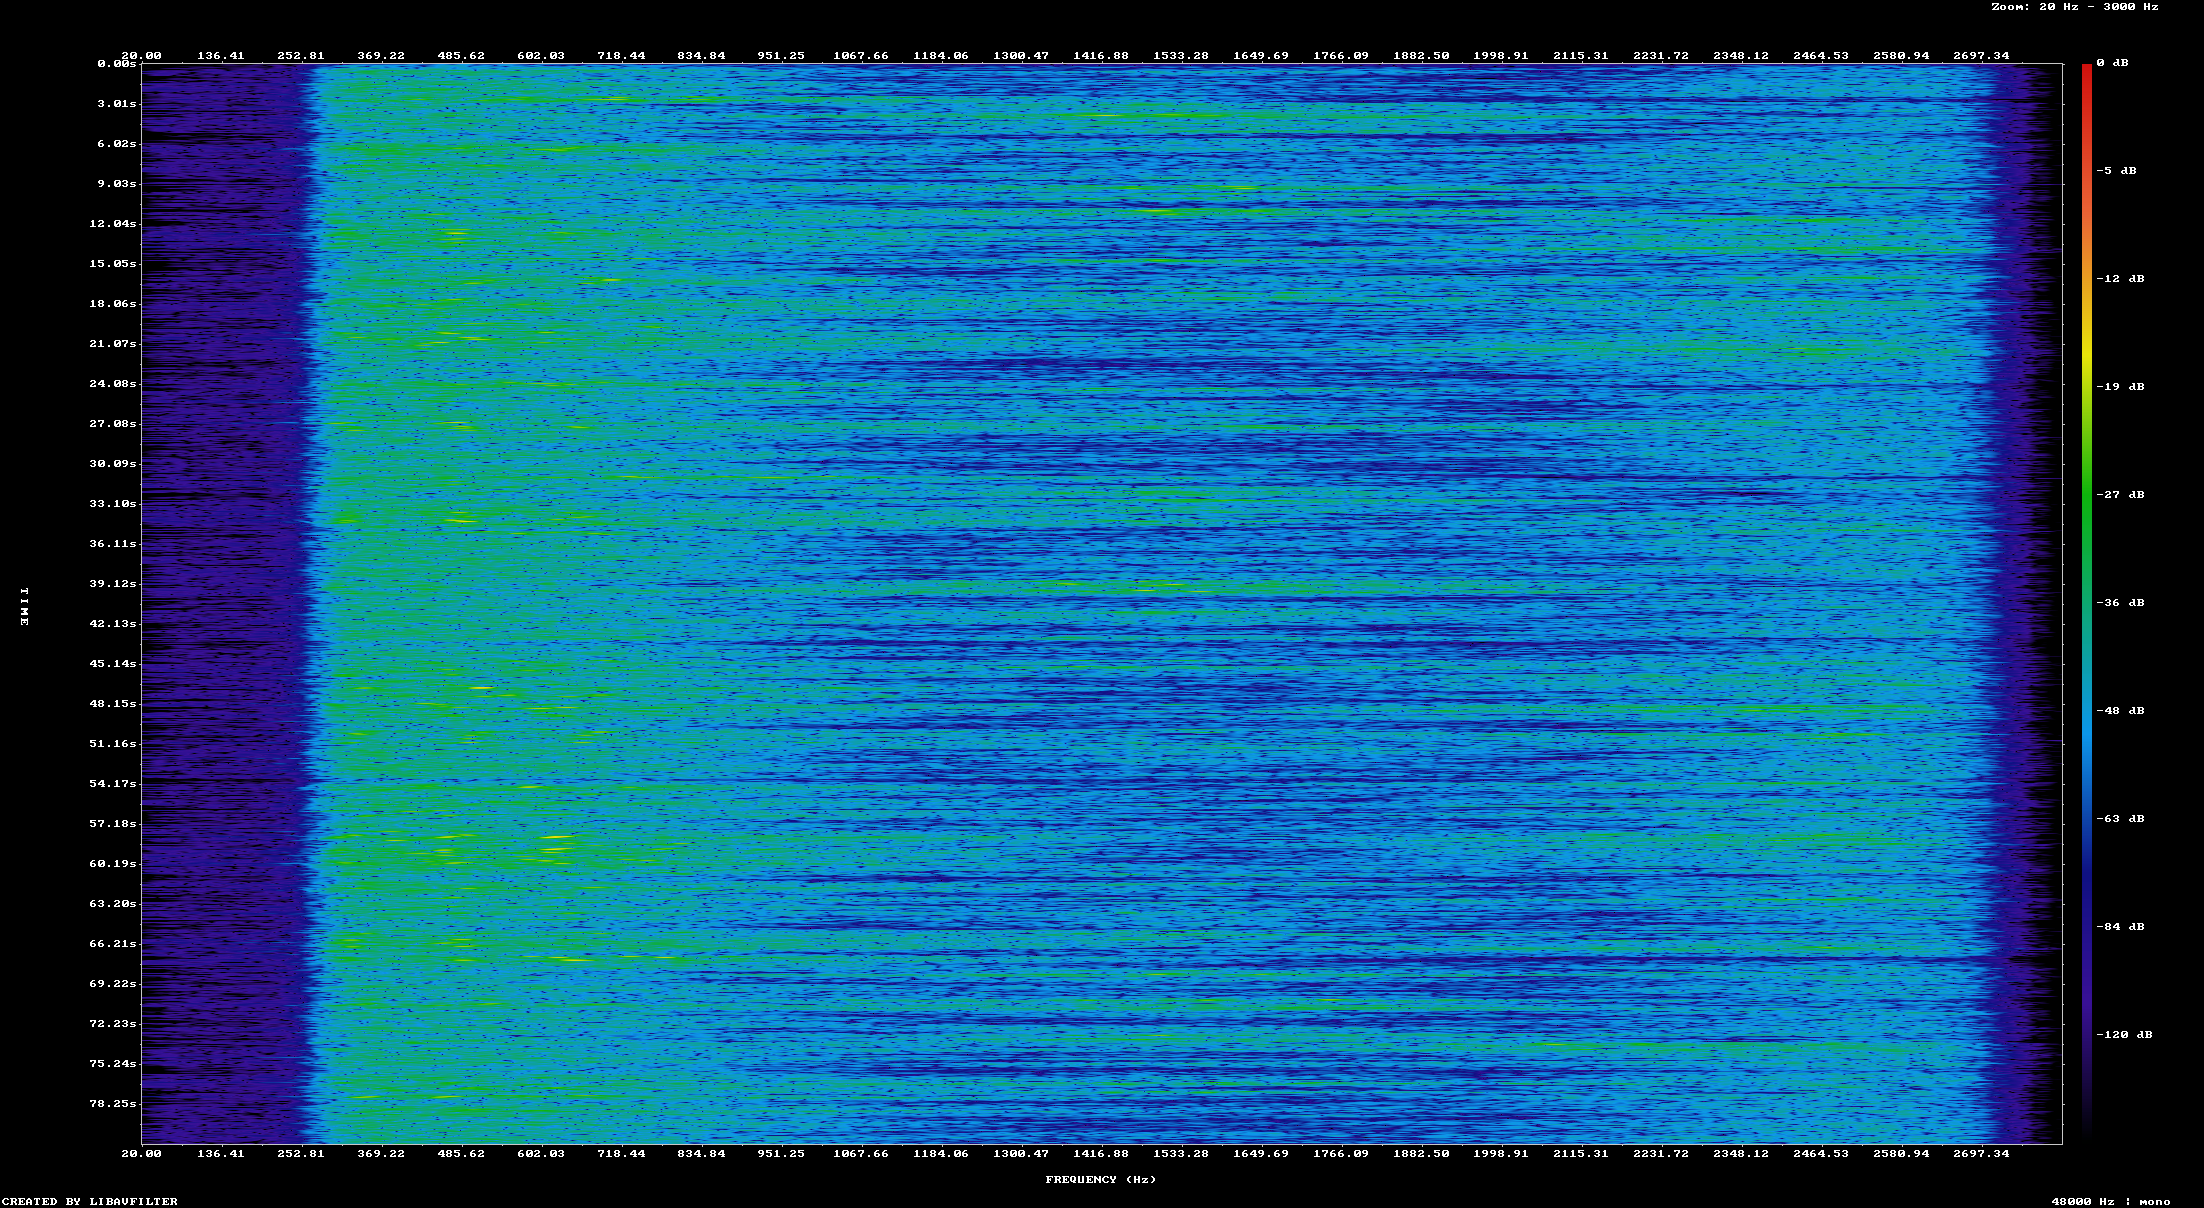
After noise reduction
In this example the before & after difference is more visible. The spectrogram shows a nearly uniform intensity of signal. The second spectrogram has more range between the quietest and loudest sections of the audio. This is consistent with human speech, which tends to have large variations in the intensity over time. In both cases you can understand the audio, it's just easier to listen to the audio after the noise reduction has been applied.
At this stage I am satisfied with the result for now. This is meant as a proof of concept that I can integrate into other projects later on.
Running it
This project is just a small set of C language files and a build script. To get the source code, download it from here. To compile the code just run ./build.sh. The executable called kiwi_lms is created. This program takes on standard input a stream of 16 bit native-endian audio samples at a rate of 48000 samples per second. It writes the filtered samples out at the same rate and data type.
In order to get some audio to process what I did was selected a web software defined radio. This plays audio from a radio receiver on your local computer. If you're running linux with pulse audio, you can list off the available inputs by running pacmd list-sink-inputs. Each input usually has a description of what program is producing it, you're looking for one created by your browser. Note the index number.
You can record what your browser is playing by running the command
parec --monitor-stream=42 --format=s16le --rate=48000 --channels=1 --file-format=sample.raw
The value 42 needs to be changed to the index from the previous step. After some amount of time press CTRL+C to stop recording.
At this point you have a raw audio file that is ready to be processed. You can process and play it by running
cat sample.raw | ./kiwi_lms | pacat --playback --verbose --file-format=raw --channels=1 --format=s16le --rate=48000 --raw
This plays the processed audio on your default sound device.
Notes
Converting audio files
The kiwi_lms program processes raw audio samples which is convenient. But the files can be very large. You can convert them into a compressed file by using the sox program. To compress a raw audio file into an Ogg file do this
sox -r 48000 -b 16 -c 1 -L -e s signed-integer sample.raw sample.ogg
To convert back into a raw format, the command is almost the same
sox ./sample_20m_lightning.ogg -r 48000 -b 16 -c 1 -L -e signed-integer sample_converted_back.raw
Spectrograms
You can produce spectrograms using ffmpeg. In my case I did it using this command
ffmpeg -y -nostdin -i ./sample.ogg -lavfi showspectrumpic=s=1920x1080:mode=separate:orientation=horizontal:color=rainbow:scale=log:start=20:stop=3000 sample_20m_before.png
This is a quick and convenient way to create spectrograms.