Proxmox as a home virtualization solution
- Thursday January 08 2015
- virtualization
For many years now I've been using VirtualBox. In fact, I've been using it for so long it was a Sun Microsystems product whenever I started using it. It is incredibly easy to get started with, you can have a working virtualization environment on top of Ubuntu Linux in minutes. As a platform for experimentation and development, it is very difficult to beat. It is actually open source but most of the features that are make it a modern virtualization platform are closed source. As far as I am concerned it is closed source platform that happens to be free for my personal use.
I've never really been happy with VirtualBox as a host for virtual machines that are in someway critical to infrastructure. I do lot of tinkering with things, but once I am satisfied with a solution I'd prefer to never touch it again. The ease of use that comes with the graphical user interface is starkly contrasted by the command-line VirtualBox tool. Literally, everything is available through the command-line tool. My usual usage pattern involves creating a linked-clone of an existing machine, changing the NIC's MAC address and then customizing the machine for the purpose at hand. I can do all this with the GUI and then use VirtualBox startvm 'somevm' --type=headless to start it from an SSH session. The actual GUI is perfectly usable through X11 forwarded via SSH.
The real thing that has pushed me away from VirtualBox as a production environment is that on several occasions I've had multiple virtual machines simply abort with no explanation. There are no logs of any kind to indicate a problem. The worse part is that when I restarted them they just worked. There was not even an appearance of them being broken. So I have been searching for a replacement for a while. My requirements are straightforward.
- Installable without large amounts of effort on my part
- Installable on a single physical piece of consumer-grade hardware
- Have a GUI interface that is usable remotely
- Have a command line interface that is usable remotely
- Support guest templates
- Allow for redundant storage of at least the virtual machine images
- Zero-cost
There are many ways that these problems could be solved. I could probably come up with some scripts that would be usable on any KVM linux host to do what I need. However, I am actively trying to avoid reinventing the wheel. There are tons of great solutions for open-source virtualization out there. The biggest problem is that most of them are aiming to solve the problem of virtualizing hundreds of servers over tens of pieces of physical hardware. For my own personal usage I really don't need or want a full rack of equipment to act as a virtualization host. I played around with OpenNebula for a while. Its is possible to get it running on a single piece of hardware but it the set up is quite involved. The other thing I really need is the ability to use software RAID of some kind. High quality RAID controllers are prohibitively expensive and cheap RAID controllers are usually worse off than linux's native MDADM support. I've been using MDADM in mirrored mode for years and never once had it cause me a problem. This is actually an unusual requirement. Most enterprise virtualization products just assume you are going to spend money on something like a SAN.
Proxmox is an attractive solution because it is a linux distribution designed for virtualization but is still just a basic Debian machine. If it is easy enough to get it running, I should be able to customize it to fit my needs. I downloaded Proxmox VE 3.2.
Installation
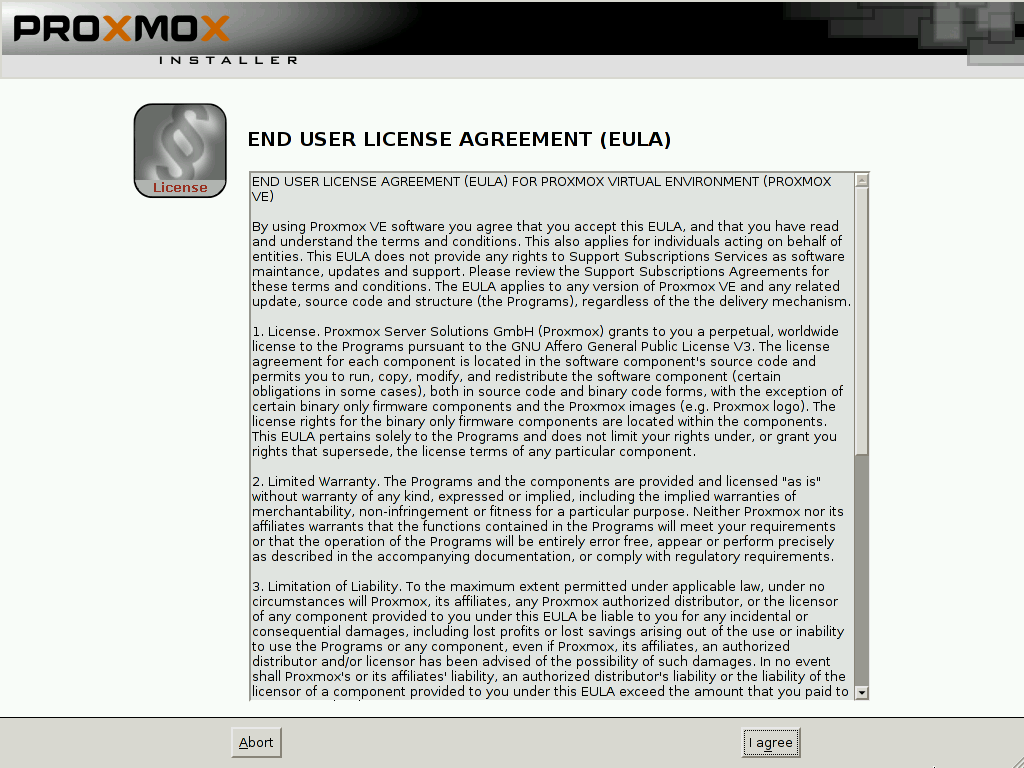
Installation of Proxmox is done through a linux live cd. By default you'll get a system using the ext3 filesystem but if you type linux ext4 at the first prompt the installed system uses the ext4 filesystem. After that you'll have to accept the license agreement. In the next few screens you configure the root user, the time zone, and country. The installer gets an address from the local DHCP server if available and then prompts you to accept it. It is a little strange because it actually statically configures the network interface to use this IP address. This could cause problems in some environments. Just make sure you put an IP address in the configuration screen that is something out side of your DHCP pool. If you have multiple hard drives Proxmox asks you to select a single one for installation. After that installation is automatic.

The Web Interface
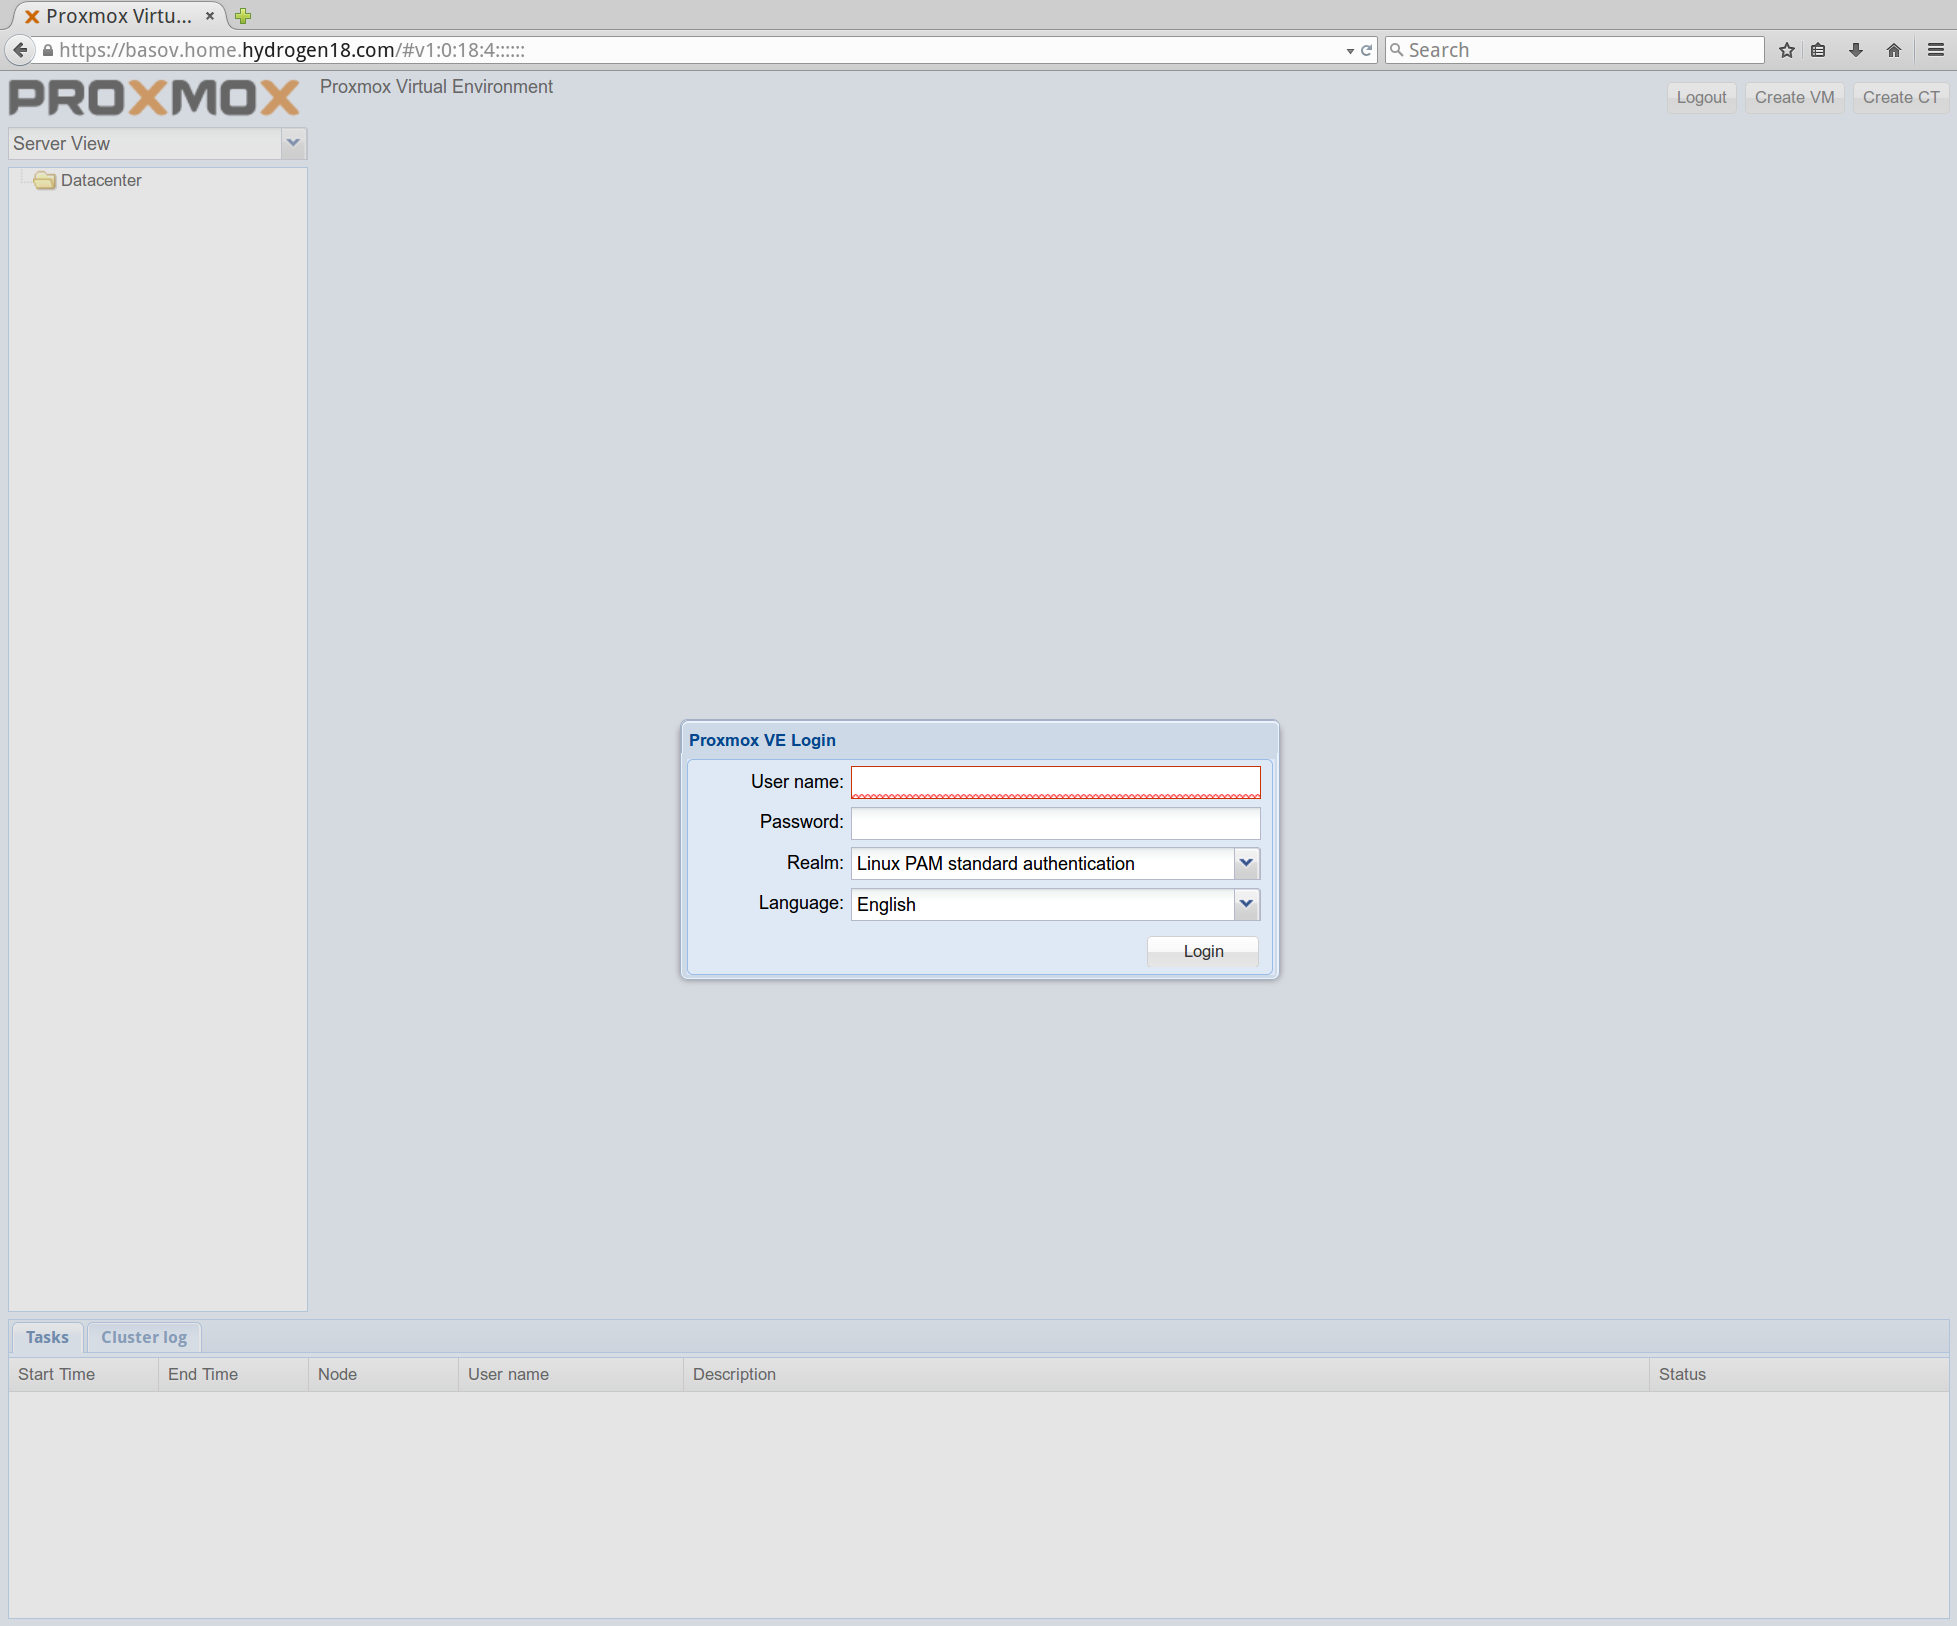
After installation you can jump directly into the web interface. The web interface for Proxmox runs by default on port 8006 serving HTTPS. I'm not really sure how this decision was made. The process is called pveproxy and there is no immediately obvious way to reconfigure it. You can access it directly using the IP address of the box and specifying the HTTPS protocol succh as https://192.168.1.1:8006/. However, most browsers are not thrilled with HTTPS running on non-standard ports. Chrome on Ubuntu 14.04 was not suitable for using this interface. The console of each VM is accessed using a VNC client that is Java based which Chrome did not like. It works very well with Firefox however.
You'll be prompted for a username and password. Use root and the password you entered during installation. There is a nag screen reminding you that you aren't subscribed each time you log in.
HTTPS support using nginx
It is much simpler to just install nginx to handle the HTTPS duties. This is strictly optional. The web interface uses web sockets to support VNC. The version of nginx that is installed is too old to support this. A newer version is available from the debian wheezy backports.
To enable the backports add the following line to /etc/apt/sources.list
deb http://ftp.debian.org/debian wheezy-backports main contrib non-free
Adding the repository just makes the packages available. To mark them for installation you'll need to pin them. Create the file /etc/apt/preferences.d/nginx-backports and give it the following content
Package: nginx*
Pin: release n=wheezy-backports
Pin-Priority: 900
Now you can install nginx with aptitude install nginx. You should get a 1.6.x version from the backports repository. Check this by doing the following.
# nginx -v
nginx version: nginx/1.6.2
Once nginx is installed you'll need to configure it to act as a proxy to the pveproxy process running on the machine. I created the file /etc/nginx/sites-available/proxmox.
upstream proxmox {
    #proxy to the locally running instance of pveproxy
    server 127.0.0.1:8006;
    keepalive 1;
}

server {
    listen 80;
    server_name proxmox.your.domain;
    #Do not redirect to something like $host$1 here because it can
    #send clients using the IP address to something like https://192.168.1.1
    rewrite ^(.*) https://proxmox.your.domain permanent;
}

server {
    listen 443;
    server_name proxmox.your.domain;
    ssl on;
    #The server certificate and any intermediaries concatenated in order
    ssl_certificate /etc/nginx/proxmox.your.domain.crt;
    #The private key to the server certificate
    ssl_certificate_key /etc/nginx/proxmox.your.domain.key;

    #Only use TLS 1.2
    #comment this out if you have very old devices
    ssl_protocols TLSv1.2;

    #Forward everything SSL to the pveproxy process
    proxy_redirect off;
    location ~ ^.+websocket$ {
        proxy_pass https://proxmox;
        proxy_http_version 1.1;
        proxy_set_header Upgrade $http_upgrade;
        proxy_set_header Connection "upgrade";
    }
    location / {
        proxy_pass https://proxmox;
        proxy_http_version 1.1;
    }
}
This file should be easy to understand. If it is not I suggest looking at the documentation for nginx here, here, and here.
I have a certificate authority that I used locally to sign the certificate for my machine. If you don't have your own CA setup, I highly recommend using easy-rsa3. You'll need to generate your own.
You enable this new proxy definition by creating a symbolic link in /etc/nginx/sites-enabled.
ln -v -s /etc/nginx/sites-available/proxmox /etc/nginx/sites-enabled/proxmox
I disabled the default site by deleting the symbolic link for it
rm -v /etc/nginx/sites-enabled/default
Then do service nginx restart. After that you can access the machine like any other HTTPS enabled site.
Creating a CentOS 7 VM
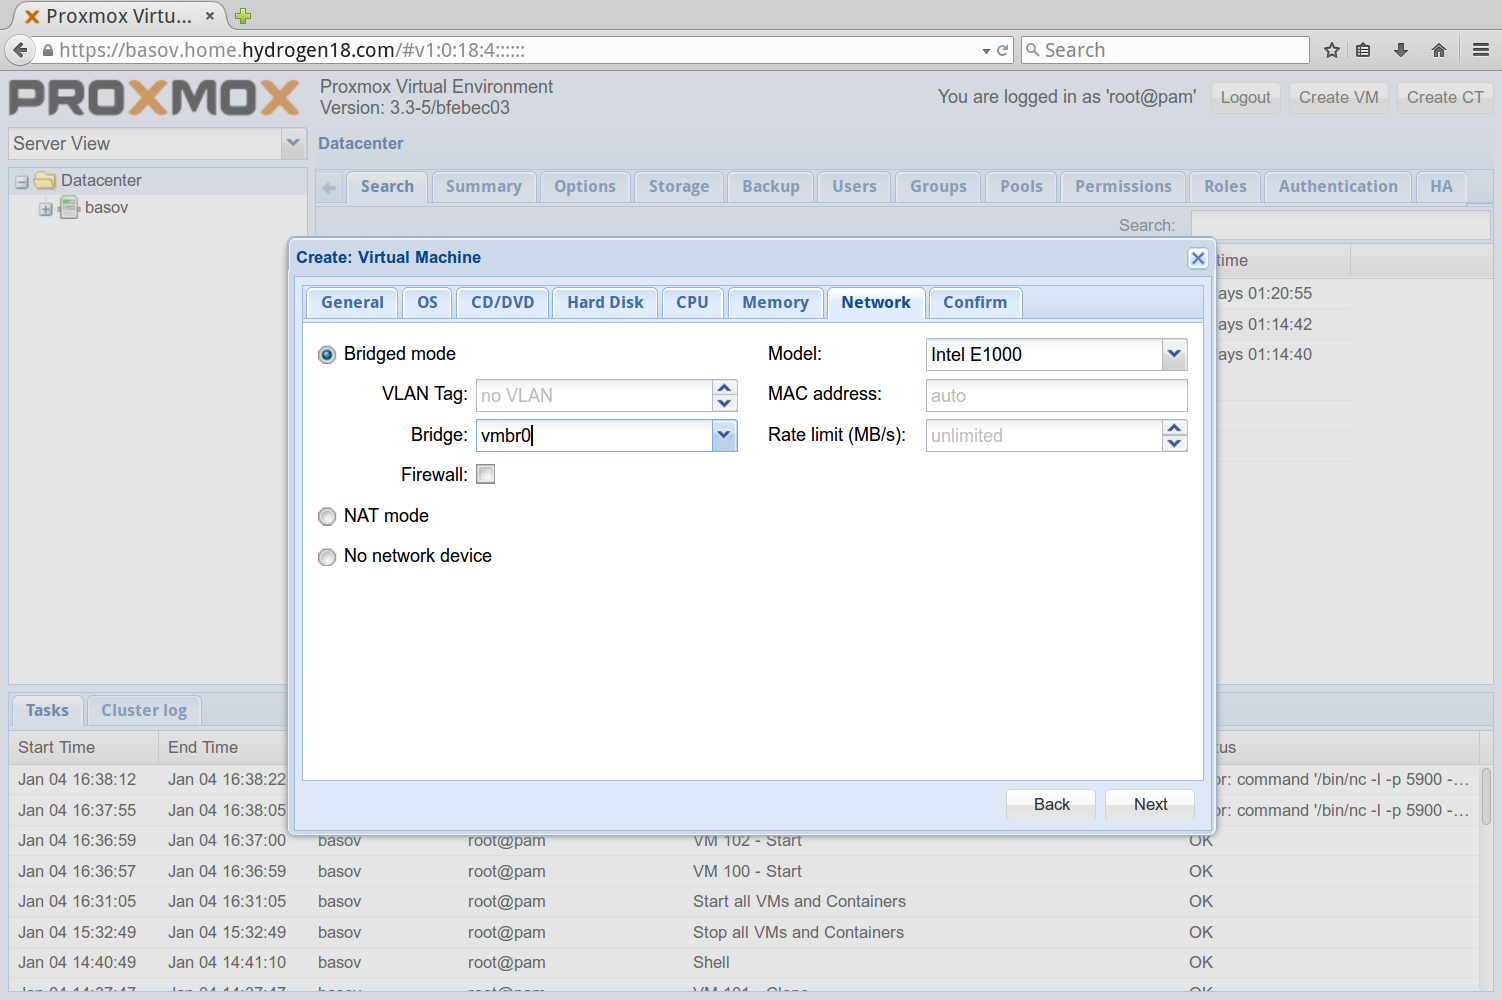
To create your first VM pick the "Create VM" in the upper right. This starts a wizard that takes you through the initial configuration as a series of tabs. The "VM ID" is automatically assigned but you should give the VM a meaningful name.

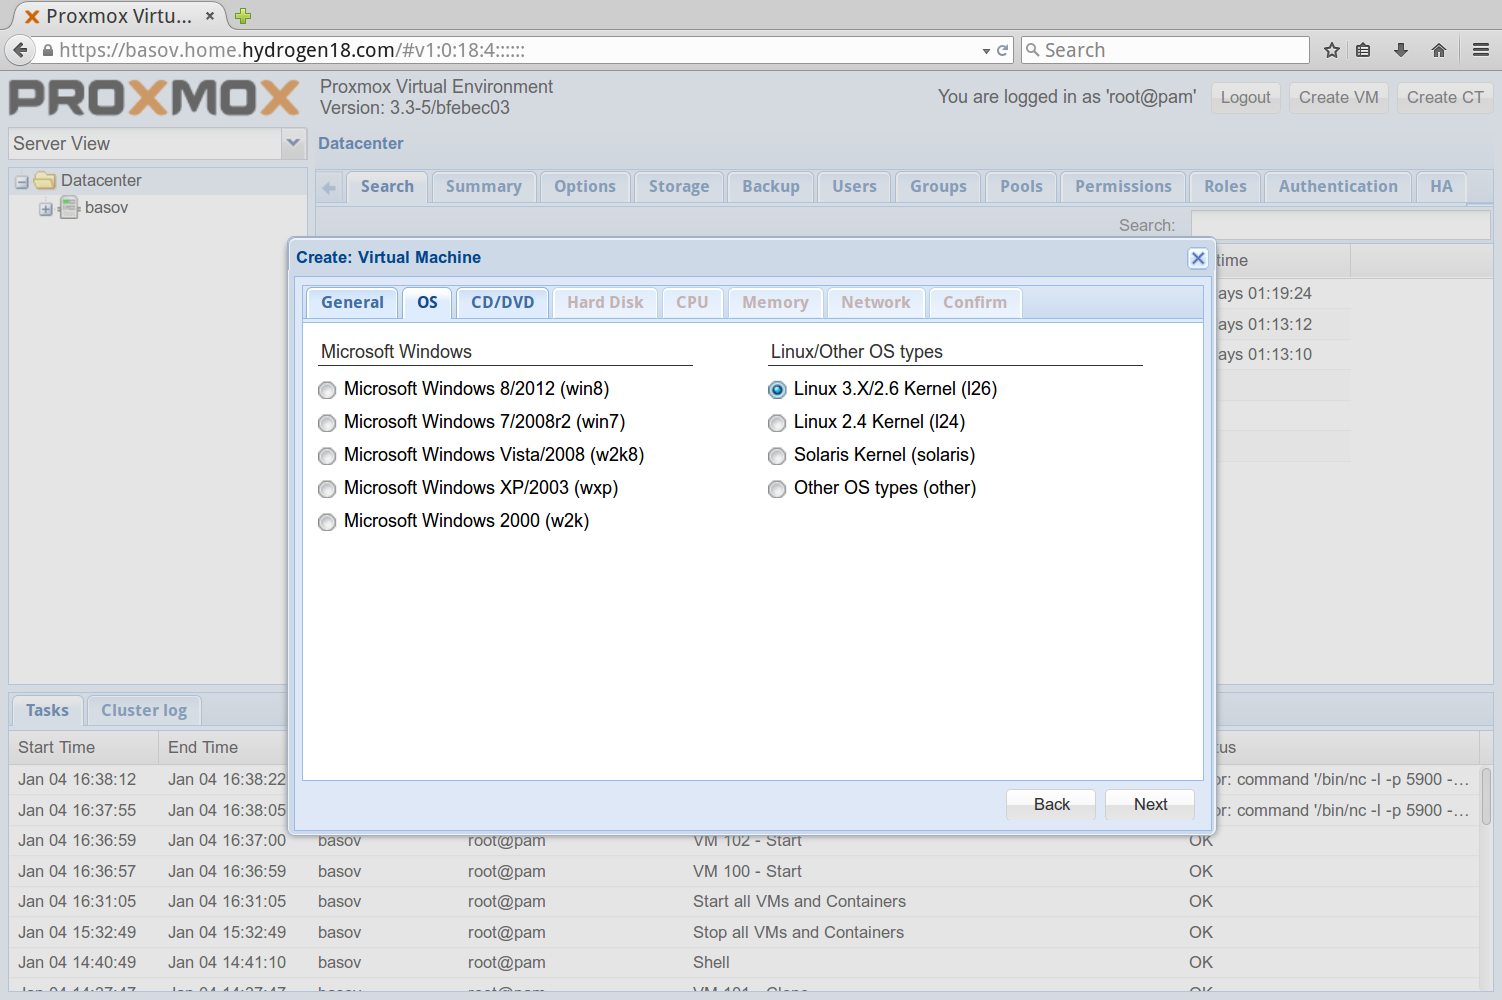
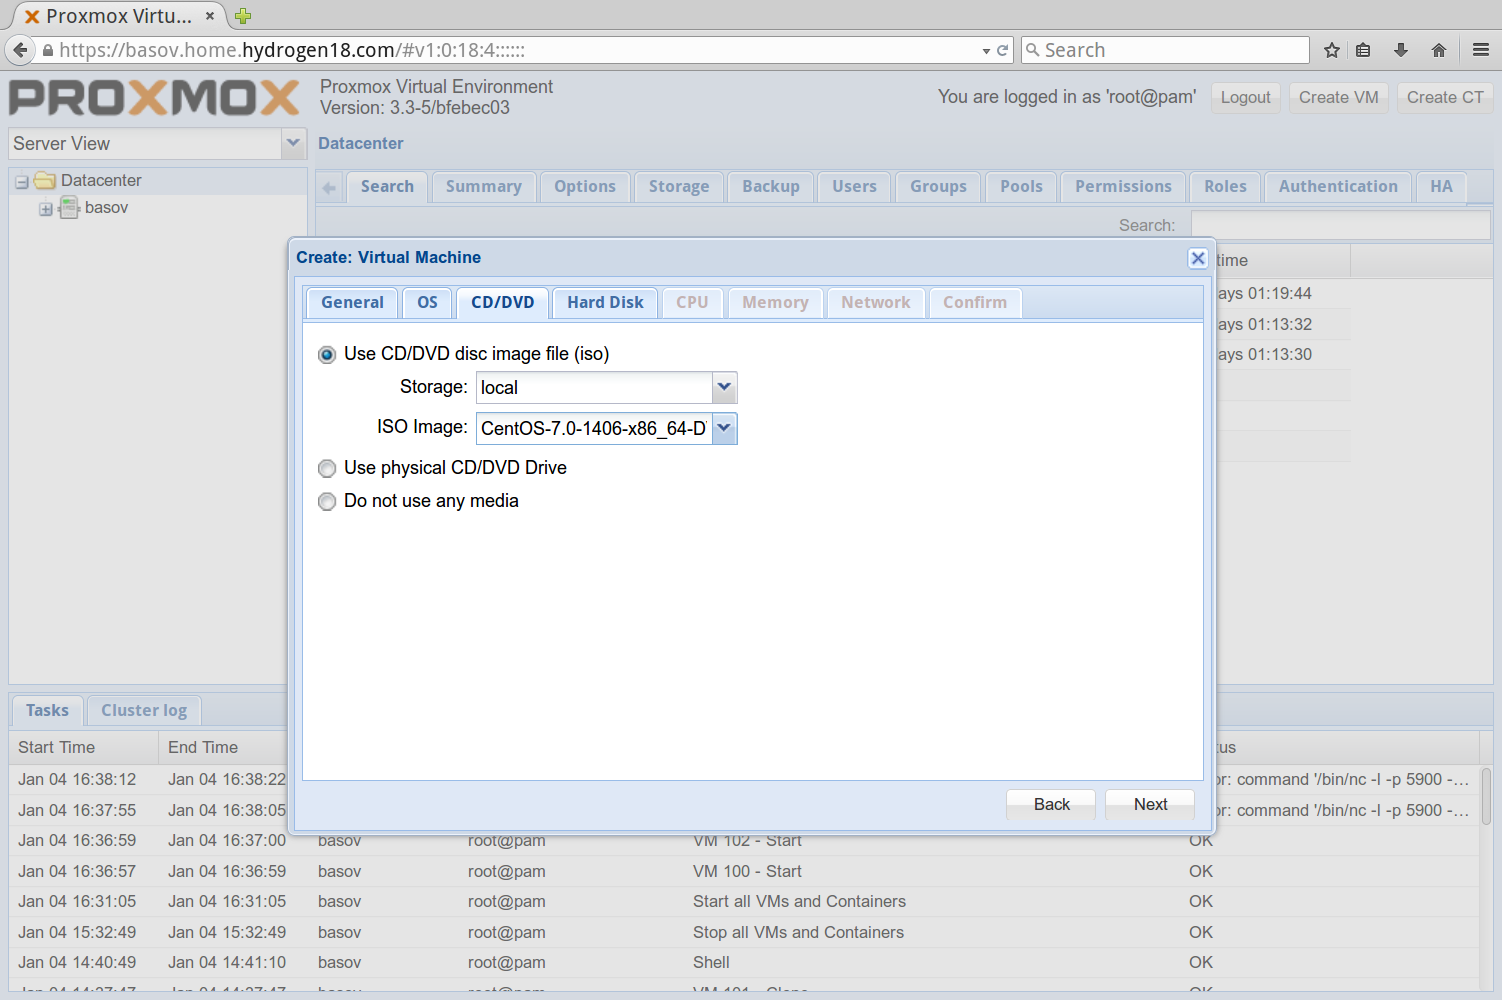
In the OS tab you'll need to select the operating system type you are installing. I selected "Linux 3.x/2.6 Kernel(I26)".
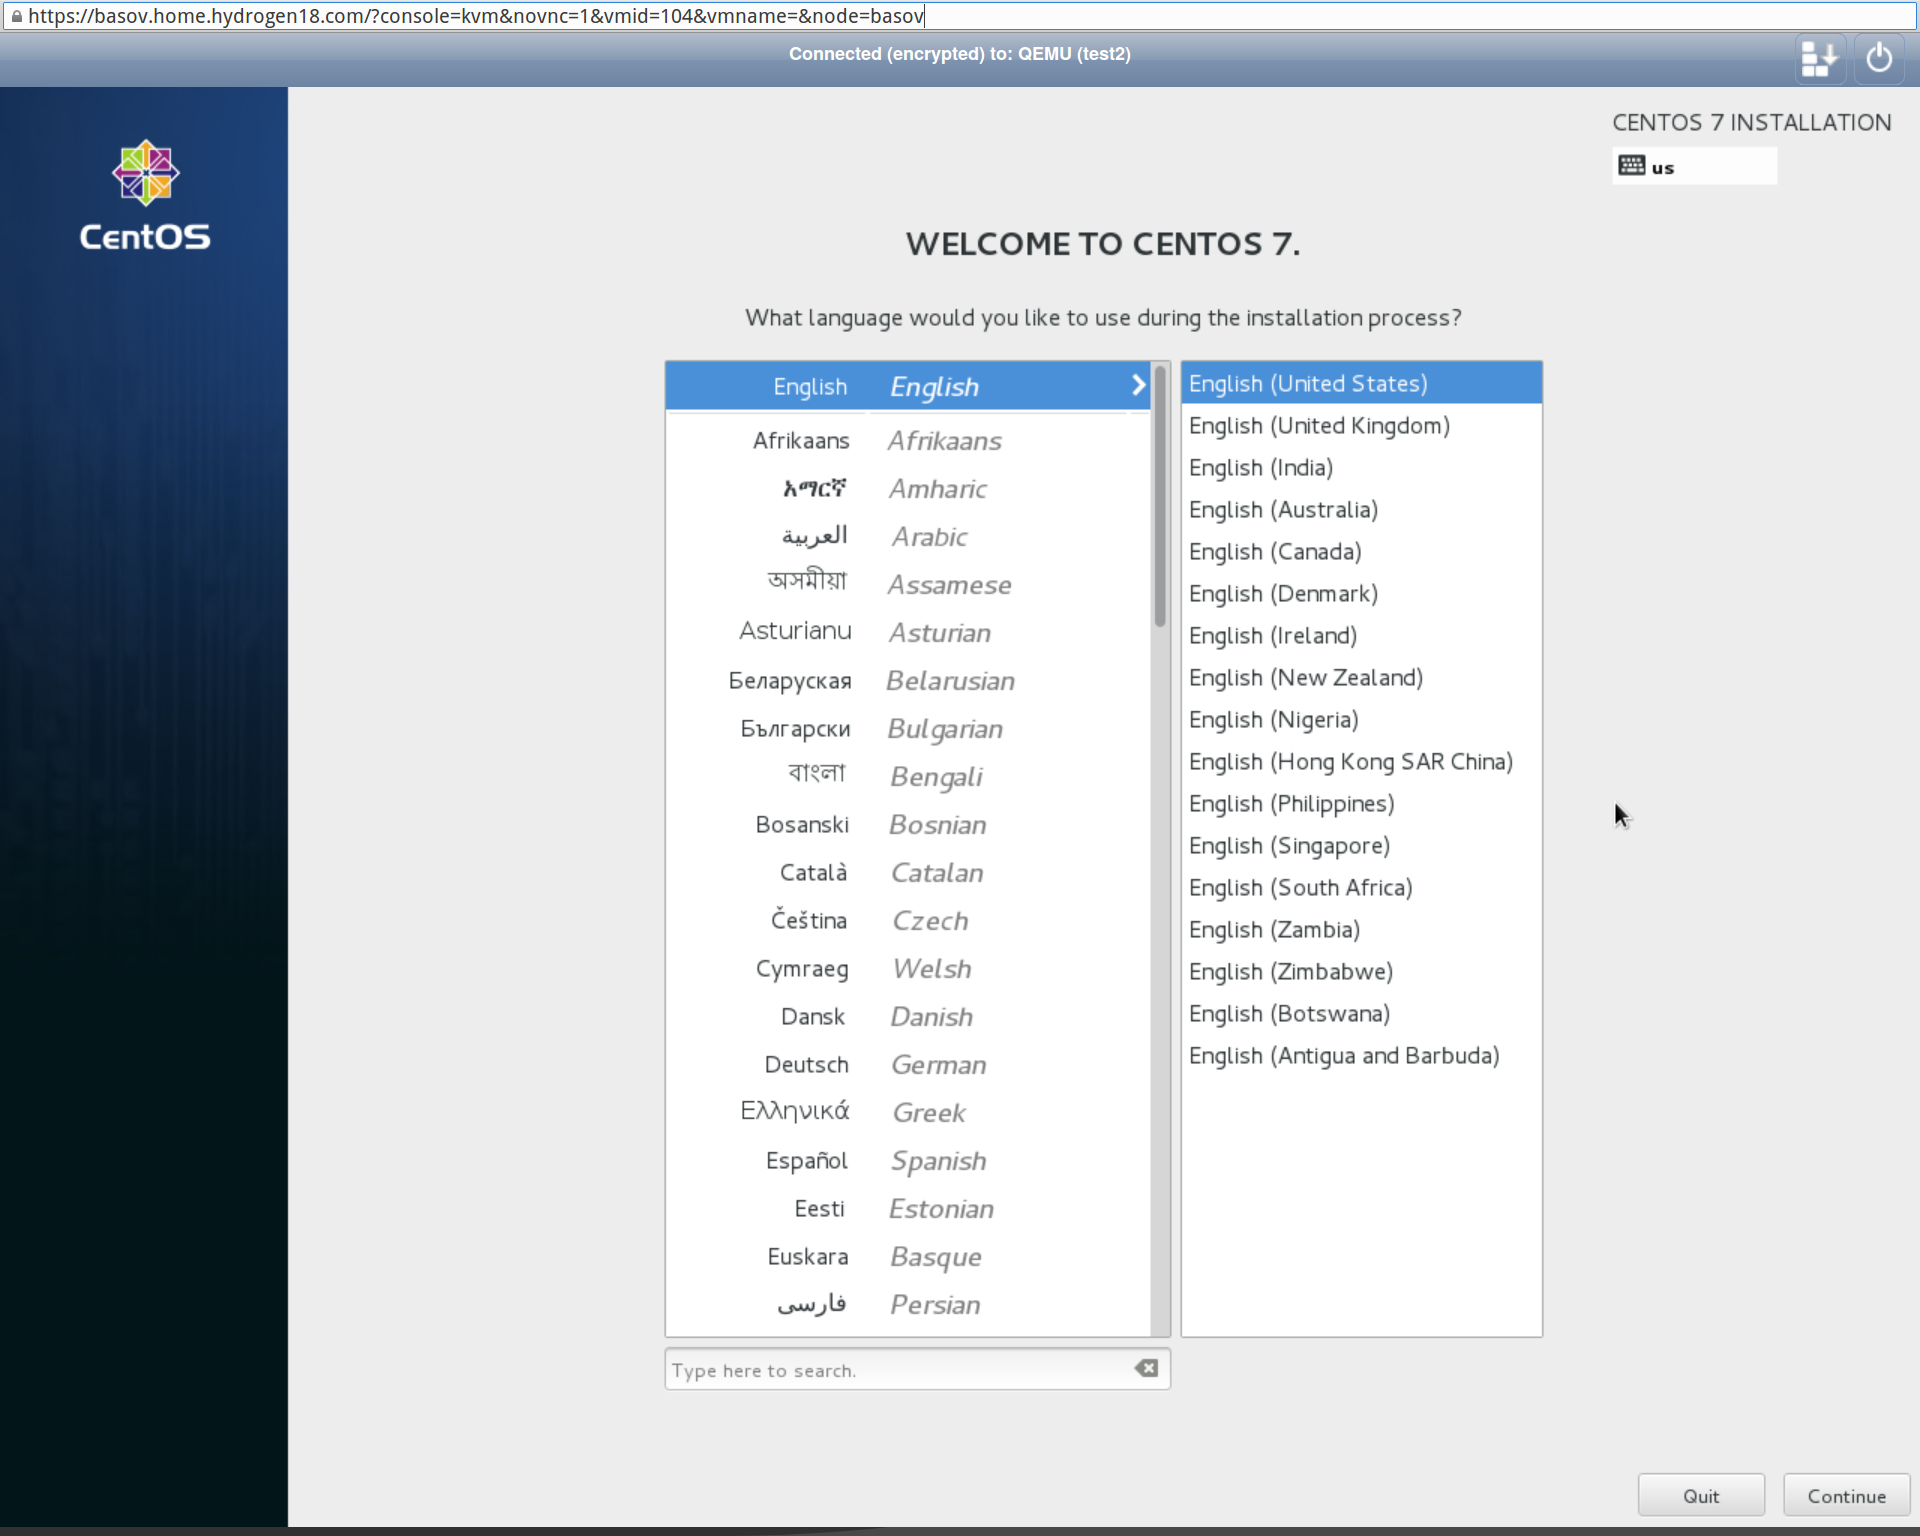
The first problem you'll run into is that you have no ISO images to use as a boot medium. You can rsync ISO images to /var/lib/vz/templates/iso and they'll become available momentarily. I downloaded and copied over CentOS-7.0-1406-x86_64-DVD.iso. The netinstall version of CentOS 7.0.1406 is problematic in that it does not know what software repositories to use.
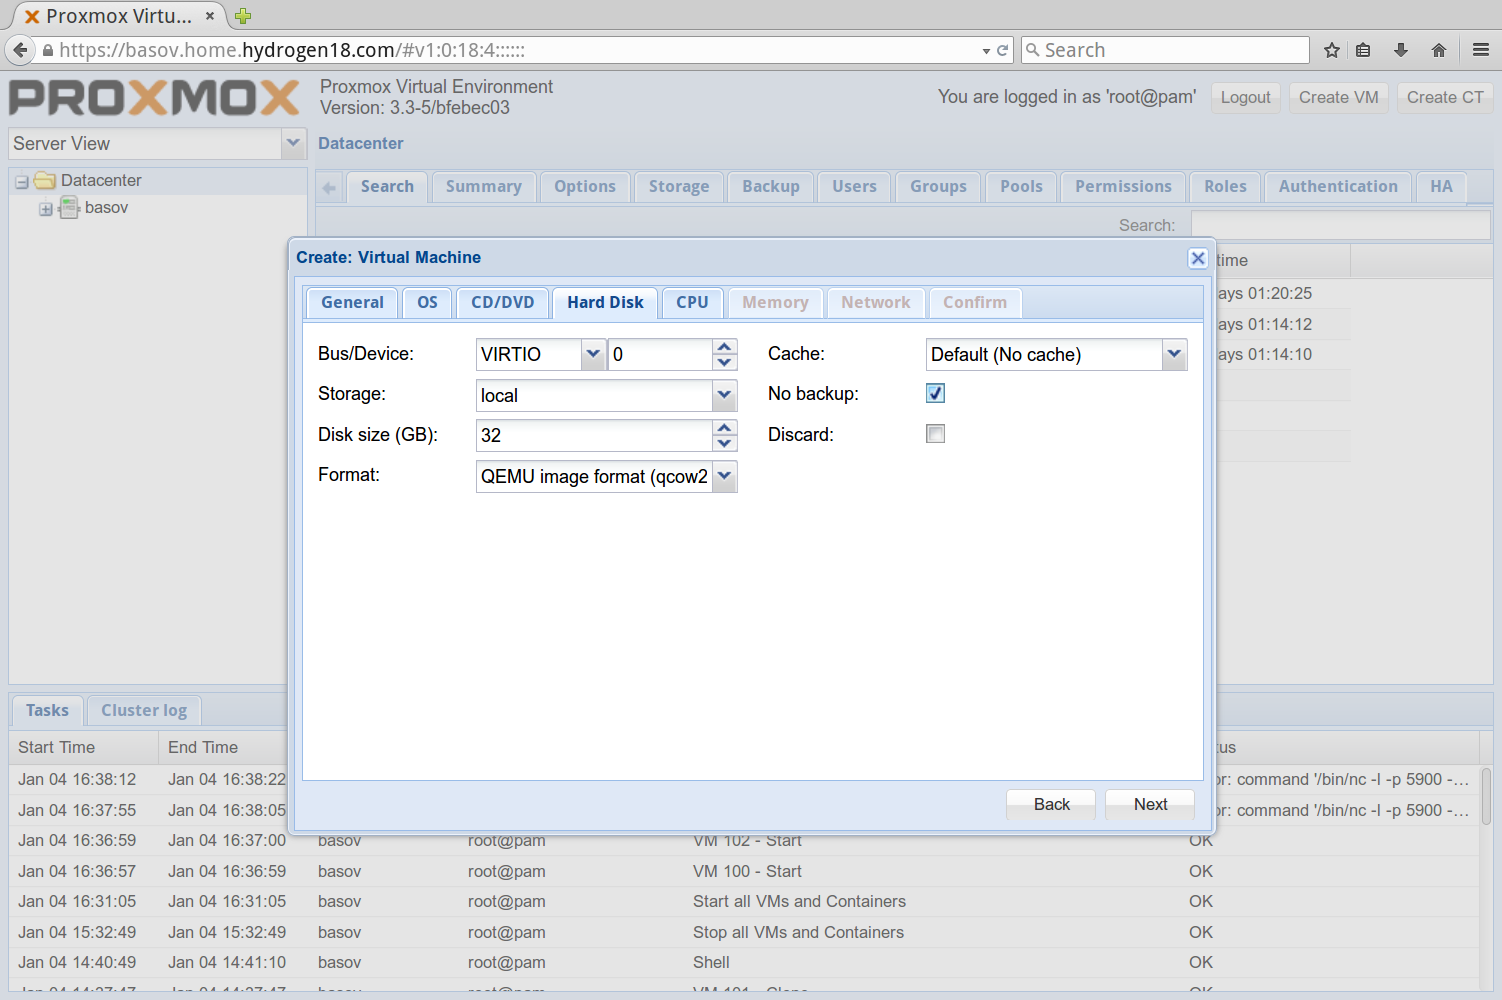
For the hard drive I created a 24 gigabyte image using the "SATA" Bus type. I used the default qcow2 image type. These appear to be dynamically sized and grow on disk as needed. I also checked "No backup". ( 1/11/15 - You should use the hard disk type "VIRTIO" here, it has the best KVM performance)
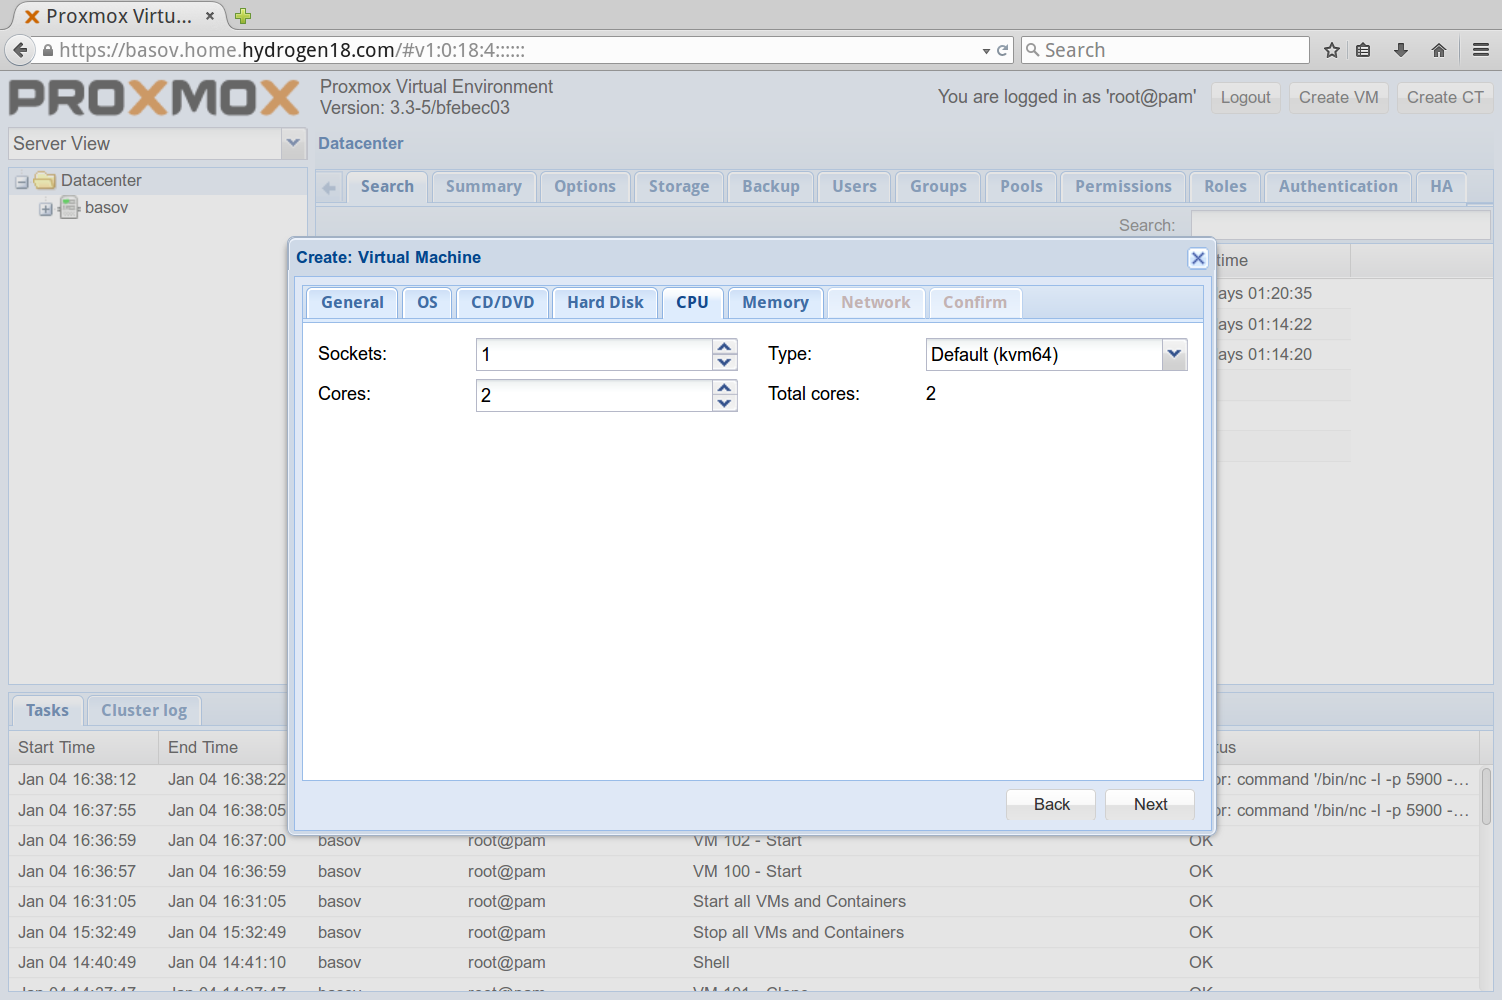
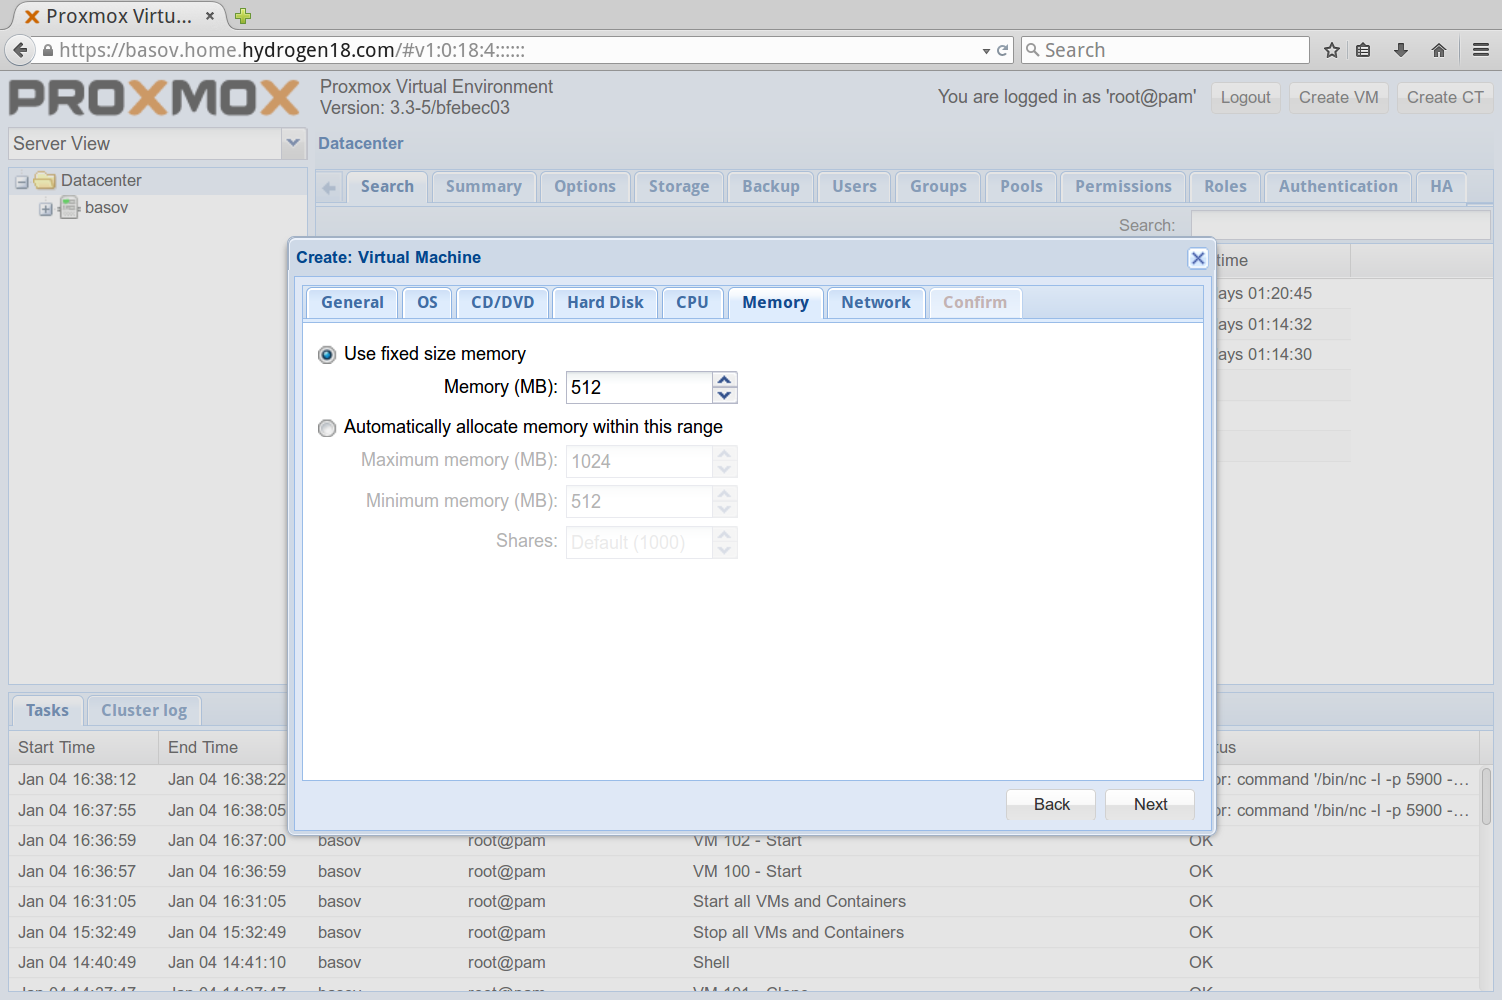
If you want to make more processing power available to the guest operating system add more cores. Adding more sockets could make the kernel think it is running in a NUMA environment of some sort. For memory I chose 1024 megabytes. The CPU and memory can both easily be changed later on.
For networking select the default of "Brigded mode" and use the bridge vmbr0. This is the default bridge that is created automatically on installation. I have not explored the use of "NAT mode".
After that the machine can be booted by selecting it from the list on the left hand side and clicking the "Start" button near the upper right. It will begin the boot sequence. In order to install CentOS 7, you can connect to the terminal by clicking on the "Console" button that is nearby. The VNC terminal worked fine for me in Firefox. It is Java based, and I barely noticed that I was using a web based piece of software. I'm not going to go through the steps I performed to install CentOS 7 here because there is plenty of literature on that topic already.
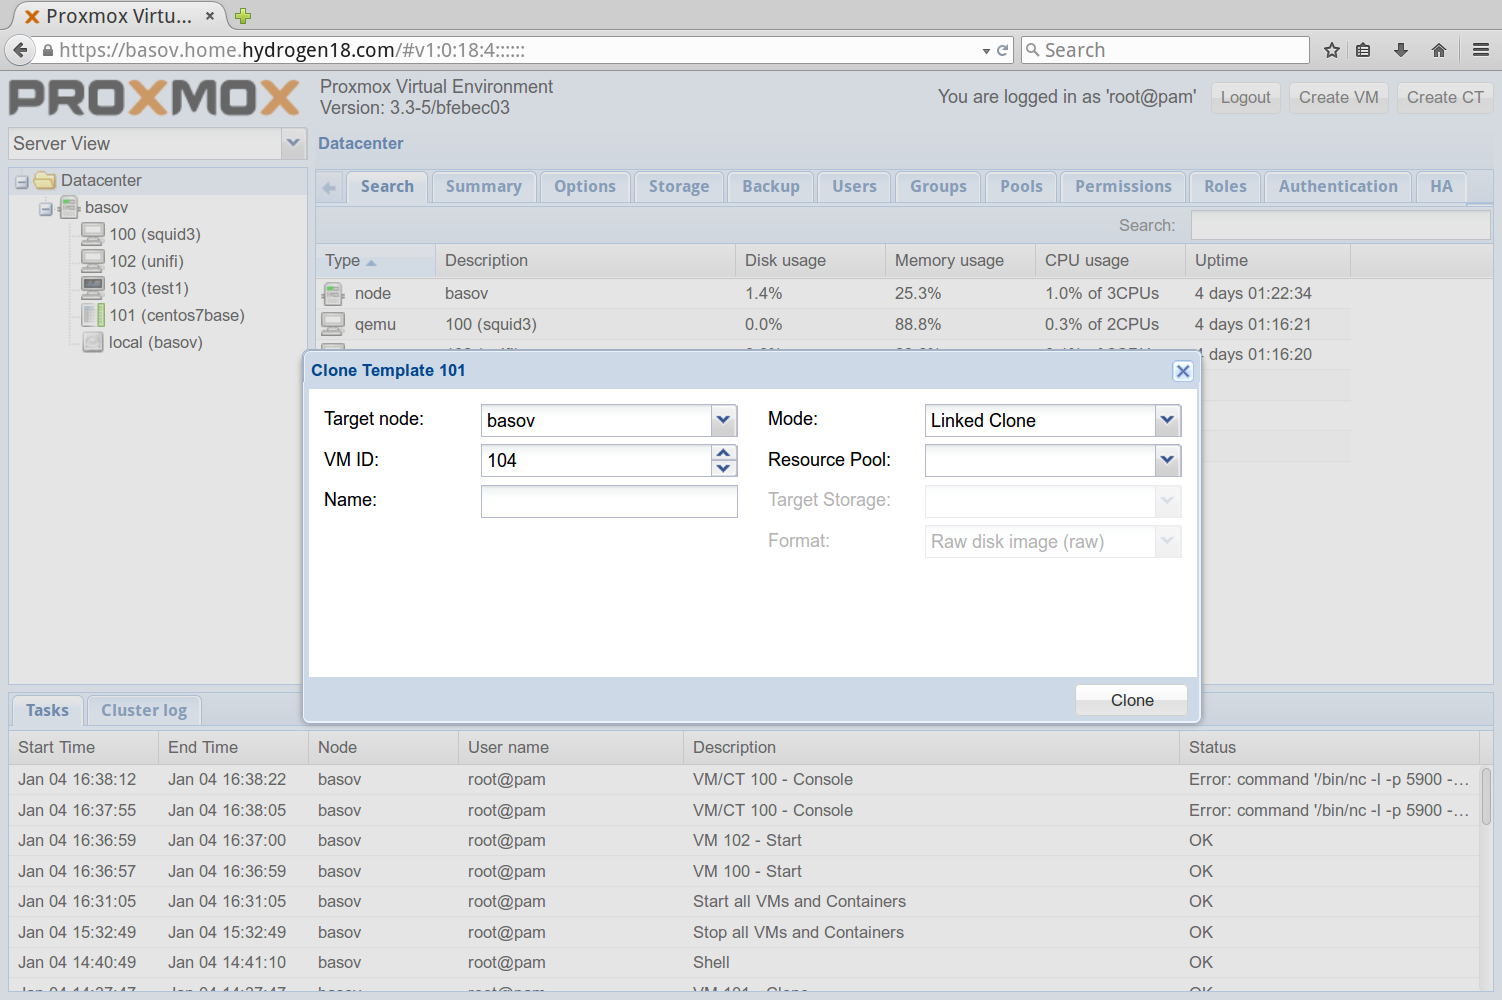
Create a VM template
You can create a template by converting an existing virtual machine to a template. This process is one-way: a template cannot be converted back into a virtual machine. To make CentOS 7 into a template I did the following.
- Install CentOS 7 from the DVD ISO image
- Only set the
rootpassword during install - Delete the SSH host keys in
/etc/sshon boot - Run
sys-unconfig
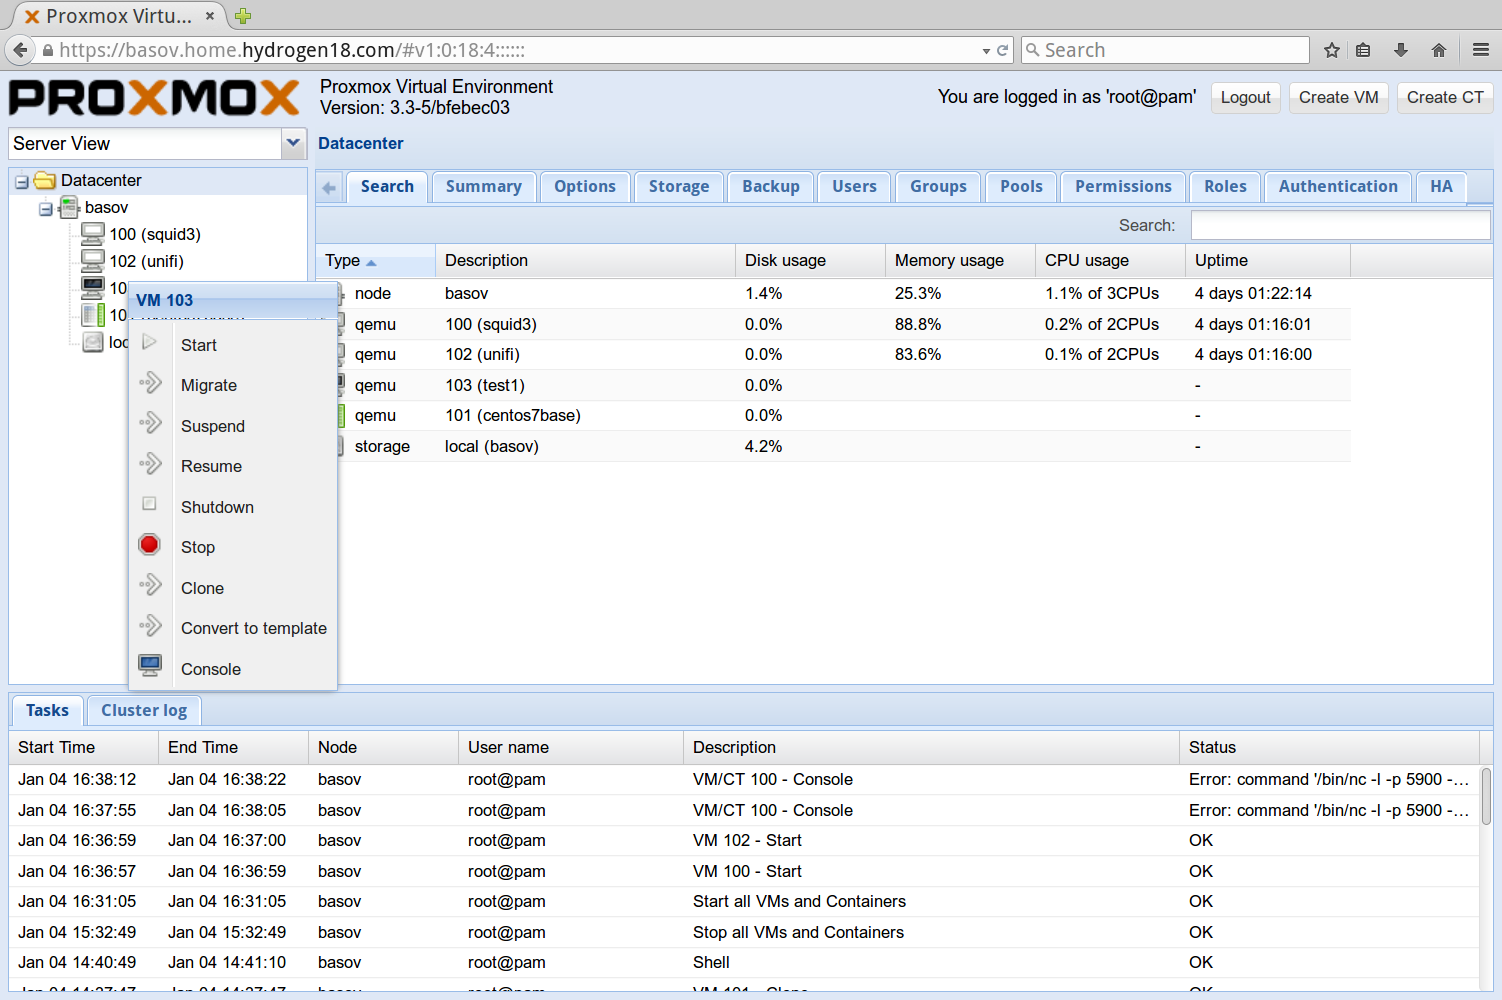
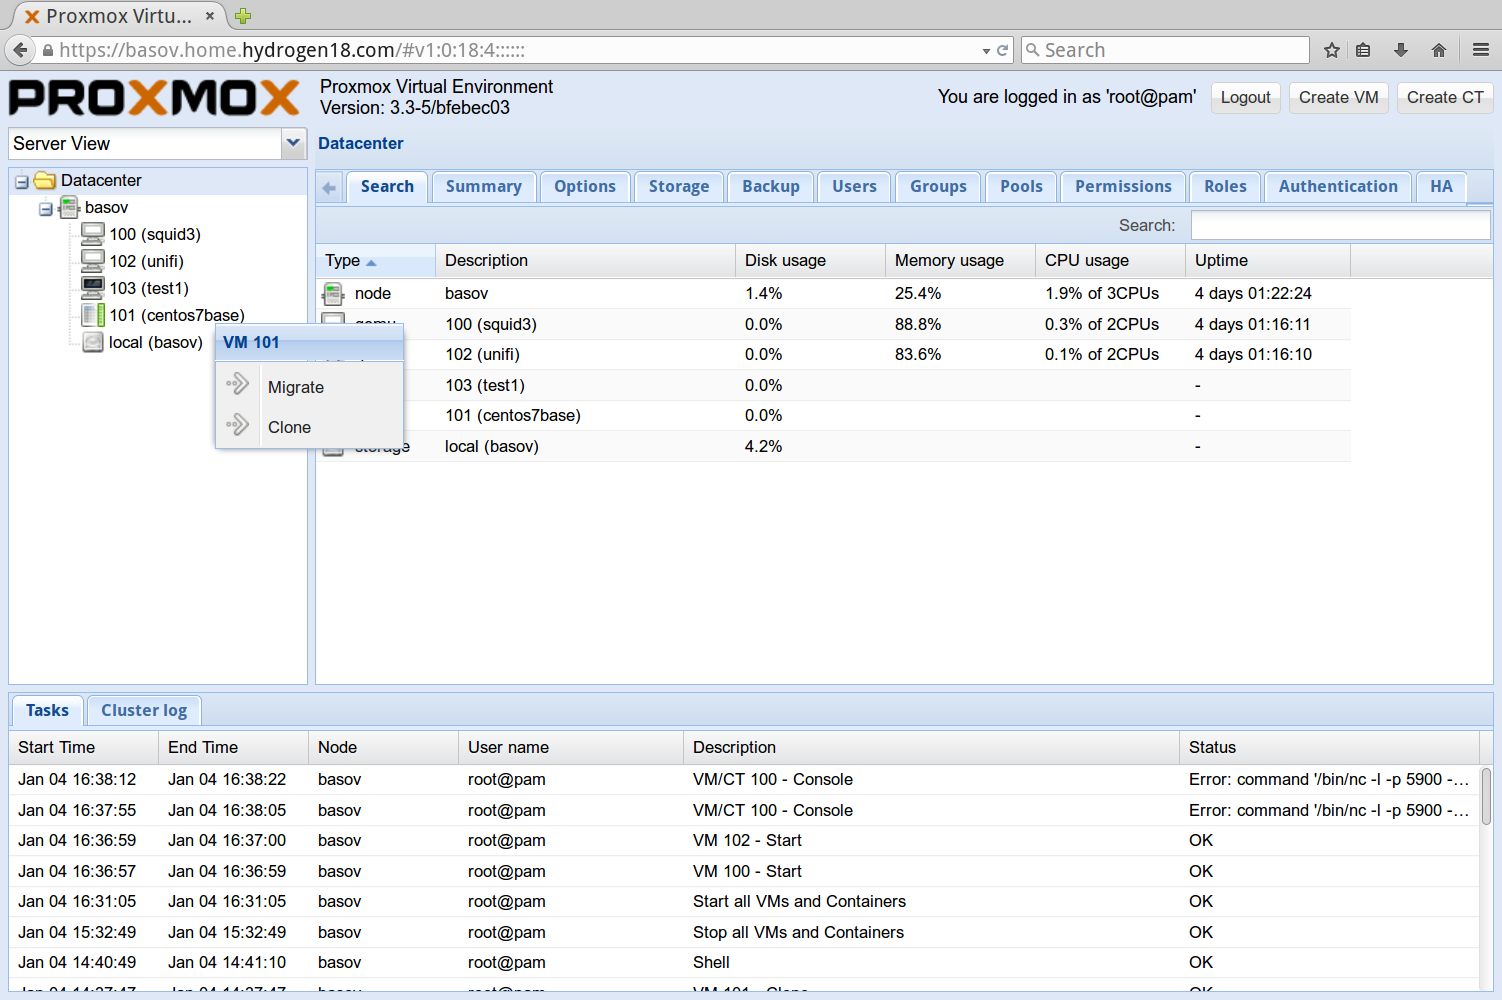
It really is that easy. Running the last step halts the machine, but I had to stop it using the web interface of Proxmox. After that right click on the machine and select "Convert To Template". Templates are then cloned into virtual machines by right clicking on them and selecting "Clone".
The Debian Within
The system that gets installed is just Debian. You can SSH into the machine as root with the password you gave the installer.
Customization
Since the installed system is just a Debian machine you can customize it to do just about anything. I installed the sudo package, created a user for myself and added the user to the sudo group. I then edited /etc/ssh/sshd_config with a line of PermitRootLogin no. I consider this mandatory, even on machines not exposed to the internet. I also configure apt to use the instance of apt-cacher-ng running on my local network.
Network configuration
In my case I am using a Realtek integrated NIC that identifies as "Realtek Semiconductor Co., Ltd. RTL8111/8168/8411 PCI Express Gigabit Ethernet Controller". I've used this motherboard under linux exclusively since I purchased it so I did not anticipate any problems. The default network configuration entered during installation is reflected in /etc/network/interfaces.
# cat /etc/network/interfaces
auto lo
iface lo inet loopback

auto vmbr0
iface vmbr0 inet static
    address 192.168.12.12
    netmask 255.255.255.0
    gateway 192.168.12.2
    bridge_ports eth0
    bridge_stp off
    bridge_fd 0
As you can see, a bridge is configured instead of using eth0 directly. This bridge is used as the NIC for the virtual machines, effectively making them appear like they are plugged into your network.
Setting up a second bridge
My goal is to have all of my virtual machines to be on a different subnet than other devices on my network. I also need to avoid manual configuration of IP addresses on the virtual machines. On my DHCP server I added an additional DHCP pool for the 192.168.14.0/24 subnet. I use dhcpd so I added the following to /etc/dhcp/dhcpd.conf
subnet 192.168.14.0 netmask 255.255.255.0
{
    #30 minutes
    default-lease-time 1800;
    #the proxmox host
    option routers 192.168.14.12;
    option broadcast-address 192.168.14.255;
    option subnet-mask 255.255.255.0;
    option domain-name-servers 192.168.14.95;
    option domain-name "home.hydrogen18.com";

        pool
        {
                range 192.168.14.129 192.168.14.254;
                allow unknown-clients;
        }

}
My DHCP server is authoritative for the domain home.hydrogen18.com. If you add an interface with an IP address matching one of the pools, dhcpd automatically starts providing DHCP on that interface. Since I have plenty of physical bandwidth on my home network I wanted to use VLANs to keep the VMs separate from other devices. On the machine acting as my DHCP server I added to /etc/network/interfaces.
auth eth0.14
iface eth0.14 inet static
    address 192.168.14.95
    netmask 255.255.255.0
The syntax eth0.X automatically indicates that the interface should use a VLAN. This works, but requires that you have the kernel module for it loaded. You can do that with the following.
# modprobe 8021q
# echo '8021q' >> /etc/modules
Now any device on my network using a VLAN of 14 will get an IP address in the 192.168.14.0/24 range. But I still needed a way to place all of the virtual machines on VLAN 14. To do this I added a bridge for VLAN 14 on the proxmox host.
auto vmbr14
iface vmbr14 inet static
       address 192.168.14.12
       netmask 255.255.255.0
       bridge_ports eth0.14
       bridge_stp off
       bridge_fd 0
The same syntax used above for declaring the vlan is used in the bridge_ports option of the bridge declaration. In order to get the hosts on 192.168.14.0/24 subnet to intercommunicate with my existing hosts, I needed a device to act as an IP router. The logical machine for this is the proxmox host. This is done by turning on IP forwarding in the networking stack of the linux kernel. It turns out this is already enabled
# cat /proc/sys/net/ipv4/ip_forward
1
No further action was necessary. Now whenever I create virtual machines I have the option of vmbr0 or vmbr14. Selecting vmbr14 causes them to receive a DHCP assigned address in the 192.168.14.0/24 subnet.
Storage & Filesystem
The installer created 3 partitions on the drive
#lsblk /dev/sdb
NAME                MAJ:MIN RM   SIZE RO TYPE MOUNTPOINT
sdb                   8:16   0   1.8T  0 disk
├─sdb1                8:17   0     1M  0 part
├─sdb2                8:18   0   510M  0 part /boot
└─sdb3                8:19   0   1.8T  0 part
  ├─pve-root (dm-0) 253:0    0    96G  0 lvm  /
  ├─pve-swap (dm-1) 253:1    0     7G  0 lvm  [SWAP]
  └─pve-data (dm-2) 253:2    0   1.7T  0 lvm  /var/lib/vz
The /boot filesystem is placed directly on the physical disk. My suspicion is that /boot was placed on its own partition to support some older systems that needed /boot to be near the beggining of the disk. Almost any modern linux system can boot off a /boot partition that is placed anywhere. Furthermore, you can place /boot in LVM so that it can be mirrored and relocated. The 1 megabyte partition is marked as bios_grub. The third partition is used as a single physical volume for LVM.
  --- Physical volume ---
  PV Name               /dev/sdb3
  VG Name               pve
  PV Size               1.82 TiB / not usable 0
  Allocatable           yes
  PE Size               4.00 MiB
  Total PE              476804
  Free PE               4095
  Allocated PE          472709
  PV UUID               zqLFMd-gsud-dmDD-xyNV-hduA-Lnu2-B1ZF6v
In my case this is on a 2 terabyte hard drive I have in the machine. This physical volume is added to a single volume group and three logical volumes are created
  --- Logical volume ---
  LV Path                /dev/pve/swap
  LV Name                swap
  VG Name                pve
  LV UUID                df3swz-RUho-dOzK-XQcm-YjDF-gVXa-fLXo7d
  LV Write Access        read/write
  LV Creation host, time proxmox, 2015-01-01 10:55:19 -0600
  LV Status              available
  # open                 1
  LV Size                7.00 GiB
  Current LE             1792
  Segments               1
  Allocation             inherit
  Read ahead sectors     auto
  - currently set to     256
  Block device           253:1

  --- Logical volume ---
  LV Path                /dev/pve/root
  LV Name                root
  VG Name                pve
  LV UUID                GdPhWd-Dydo-2QY5-UJFd-qp5G-jnMe-A5gMbC
  LV Write Access        read/write
  LV Creation host, time proxmox, 2015-01-01 10:55:19 -0600
  LV Status              available
  # open                 1
  LV Size                96.00 GiB
  Current LE             24576
  Segments               1
  Allocation             inherit
  Read ahead sectors     auto
  - currently set to     256
  Block device           253:0

  --- Logical volume ---
  LV Path                /dev/pve/data
  LV Name                data
  VG Name                pve
  LV UUID                3tulMK-XLKM-JcCp-DIBW-1jT5-RBt2-JFHDUL
  LV Write Access        read/write
  LV Creation host, time proxmox, 2015-01-01 10:55:19 -0600
  LV Status              available
  # open                 1
  LV Size                1.70 TiB
  Current LE             446341
  Segments               1
  Allocation             inherit
  Read ahead sectors     auto
  - currently set to     256
  Block device           253:2
I really have no idea how the installer decided on a 7 gigabyte swap given that I have 8 gigabytes of memory in the machine. Also if you have a virtualization host that is aggressively swapping, the experience is going to be miserable. The logical volume /dev/pve/data is mounted as /var/lib/vz. This is where everything for the virtual machines is stored. The installer gave the majority of the available space to /data which is a good decision. However, I don't want to use all of my available space as a filesystem. I want to use logical volumes directly for some virtual machines.
Migrating to mirrored LVM
There are a few things I need to change about the base installation
- All the filesystems should be on logical volumes.
- The logical volumes in LVM should be mirrored.
- I should be able to use logical volumes directly for virtual machines
There are a number of ways I could go about achieving this. I decided to chose the path of least resistance since LVM is set up on the base install. In order to make the changes I want the easiest way is to boot into a live CD environment. Since Proxmox doesn't support this, I grabbed the Debian Wheezy 64-bit LiveCD.
Once in the Debian LiveCD environment you can switch from the default user named user to root with sudo su. After that you'll need to get LVM started since the LiveCD does not by default.
aptitude install lvm2 #Install the LVM modules
service lvm2 restart #Restart LVM
service udev restart #Restart udev
vgmknodes #Map devices for any existing logical volumes
With LVM up and running I added my second disk directly to LVM. You can partition it if you'd like, but there is generally no reason to.
pvcreate /dev/sdx #Change sdx to your second hard drive
vgextend pve /dev/sdx #Extend the existing volume group
The first thing to do is to convert the swap volume to be mirrored.
lvconvert --mirrors 1 --mirrorlog mirrored --alloc anywhere /dev/pve/swap
This warrants additional explanation. I found a great reference explaining why the defaults of LVM do not work for a two disk setup. Here is an explanation of the above
--mirrors 1Keep one copy of the data--mirrorlog mirroredMirror the log of the logical volume--alloc anywherePlace the log of the logical volume anywhere
These options are needed because by default LVM would attempt to store some metadata about the logical volume in memory. By using --mirrorlog mirrored two copies of this metadata are stored on disk.
Now lets reduce the size of the data fileystem. In my case I am going to reduce it down to 256 gigabytes in size. Even with several virtual machine templates I wound up with 243 gigabytes of free space after doing this. The ext4 filesystem already on the logical volume uses 4096 byte blocks. This means I need to reduce the size to 67108864 blocks. You can check the current number of blocks and the block size with dumpe2fs.
#Show block size information
dumpe2fs -h /dev/pve/root  | grep Block
The filesystem must be checked with e2fsck and then resized with resize2fs
#Check the existing filesystem
e2fsck -f /dev/pve/data
resize2fs -p /dev/pve/data N #Replace 'N' with the number of blocks for the filesystem
On a new filesystem this step should complete quickly since few blocks are in use. After resize2fs is complete the size of the file system has been shrunk but the physical volume has not. The LVM volume group created by the installer used 4 megabyte extents. In order to determine how many extents the physical volume is some calculation must done. If this is done wrong, the filesystem is destroyed.
\((B * N) / E = S\)
The above variables are
- \(B\) - The block size of the filesystem
- \(N\) - The length of the filesystem in blocks
- \(E\) - The size of the extents used by LVM
- \(S\) - The number of extents needed by the logical volume
Once \(S\) is calculated you will likely wind up with a number that has a fractional remainder. This number must be rounded up to the next integer value. You can call this number \(T\)
\( S < T\)
The logical volume can now be resized to free up the physical extents in the volume group.
lvresize --extents T /dev/pve/data
This step should complete almost instantly. Next we can create a mirrored logical volume for /boot. We can't convert the existing /boot since it is a partition on the physical disk.
lvcreate --extents 128 --mirrors 1 --mirrorlog mirrored --nosync --alloc anywhere --name 'boot' pve
mkfs.ext4 /dev/pve/boot #Format the block device as ext4
The syntax of lvcreate is similar to the syntax used for lvconvert above. The only thing new is --nosync. This tells LVM to create the logical volume as mirrored but not to synchronize. Since the next step is to create a filesystem on the logical volume, this is not an issue. The newly created filesystem is empty. To get the contents of /boot we need to mount both the old and new filesystems and copy everything over.
#mount the old boot filesystem
mkdir /mnt/oldboot
mount -t ext4 /dev/sdx /mnt/oldboot #replace sdx with old boot partition
#mount the new boot filesystem
mkdir /mnt/newboot
mount -t ext4 /dev/pve/boot /mnt/newboot
#copy oldboot to newboot
cp -a -P -v -R /mnt/oldboot/* /mnt/newboot/

#unmount the filesystems
umount /mnt/oldboot
umount /mnt/newboot

#wipe the old '/boot' FS
dd bs=512 count=4 if=/dev/zero of=/dev/sdx #replace sdx with the old boot partition
Now that the copy of the old /boot filesystem has been copied over, we need to instruct grub to boot using the new one. The file /etc/fstab must be updated to reference the new /boot as well. This filesystem is mounted by UUID, so use dumpe2fs to determine the UUID of the new filesytem.
#show just the UUID of the filesystem
dumpe2fs -h /dev/mapper/boot | grep -i uuid
To change /etc/fstab and grub a chroot environment is used. The / filesystem of the installation needs to be mounted. You can't mount it to / however because the live CD environment already mounts a filesystem there. This is why the chroot is needed. You also need to mount /boot. This still isn't quite enough. The mount command is used with --bind to expose the /sys,/proc, and /dev filesystems of the live CD environment to the chroot.
#mount the root filesystem
mkdir /mnt/root
mount -t ext4 /dev/pve/root /mnt/root
#mount newboot in root
mount -t ext /dev/pve/boot /mnt/root/boot
#bind filesystems into /mnt/root
mount --bind /dev /mnt/root/dev
mount --bind /sys /mnt/root/sys
mount --bind /proc /mnt/root/proc
chroot /mnt/root
Now that we're in the chroot environment we can edit /etc/fstab. You should be able to find a line that looks like this.
#Find the line for '/boot/' looks like
UUID=1949701c-da21-4aa4-ac9b-9023d11db7c5 /boot ext4 defaults 0 1
The UUID will not be the same. Replace UUID=1949701c... with UUID=xxx where xxx is the UUID of the /boot filesystem we found using dumpe2fs above.
Grub can be reinstalled and updated automatically. There is a good explanation of this process here.
#install grub to the disk
grub-install /dev/sdx #device you selected during proxmox install
#update the grub configuration
update-grub
I got the error error: physical volume pv0 not found. about 30 times when I did this. It doesn't seem to matter. To verify that everything has been updated we can check /boot/grub/grub.cfg.
#verify the UUID set in /boot is now in the configuration
grep -m 1 xxx /boot/grub/grub.cfg
Again, xxx is the UUID of the /boot filesystem. At least one line should match.
Now just type exit to leave the chroot. At this point /data and / logical volumes are still unmirrored. LVM can be manipulated while systems are in use, so there isn't much point in staying the in the LiveCD environment. Reboot the machine with shutdown -h -r now and remove the CD when prompted.
Once Proxmox boots back up, SSH in as root. You'll want to start a screen session before upgrading the logical to mirrored because it can be very time consuming.
#upgrade data logical volume to mirrored
lvconvert --mirrors 1 --mirrorlog mirrored --alloc anywhere /dev/pve/data
#upgrade root filesystem to mirrored
lvconvert --mirrors 1 --mirrorlog mirrored --alloc anywhere /dev/pve/root
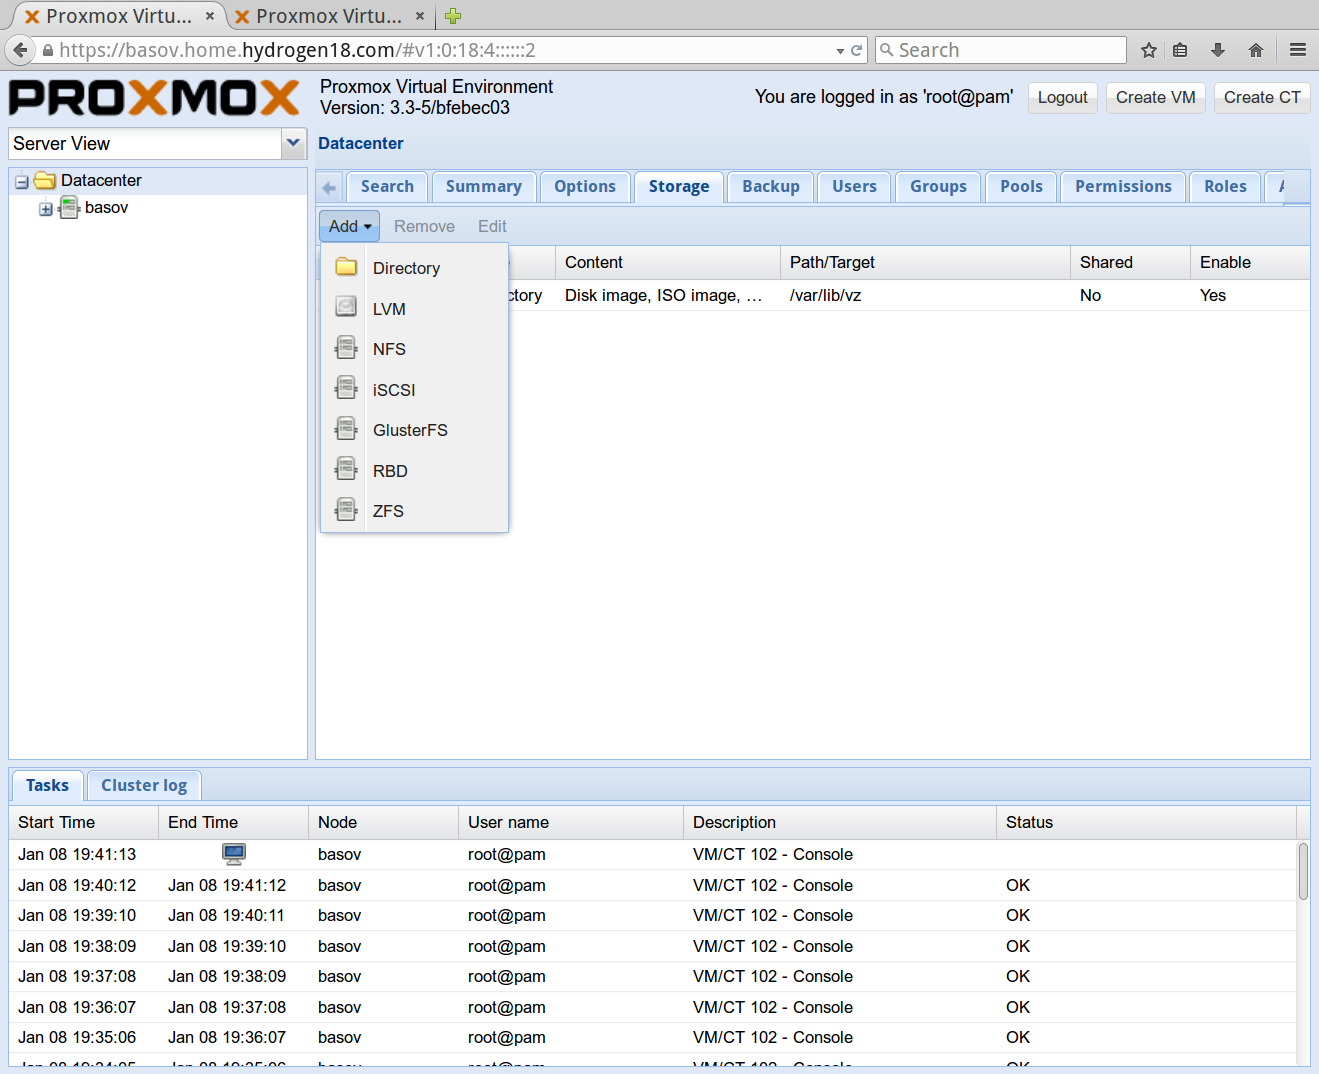
Enable LVM in the Web Interface
To use LVM volumes from the web interface you must enable LVM as a storage option. This is done by selecting "Server View" then the "Storage" tab. Click the "Add" button and a drop down appears, select the LVM option. You'll need select the volume group you want to use, in my case that is "pve".
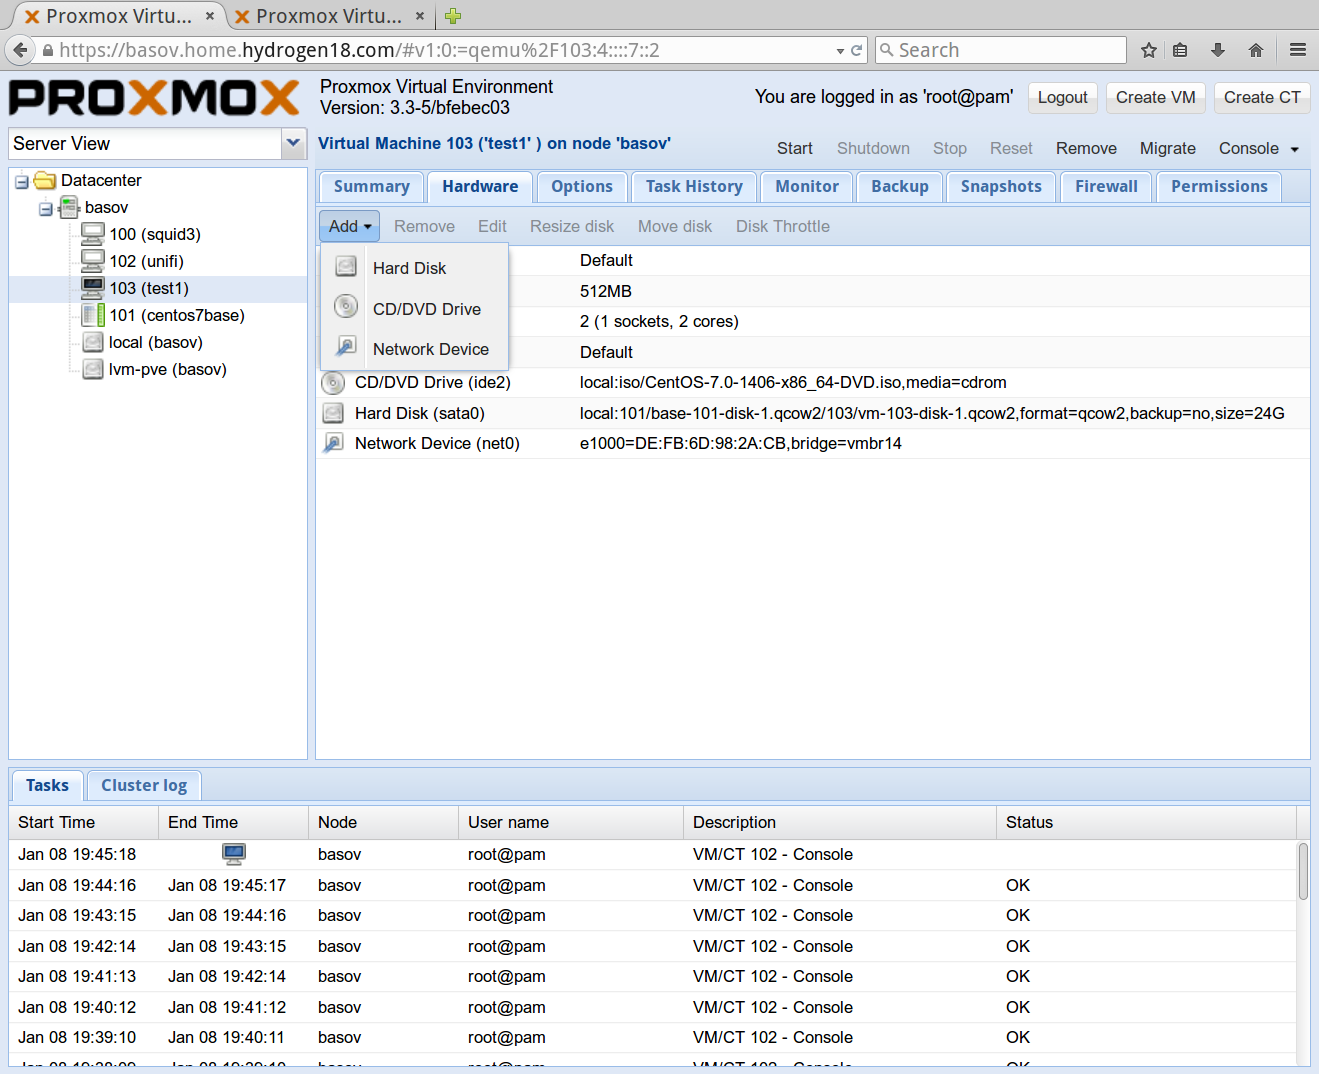
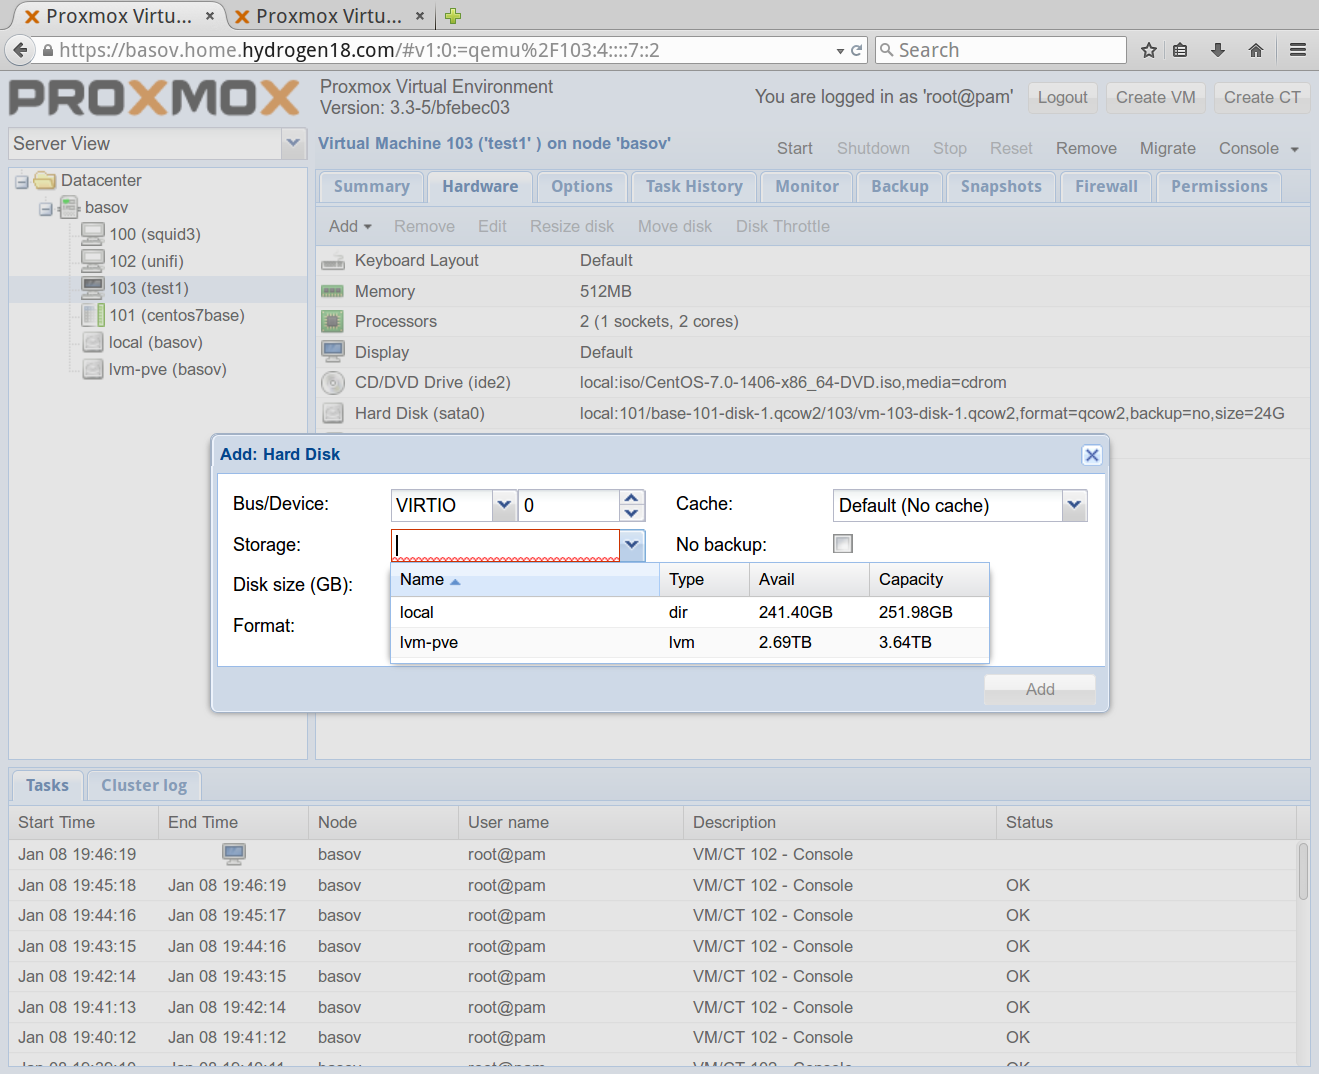
After adding the volume group you'll have the option of using logical volumes as the storage for virtual machines. You can add a logical volume to an existing virtual machine by clicking it in the left hand pane, clicking the "Hardware" tab and clicking "Add". From the drop down menu select "Hard Disk". The "Storage" option in the modal dialog has the LVM volume group as an option.
The created logical volume has a predictable name. But it is not mirrored
  --- Logical volume ---
  LV Path                /dev/pve/vm-103-disk-1
  LV Name                vm-103-disk-1
  VG Name                pve
  LV UUID                ib3q66-BY38-bagH-k1Z2-FDsV-kTMt-OKjlMH
  LV Write Access        read/write
  LV Creation host, time basov, 2015-01-08 19:47:54 -0600
  LV Status              available
  # open                 0
  LV Size                32.00 GiB
  Current LE             8192
  Segments               1
  Allocation             inherit
  Read ahead sectors     auto
  - currently set to     256
  Block device           253:36
The logical volume can be made mirrored by using the same lvconvert commands as used to make /dev/pve/root mirrored.
Conclusion
At this point I am still trial running Proxmox. I have a couple things on it but have not moved all of my home infrastructure over. So far I have been happy with it.