Sniffing out probes
- Sunday September 29 2013
- python wifi surveillance
- Series: sniffing-probes
WiFi capability comes included on just about every device you can imagine. You can even purchase SD cards that are WiFi capable. Most people carry their phones with them wherever they go. Even if you never use the WiFi in your phone, it is probably giving up your location continously. It is also probably identifying you uniquely. In almost any computer network, computers use unique numbers to refer to one another. A WiFi capable device has a media access control address, or MAC, assigned to it long before you purchased it. This address is six bytes long, so there are exactly 281,474,976,710,656 unique addresses available. Any time your device uses a WiFi network, it must send this six byte address to uniquely identify itself.
The process of joining a WiFi network is a straightforward task. First, the device joining can listen for other devices to identify themselves. These identifiers are broadcast continously and are known as beacons. Beacons are broadcast by devices that act as an access point. Included in the beacon is a Service Set Identifier or SSID. This is the name of the access point. If you are ever in a busy area and goto your phone or laptop's listing of nearby networks you've noticed it lists a large number of networks. In such an environment, your device is being constantly inundated with beacons from many networks. If your device receives a beacon from a network it wants to associate with, it can begin the process of joining the network.
The second possibility is that your phone can send out probes. In the case of probes your phone has the option of simply asking "Is anyone out there?" This is known as a broadcast probe. In that case any access point may reply. The other method is your phone has the option of asking "Is Bob there?" In this case your phone must broadcast not only its unique six byte address but the SSID of the access point it wants to connect to. Many WiFi capable devices will continually transmit such probes if outside of range of a known network.
Looking at all this together, we can see that the WiFi signal of your phone can not only unique identify you but also identify places you have been. After all, if your phone is probing for a network named "Starbucks" you were either there or free loading the WiFi from the parking lot.
Putting this knowledge to work
I live along a busy roadway, so I am in a unique position to capture WiFi traffic. There is also a decent amount of pedestrian traffic in the area.
Hardware
In order to capture as many signals as possible, I set up a high gain antenna pointing at the roadway. It is important to emphasize that the antenna should point down the roadway as much as possible. It is very helpful to think of a directional antenna like a flashlight. If you are standing on the side of the roadway, you can point the flashlight directly at it illuminating a single spot. But if you are very close to the edge of the roadway, you can point almost parallel to it. This illuminates more surface area. In this way, the antenna has as many vehicles in view as possible for as long as possible.
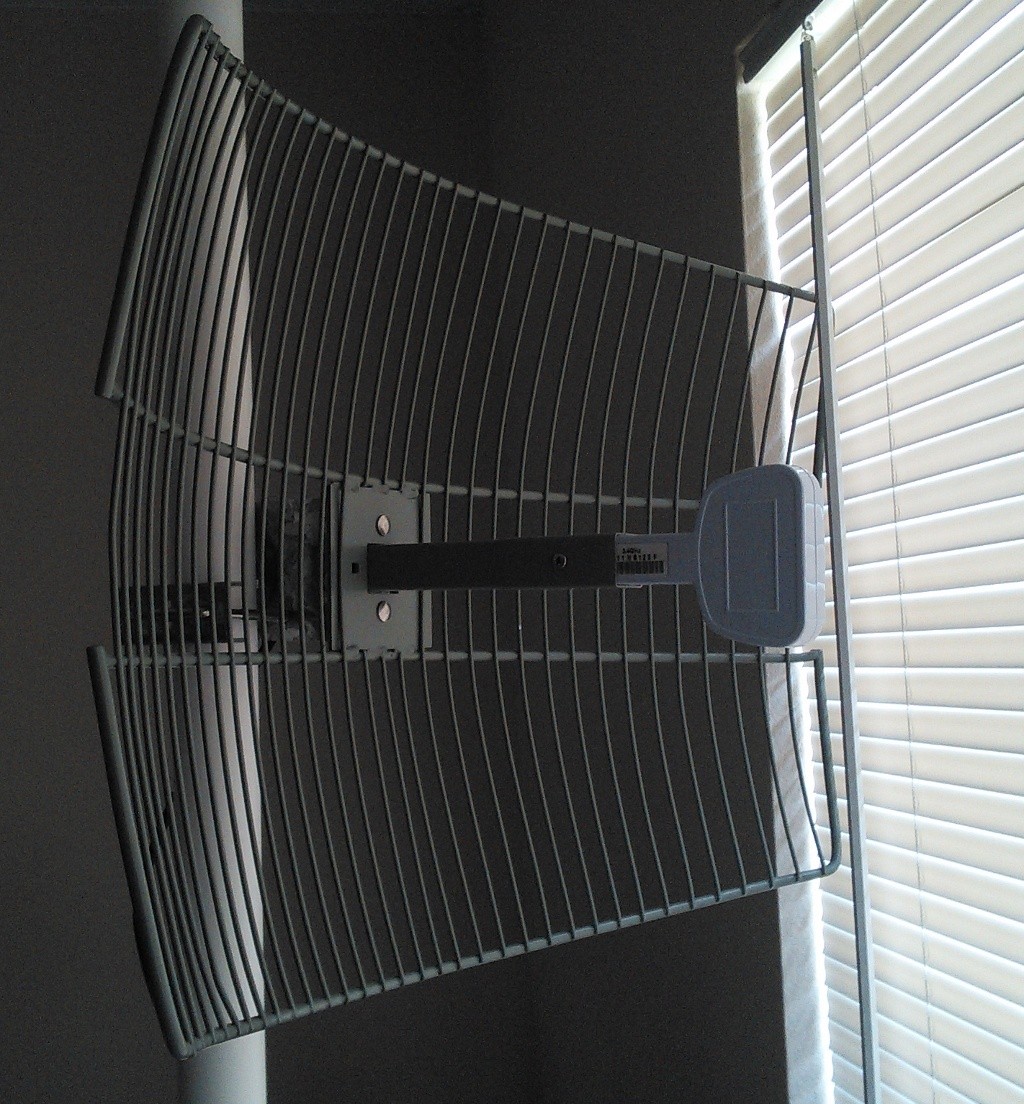
This antenna cost me less than $20 shipped off eBay.
In order to capture WiFi traffic I needed a device that could be hooked to this antenna. This device also needs to support monitor mode. Monitor mode is a way of saying the device can capture all available traffic. I happen to have modified a laptop for such purposes years ago.
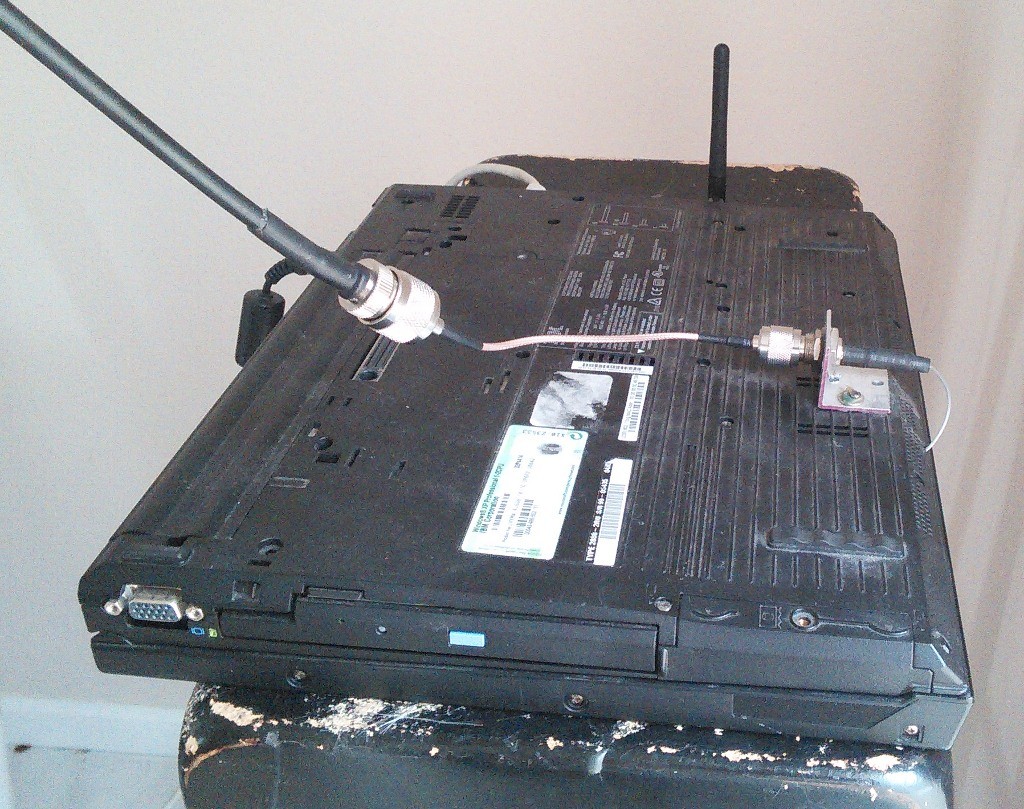
The laptop's screen is broken, but everything else works fine. I don't have any pictures of how I performed this mod. It is an IBM R51 laptop. Underneath the keyboard is a micro PCI slot. After removing the original wireless card, I installed an Atheros chipset wireless card. If you intend to buy a wireless card for the purpose of monitoring, I highly reccomend Atheros. They are certainly not scientific quality measurement equipment, but most of their products are cheap and are capable of monitor mode. Instead of connecting the card to the internal antennas, I connected it to a coaxial pigtail. The connectors on the WiFi cards themselves are almost always MMCX. On the other end of this coaxial pigtail is a Reverse-Polarity TNC connector. This is brought out the outside of the laptop case. From there, I can adapt to a type N connector used by the high gain antenna.
Software
For an operating system, I have Ubuntu Server Linux installed on the laptop. You'll need to compile the aircrack-ng suite. The airmon-ng utility included in it is the easiest way of putting the WiFi card into monitor mode.
With the wireless card in monitor mode, you can now capture packets from it. Initially I tried doing this with Python's socket module but I found it much easier to do using scapy. Getting scapy to grab packets for your is relatively easy.
import scapy
from scapy.all import sniff

def dummyHandler(packet):
    return

sniff(iface='wlan0',prn=dummyHandler,store=0)
The sniff function runs forever capturing packets from the wlan0 interface. For each packet it calls dummyHandler once with the packet as the argument. Notice the store argument is set to zero. If this is not done, scapy stores all packets in memory indefinitely. This quickly exhausts the available memory on the system.
Frame format
In order to actually make sense of the packet, it is mandatory to understand the WiFi frame format. A great quick reference to that is available here. The basic breakdown of the header is shown here.
- 2 bytes - Frame control
- 2 bytes - Duration
- 6 bytes - Address 1
- 6 bytes - Address 2
- 6 bytes - Address 3
- 2 bytes - Sequence
The frame control consists of a 16 bit integer with many independent bitfields. Normally, any data transmitted over a network is sent in big-endian order. That is to say, the most significant bytes come first. For whatever reason, the IEEE 802.11 standard which defines this format actually specifies that data is sent in a little endian format. The standard is not publicly available to my knowledge, but this this StackOverflow post does an excellent job of explaining things. The scapy module extracts the only two values from the Frame Control bitfield that we care about: packet type and subtype. The argument to the handler function has the type and subtype attributes set on it. The only type that is of interest here is Management packets, which have a type value of zero.
The payload of the packet is available from scapy as the payload attribute of the argument. It also contains the complete header frame. To extract the additional values, the struct module is useful. In the context of the previous example
def handler(packet):
    payload = buffer(str(pkt.payload))
    HEADER_FMT = "<HH6s6s6sH"
    headerSize = struct.calcsize(HEADER_FMT)
    header = payload[:headerSize]
    frameControl,dur,addr1,addr2,addr3,seq = struct.unpack(HEADER_FMT,header)

    TO_DS_BIT = 2**9
    FROM_DS_BIT = 2**10
    fromDs = (FROM_DS_BIT & frameControl) != 0
    toDs = (TO_DS_BIT & frameControl) != 0

    if fromDs and not toDs:
        srcAddr = addr3
    elif not  fromDs and not toDs:
        srcAddr = addr2
    elif not fromDs and toDs:
        srcAddr = addr2
    elif fromDs and toDs:
        return
The payload attribute is first converted to a string and then passed to the buffer constructor. Using a buffer allows the creation of read-only slices of the original data source without the interpreter having to do the additional work of a deep copy. The struct module uses a format string to specify the byte structure of data. It expects the input data to have exactly the length required by the format string. So it is neccessary to create a slice of payload before passing it to struct.unpack. For more information on the struct module format string consult do help(struct) in the interactive Python interpreter.
The addresses are assigned to addr1,addr2,addr3 because the position of the source address changes based on the value of two bits in the Frame Control bitfield. For the specification of this check the quick reference card.
Probes
Probes are management packets with a subtype of four. In the payload of the packet are tagged parameters. The format of the tags is very simple
- 1 byte - Tag ID
- 1 byte - Tag Length N
- N bytes - Content of tag
The only tag that that I am extracting is the SSID tag. It has an ID of zero and a length of 0 to 32. If the length is zero, the probe is a broadcast probe. If the length is non-zero, it is an ASCII string specifying the SSID of the network being probed for.
In order to find the SSID tag, it is required to parse and discard any tag which may precede it. Since the ID and length are just a single byte, concerns about endianness do not apply. It is sufficient to extract each tag, check if the ID is zero, and if not just advance the reference into the payload by the length of the tagged parameter.
Storing gathered data
I ended up creating a simple schema for PostgreSQL to store the observed data. I also added the restriction that if a probe is received from a device in the past five minutes for the same SSID, then it is not added to the database. This prevents devices that are persisently in the area from simply filling the database.
To insert the observations into the database, I used the psycopg2 module. Nothing exciting there.
GitHub
At this point I'm going to dispense with examples and link the current project on GitHub.
Running it
To run the script you'll need to do some preparation. Start up a PostgreSQL database if you don't already have one. Create a database for this and create all the needed tables using the probecap.sql file. In my case I am running the database on a seperate machine. As a result, it is very important to have both machines using NTP so the clocks are synchronized.
Next, get your wireless device into monitor mode by using airmon-ng. It can vary from one piece of hardware to the next, but typically all you have to do is a airmon-ng wlan0 stop then airmon-ng wlan0 start. This has to be run as root. Pay very close the output of the second command, as it tells you the name of the interface the device is listening on in monitor mode. In my case it is mon0.
You also must be root to run the Python script.
python probecap.py mon0 conf.json
The first argument is the name of the interface, the second is a JSON file containing a single dictionary. This dictionary is the arguments passed to psycopg2.connect. Update the provided conf.json.example to have the details of your PostgreSQL database.
What's next?
Now that I'm gathering data all the time, I've got some ideas. First off, I'd expect the number of probes to increase and decrease directly with traffic patterns. Additionally, I should be able observe the same device in regular daily patterns as people commute to and from work.
I plan to create some sort of HTML interface where I can quickly query the data and graph it. So there will be a followup to this post.