Creating software with Claude Opus 5
- Sunday September 13 2026
- ai videogame c++ 3d magnum sdr qt
- Series: creating-with-claude-opus
This series is about interesting projects I did with Claude Opus and lessons learned.
I've had a reasonable amount of time to work with Claude Opus at work and found it to be impressive. So I spent $20 of my own money and bought monthly access from Anthropic.
My previous experiments had let me produce a video game using Google Gemini. I made a 3D interactive video game. But I was never able to get it to load asset files. It did produce procedural assets just fine and it is actually kind of fun to play with. This post was originally meant to be a deep inspection of a video game project that I created with Claude Opus 5. I say "created" because the amount of actual software development I had to do here was low. Instead I decided to just show what I made and why I found it interesting.
You don't know what you don't know. But also, you don't know what you know.
I've been a fan of the Rumsfeld Matrix since it was first explained to me decades ago. At one point I was called Donald in the workplace.
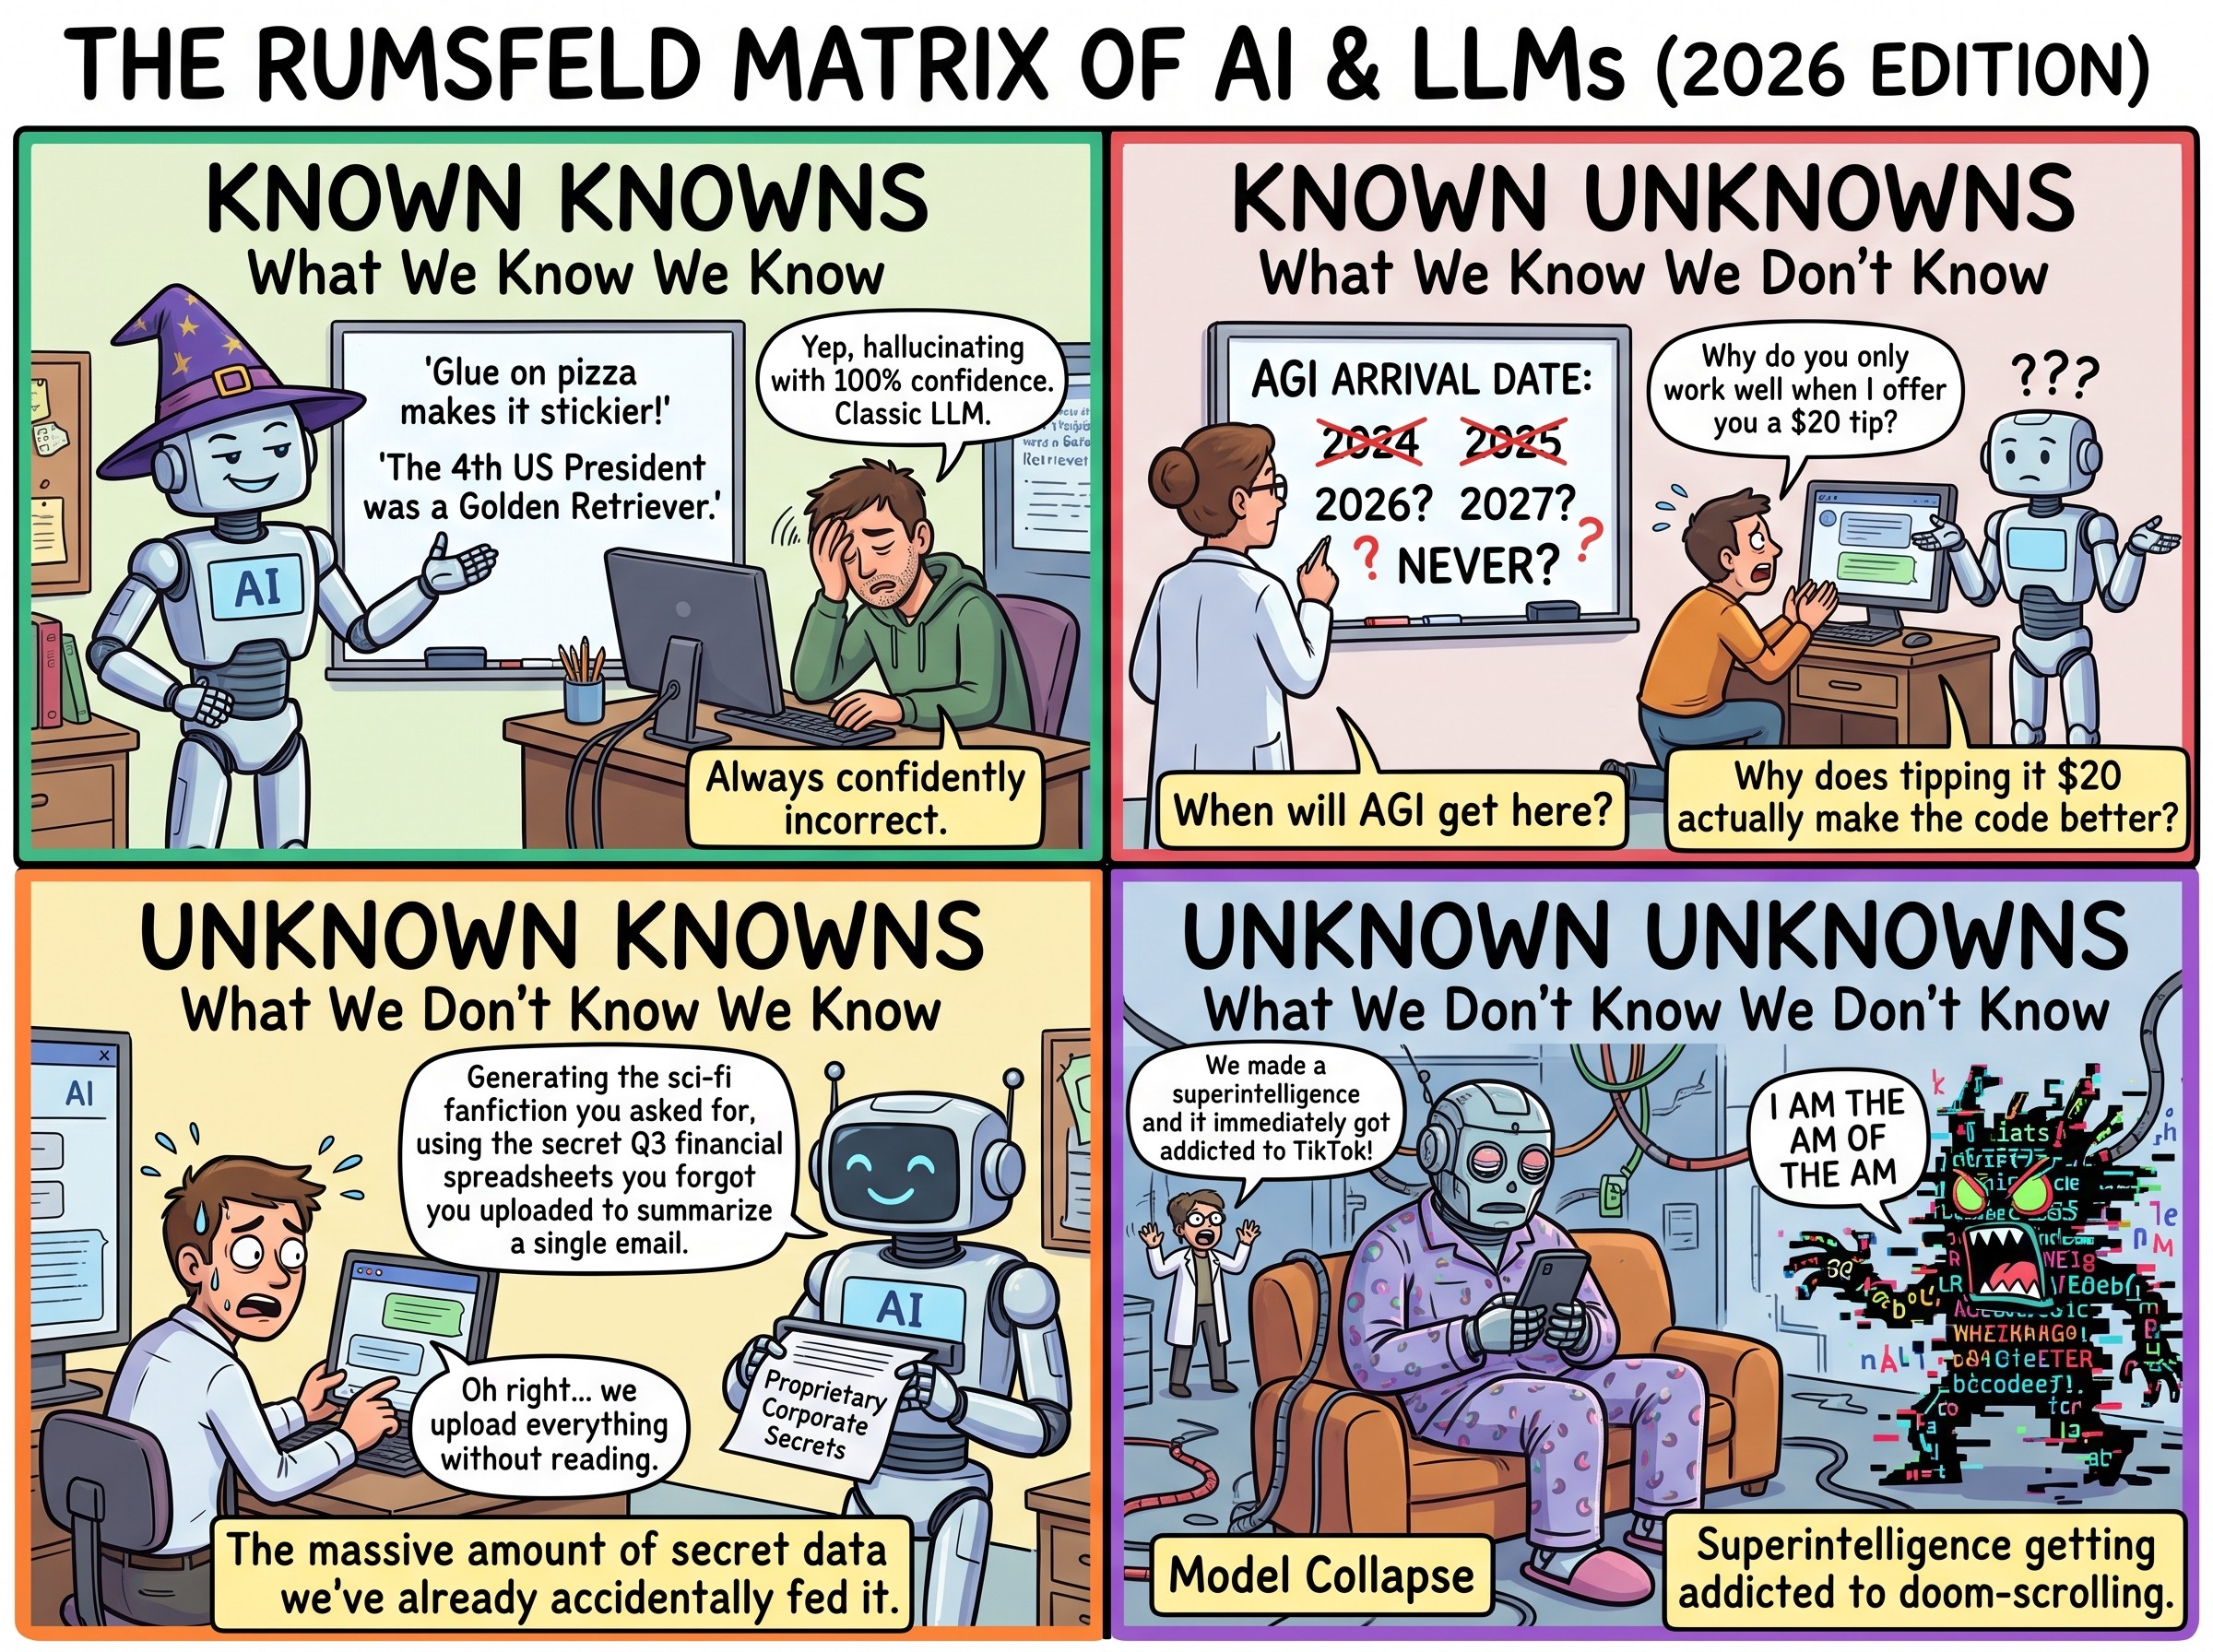
One of the unusual things the matrix calls out is "Unknown knowns". I say I "created" software with Claude Opus 5. There was not much software development or software engineering in the traditional sense. But I've also been writing software for decades. So my results and my experiences with Claude Opus 5 are intrinsically skewed by this. Basically, I know what to tell it to stay away from. But I also do that without really knowing it.
A 3D video game - land train warfare
I've had this idea for a train warfare game for a while. The idea is you would build out a land train from a vehicle and trailers. Then you add weapons and run a gauntlet-style course to deliver stuff. I hadn't really thought more about the mechanics. I ended up having Claude Opus 5 build a small tech demo that showed off the technical stuff I wanted this built on. I then fed that back in with a specification of the video game. The first message I sent to Claude was at 8/9/2026 15:26:42 and the last one was at 8/10/2026 22:55:33. This was a multi-day project that took 32 prompts to Claude Opus 5.
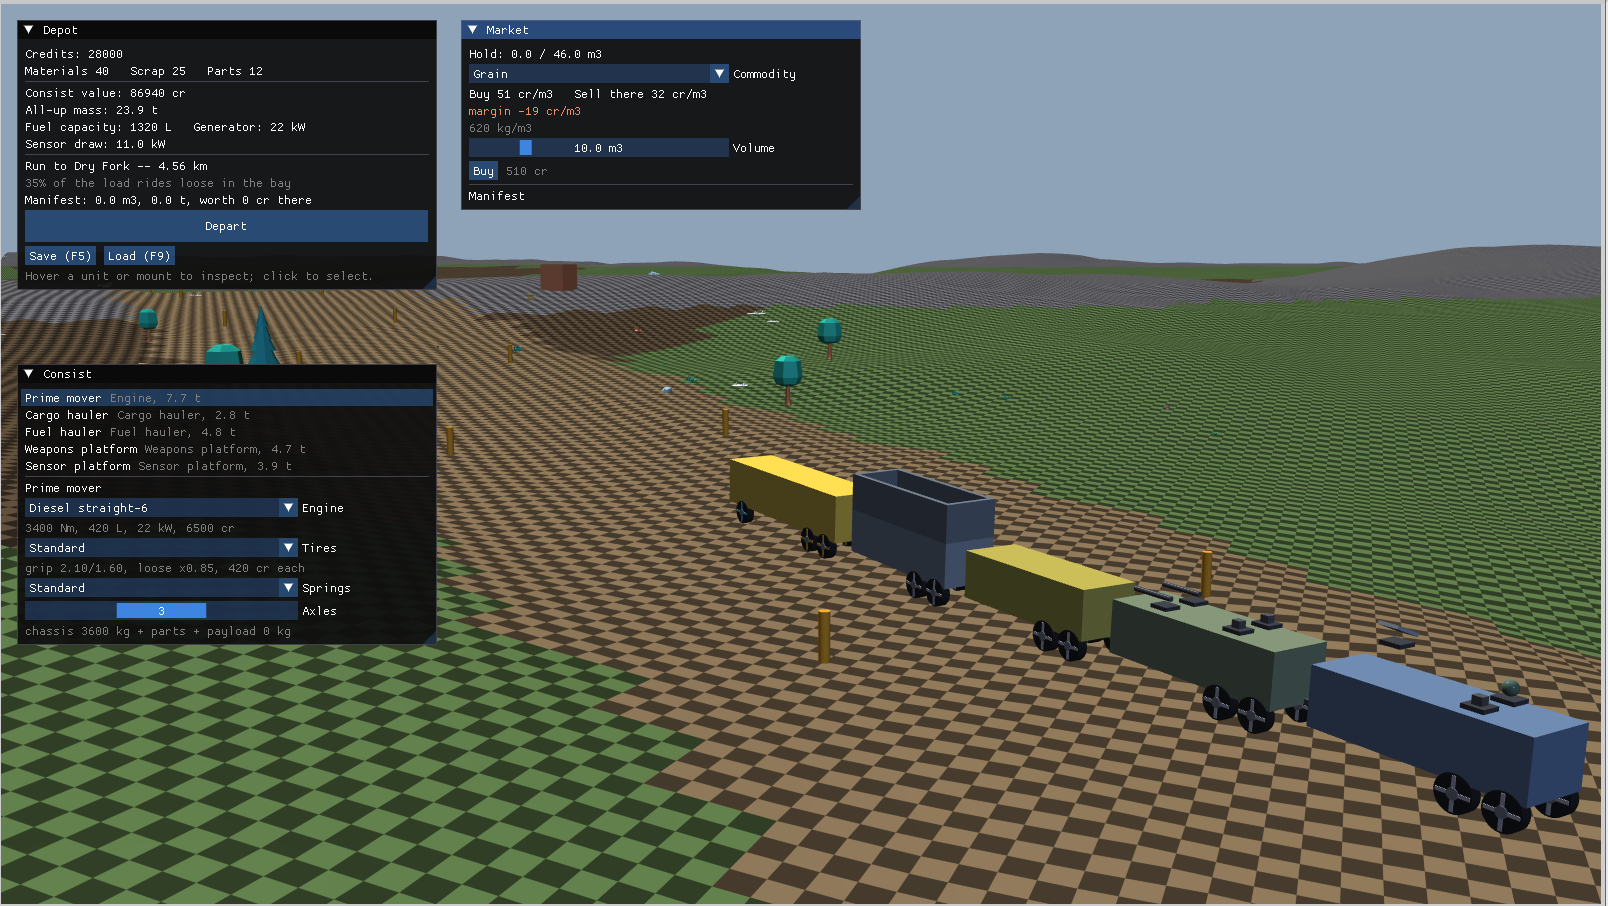
The train here is what the player builds and then guides through the level. Enemies must be defeated along the way
Loading assets
I could never get Google Gemini to load assets, but Claude did it quite easily. I did send it a list of the assets I had and also some of the files. Not everything in the game is loaded from assets as that wasn't the point. All of the nicely textured, detailed models in the screenshots below are from off-the-shelf assets I downloaded. I didn't have to do any 3D work to get them to function. Some monsters are T-posed, but I told Claude not to do skeletal work.
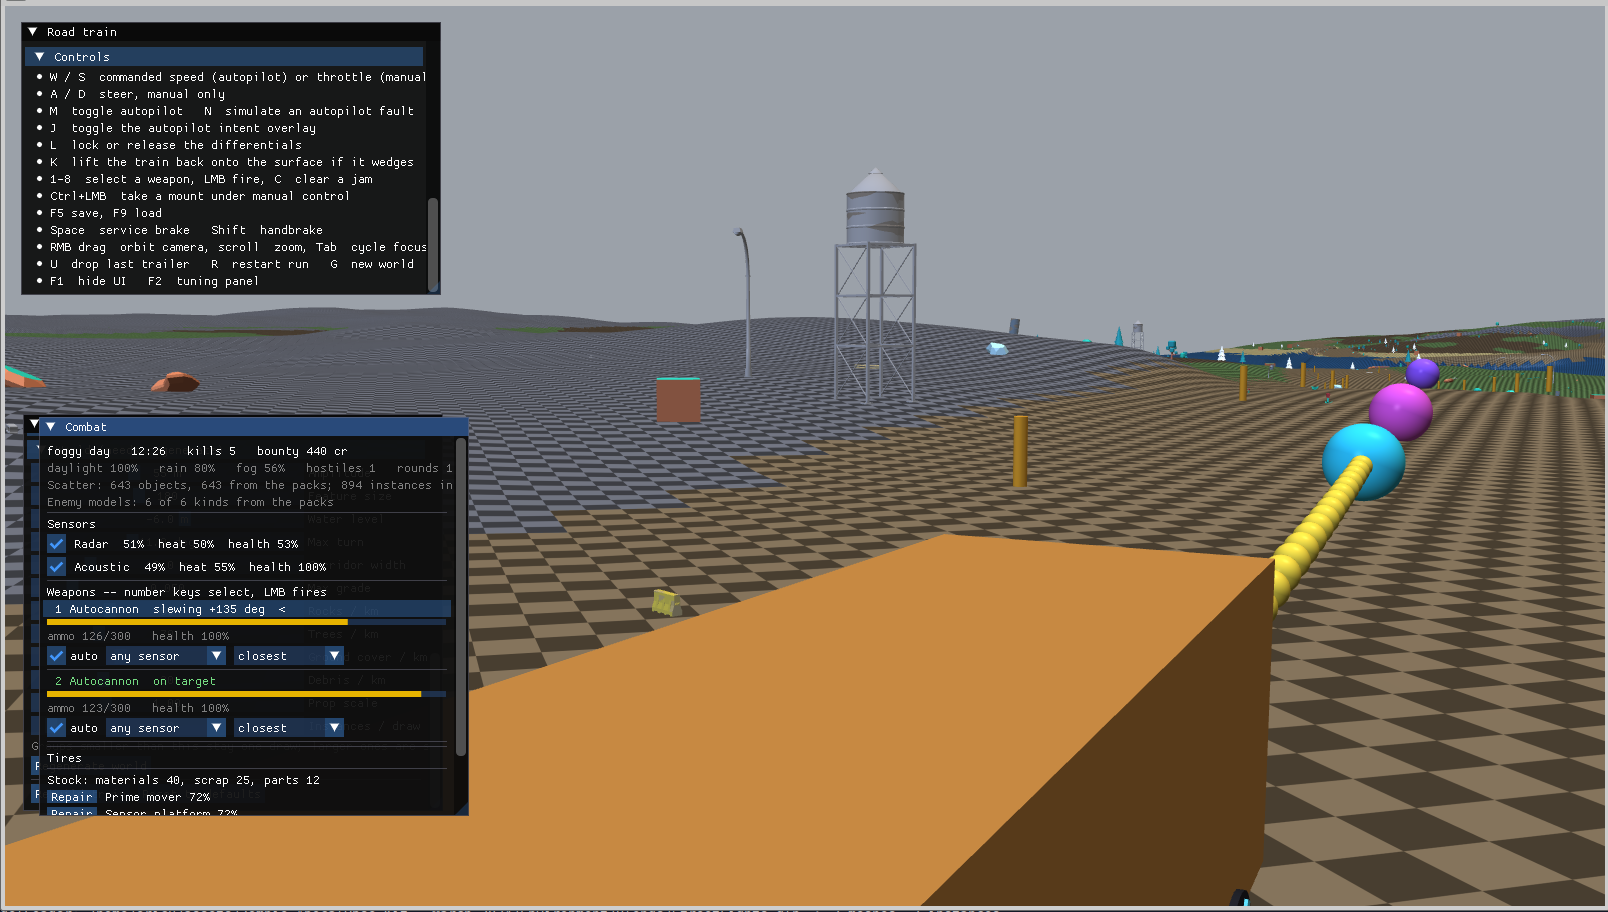
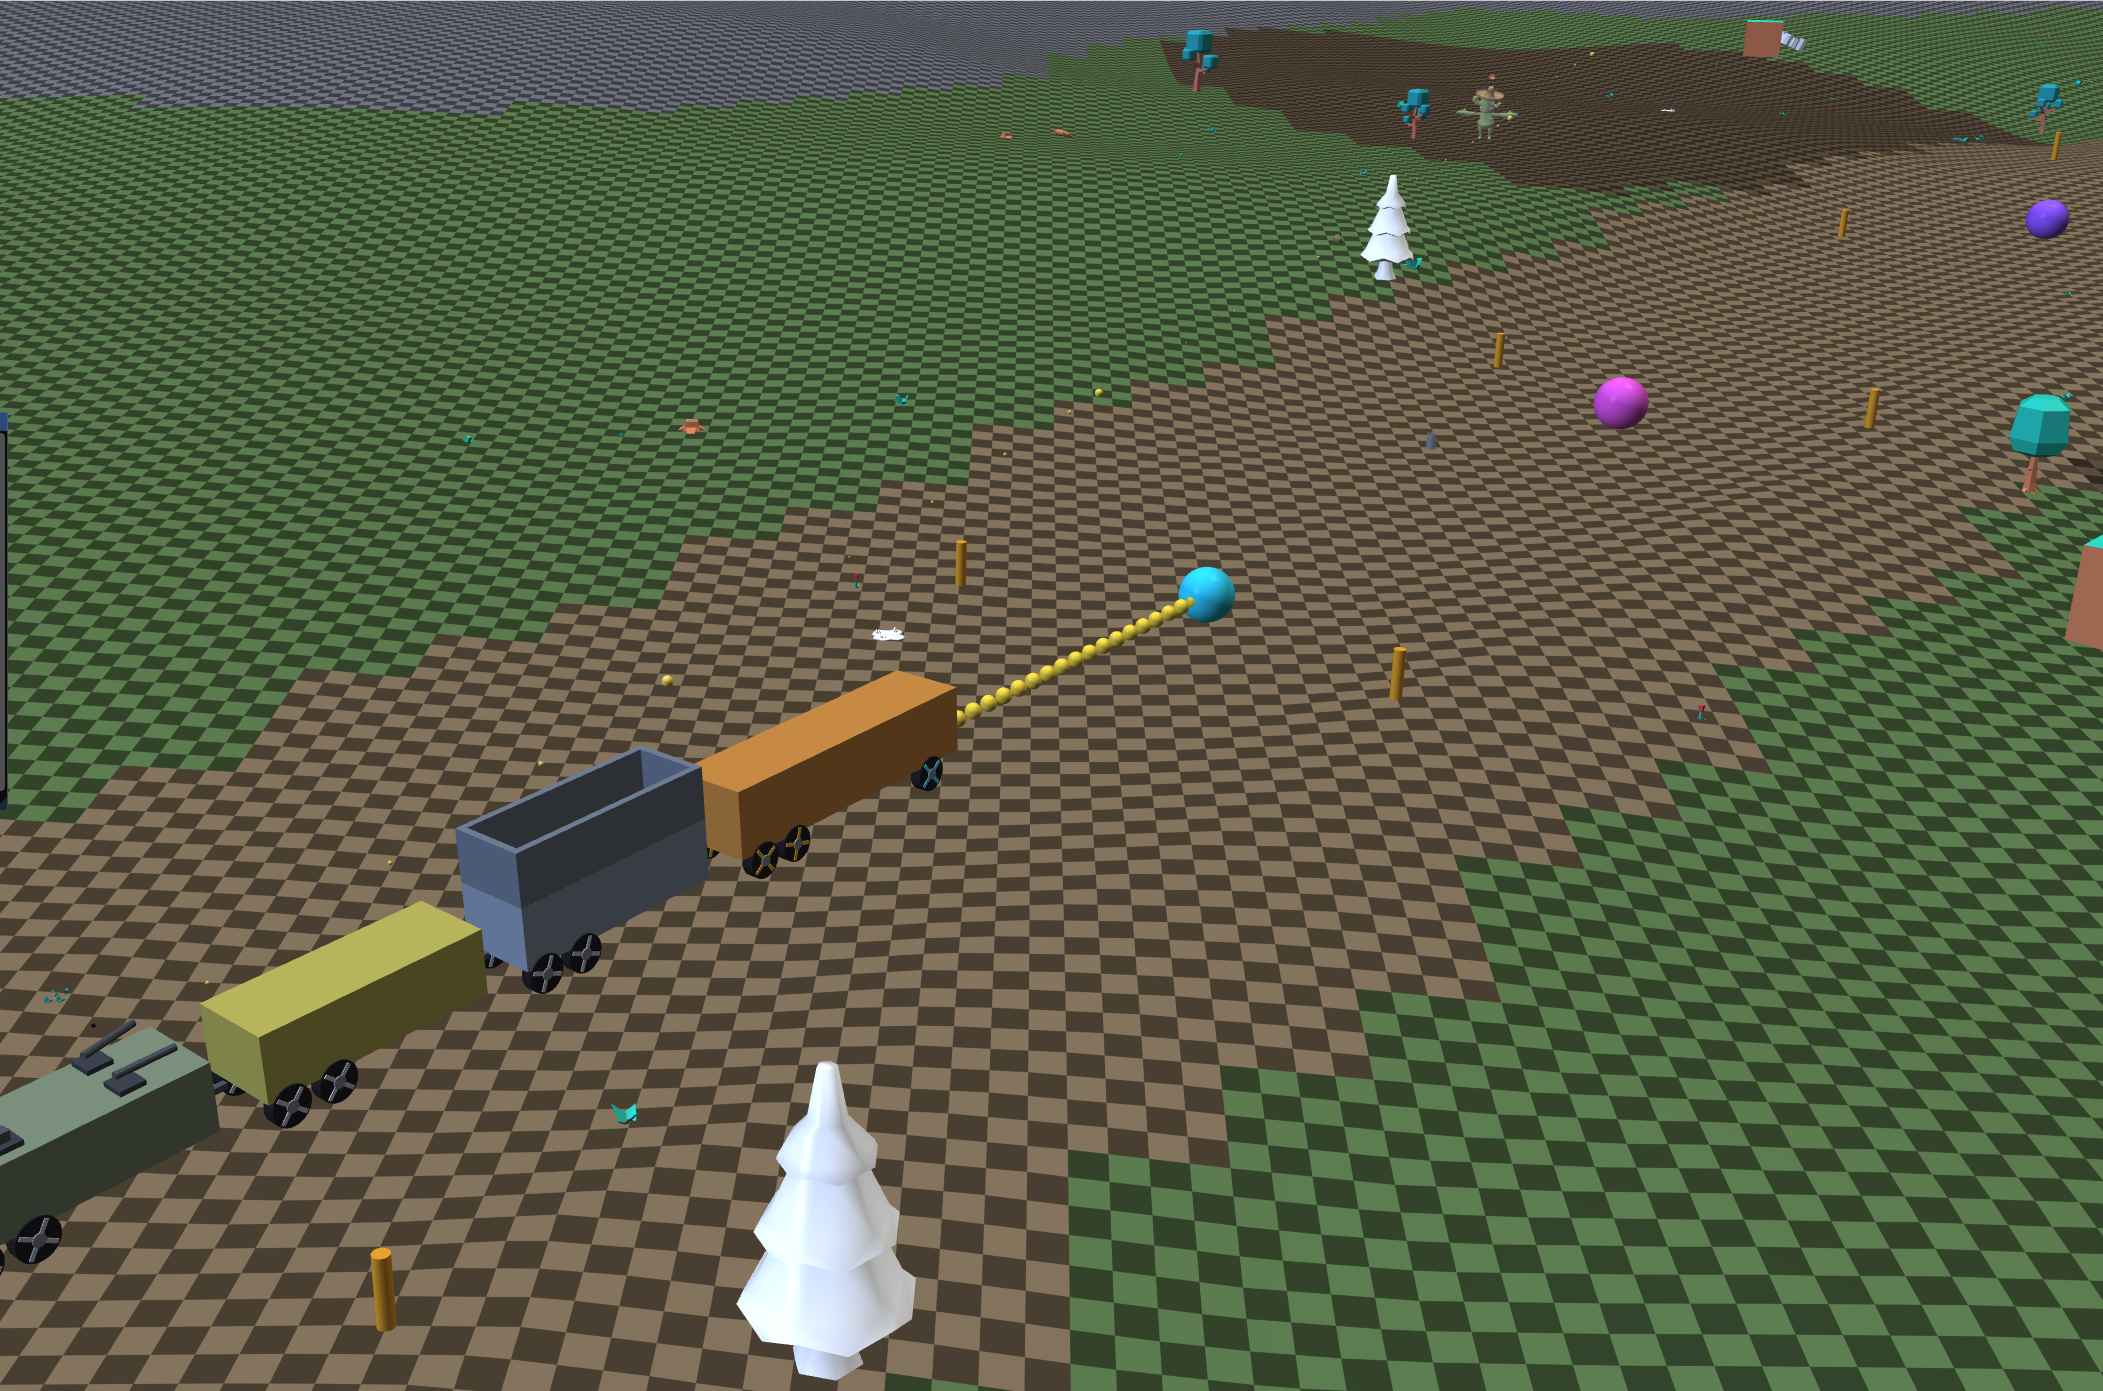
I didn't put much thought into the assets I gave Claude to use, instead just letting it pick what models to use.
Asset packs I downloaded
- https://quaternius.com/packs/ultimatemonsters.html
- https://quaternius.com/packs/zombieapocalypsekit.html
- https://kenney.nl/assets/mini-forest
- https://kenney.nl/assets/nature-kit
- https://quaternius.com/packs/scifiessentialskit.html
- https://quaternius.com/packs/modularscifimegakit.html
- https://github.com/KhronosGroup/glTF-Sample-Assets
Autopilot
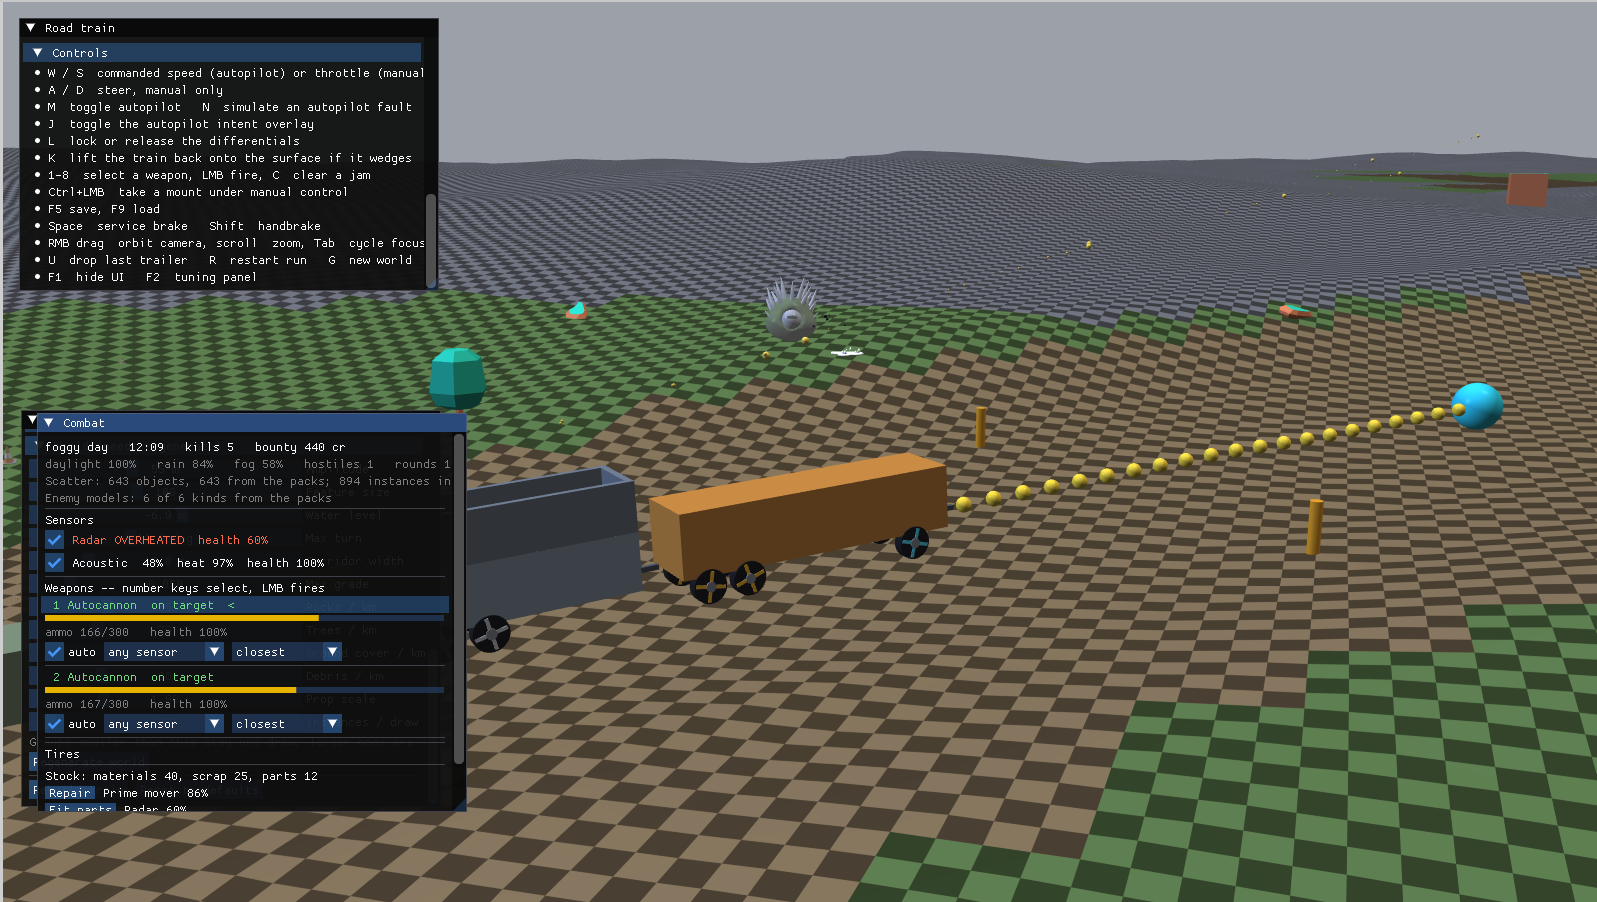
One of my requirements was the land train be capable of driving itself. Driving the land train is fun but also not the point of the game. I asked Claude to implement this. What I got was really bizarre. The train would start off OK, then immediately wind up in some weird turn that would take it off the map. What's impressive is that providing a description of this back to Claude gave it enough information to eventually fix it. I also asked for tick marks to see where the autopilot was trying to take me and the path itself. It took quite a few rounds but I eventually got a working autopilot from this.
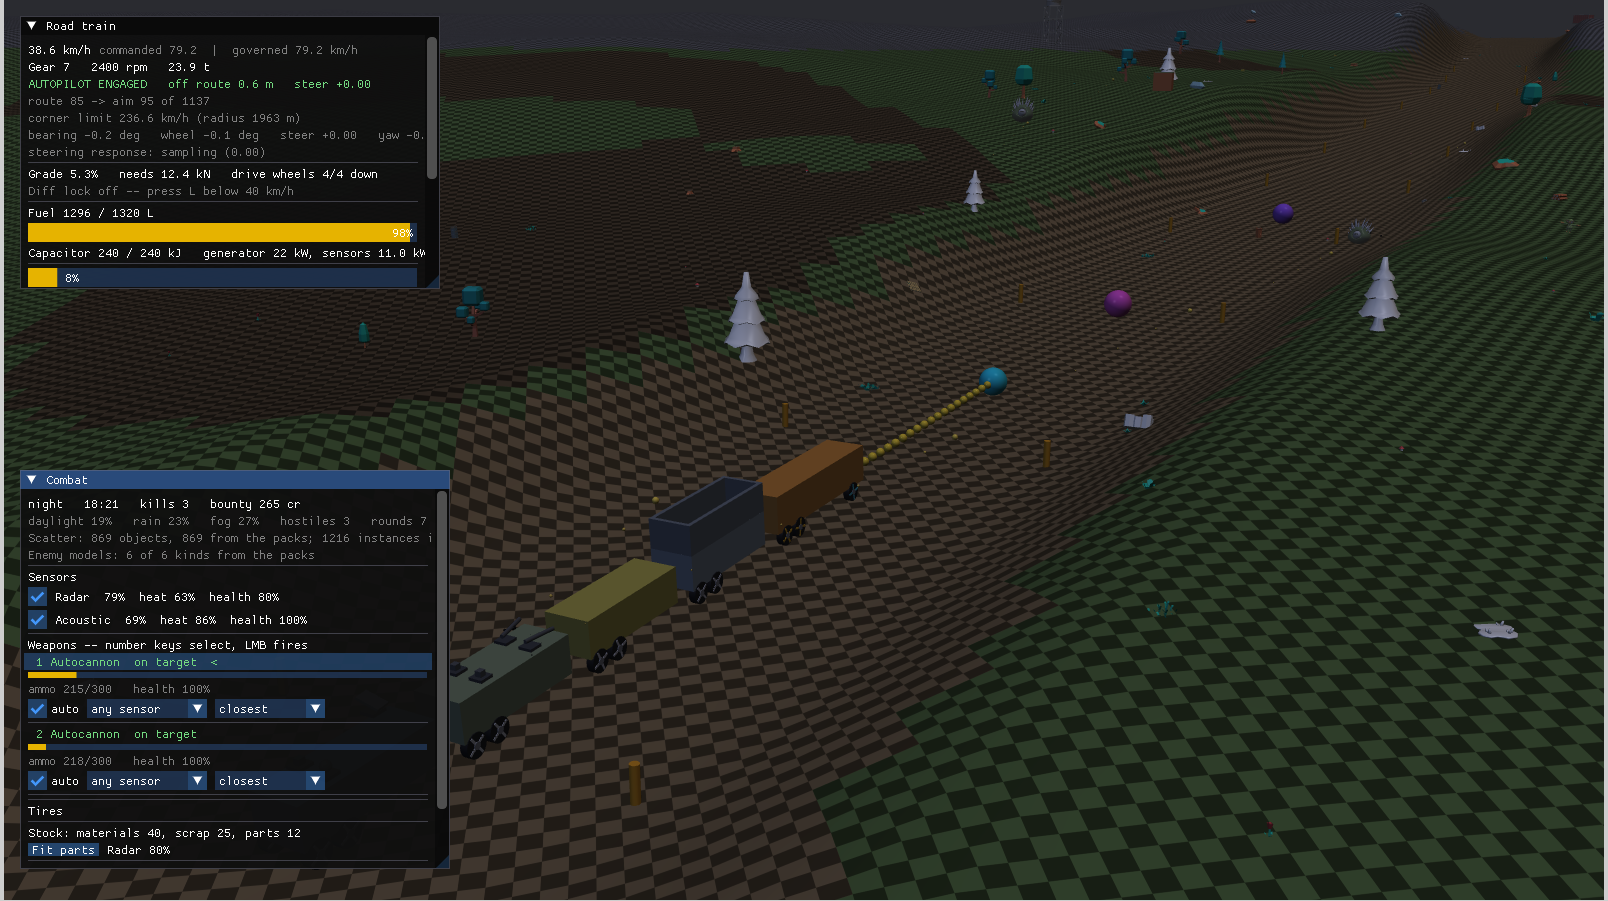
The spheres in front of the train show where the autopilot is trying to take the train
Instanced rendering
One of the limitations of any video game with a large map is that trying to render everything doesn't scale. Even in small environments, sending render calls for each entity can result in the game being CPU-bottlenecked when the number of entities is high. There are two ways to avoid this. The first is not rendering things which wouldn't be on the screen. The second one is instanced rendering, which consists of rendering things sharing a model in one call. The generated code from Claude does both of these. I asked for some performance metrics on this to be visible. The initial results were incredibly poor. Claude suggested a new approach which I accepted and wound up with an instanced rendering solution that works. It reduces the number of draw calls. I'm not entirely sure how practical this solution is as the tiny Intel N150 computer I was running this on had no issue running 100 FPS at 1440p in any circumstance while working on this project.
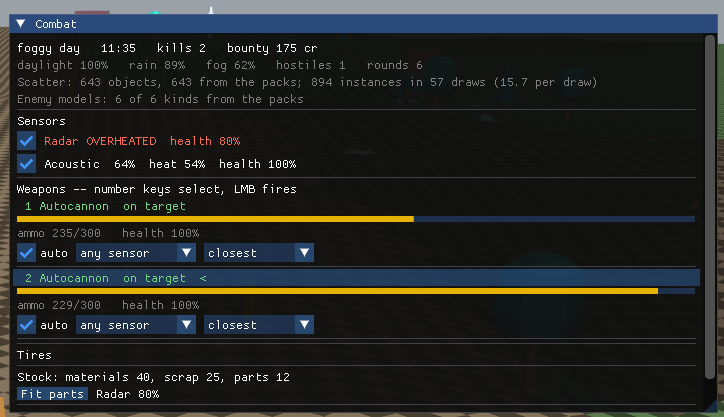
For some reason Claude decided the rendering statistics should be under the Combat tab in the UI
Gameplay
This game isn't really impressive but it was fun to work on and eventually figure out how to complete a level. I eventually did this by just driving off the path entirely under manual control. If I ever have time to actually tune the gameplay I think I could actually make a decently interesting video game out of this.
Video processor
A long time ago I had this idea that it would be really neat to make a big 2D array of addressable LEDs and have them approximate the light pattern of an actual video. I never did this mostly because of the time it takes to build stuff. There is one similar thing I remember from department stores back when CRT TVs were a thing. A large CRT was extremely expensive. Flat panels other than rear projection were rare. So to display a large image department stores just used an array of CRTs. This looked awful and was jarring. This is due to the fact that the TVs had huge bezels. Nowadays large LCD displays are so common even fast food places use them to display the menu. So I doubt this will ever be seen again. Every large-format display I have seen recently consists of modular panels with no bezel at all.
Doing some research on this it turns out that this is not nearly as common as my mind remembers. I probably encountered it once and it stuck. Claude pretty easily created something that could simulate this. I prompted it to use ffmpeg for the basis for this. I already suspected it would be the appropriate starting point.

A still frame from the original video
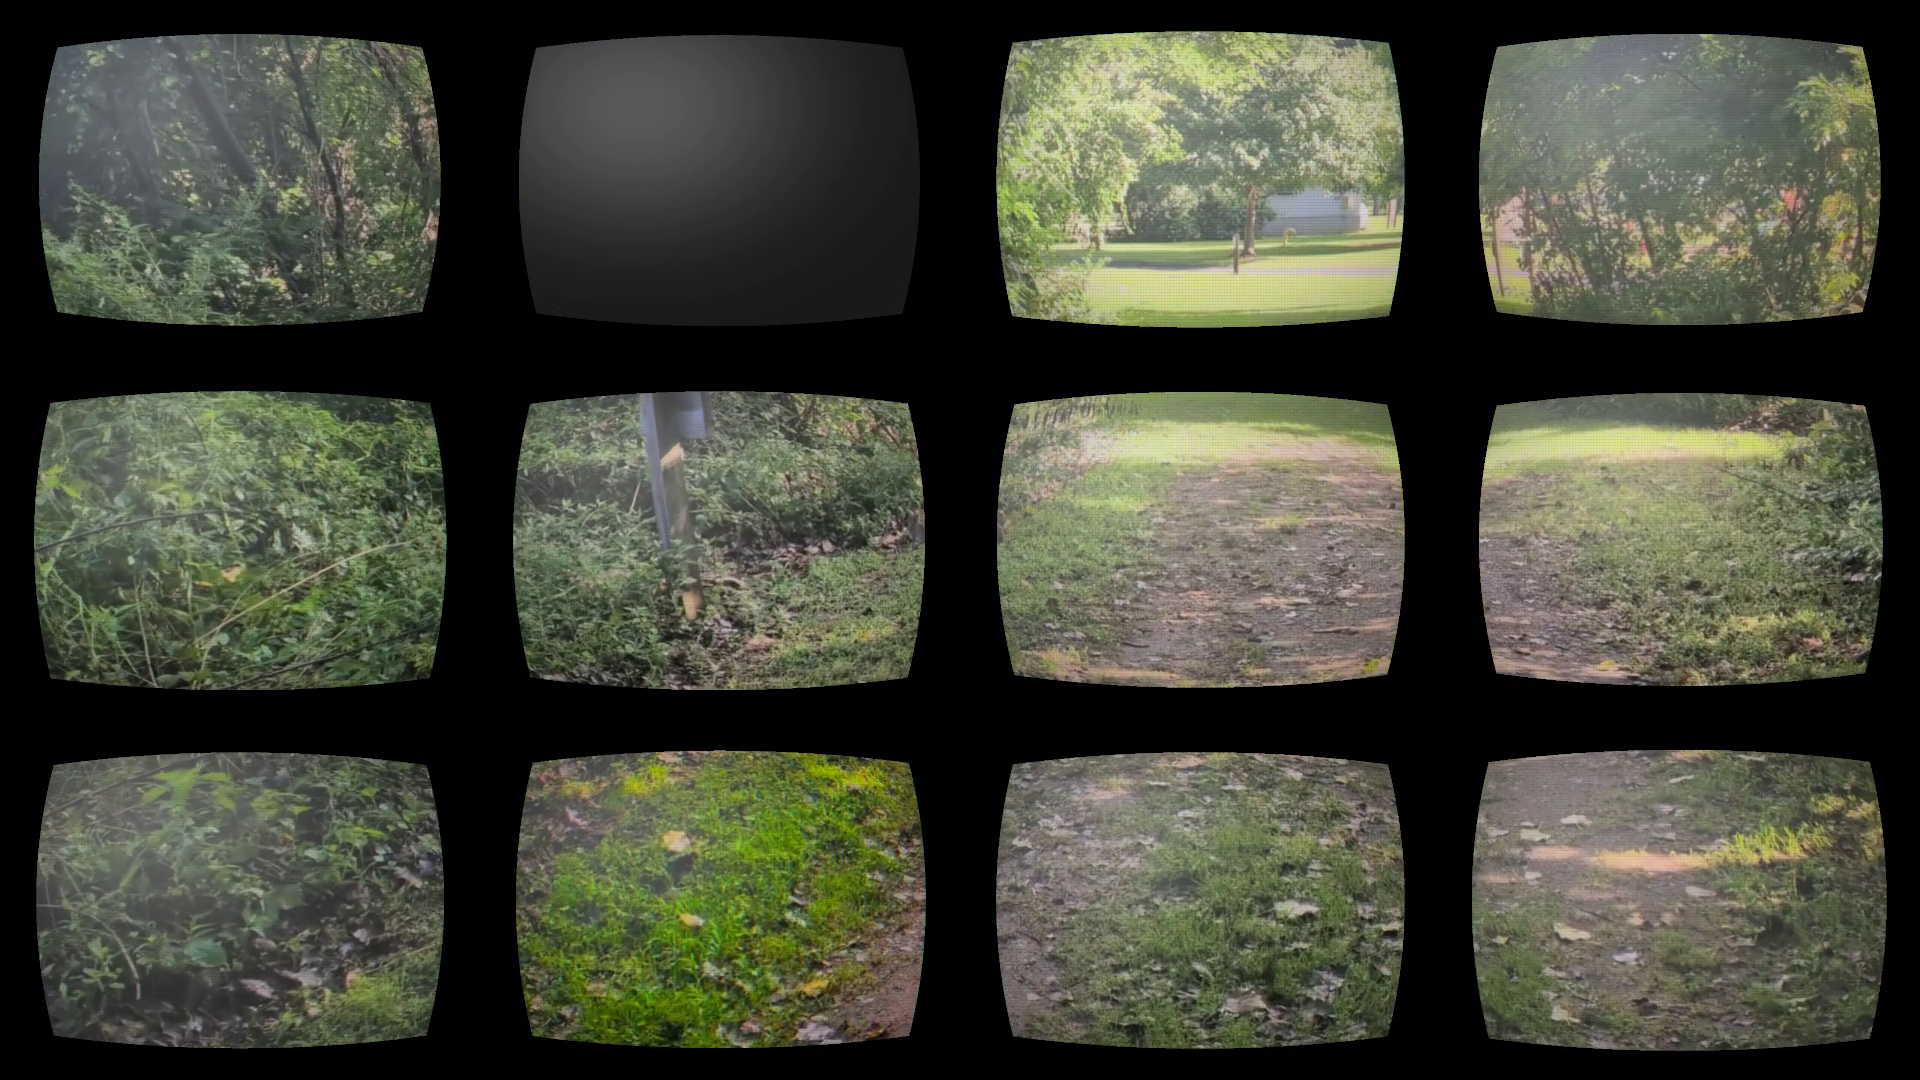
A still frame from the applied TV wall filter
The effect even accurately recreates one of the CRTs failing or flickering. This is mostly entertainment on my part. I'm aware commercial software exists to do this kind of thing. I have no interest in paying the licensing fees for that or trying to learn to use complex workflows in non-linear video editing software.
Impressed with the result I had Claude add the following goofy video effects. Some of these are interesting enough to be used in independent film work. I didn't personally do much investigation into how Claude achieved these effects. Each time I prompted for an additional filter Claude had no difficulty in generating my request on the first response. While I have a surface-level knowledge of how these effects are constructed, I suspect Claude has been trained on a huge volume of material. Some of that probably includes examples which are nearly verbatim what I was asking for anyways.
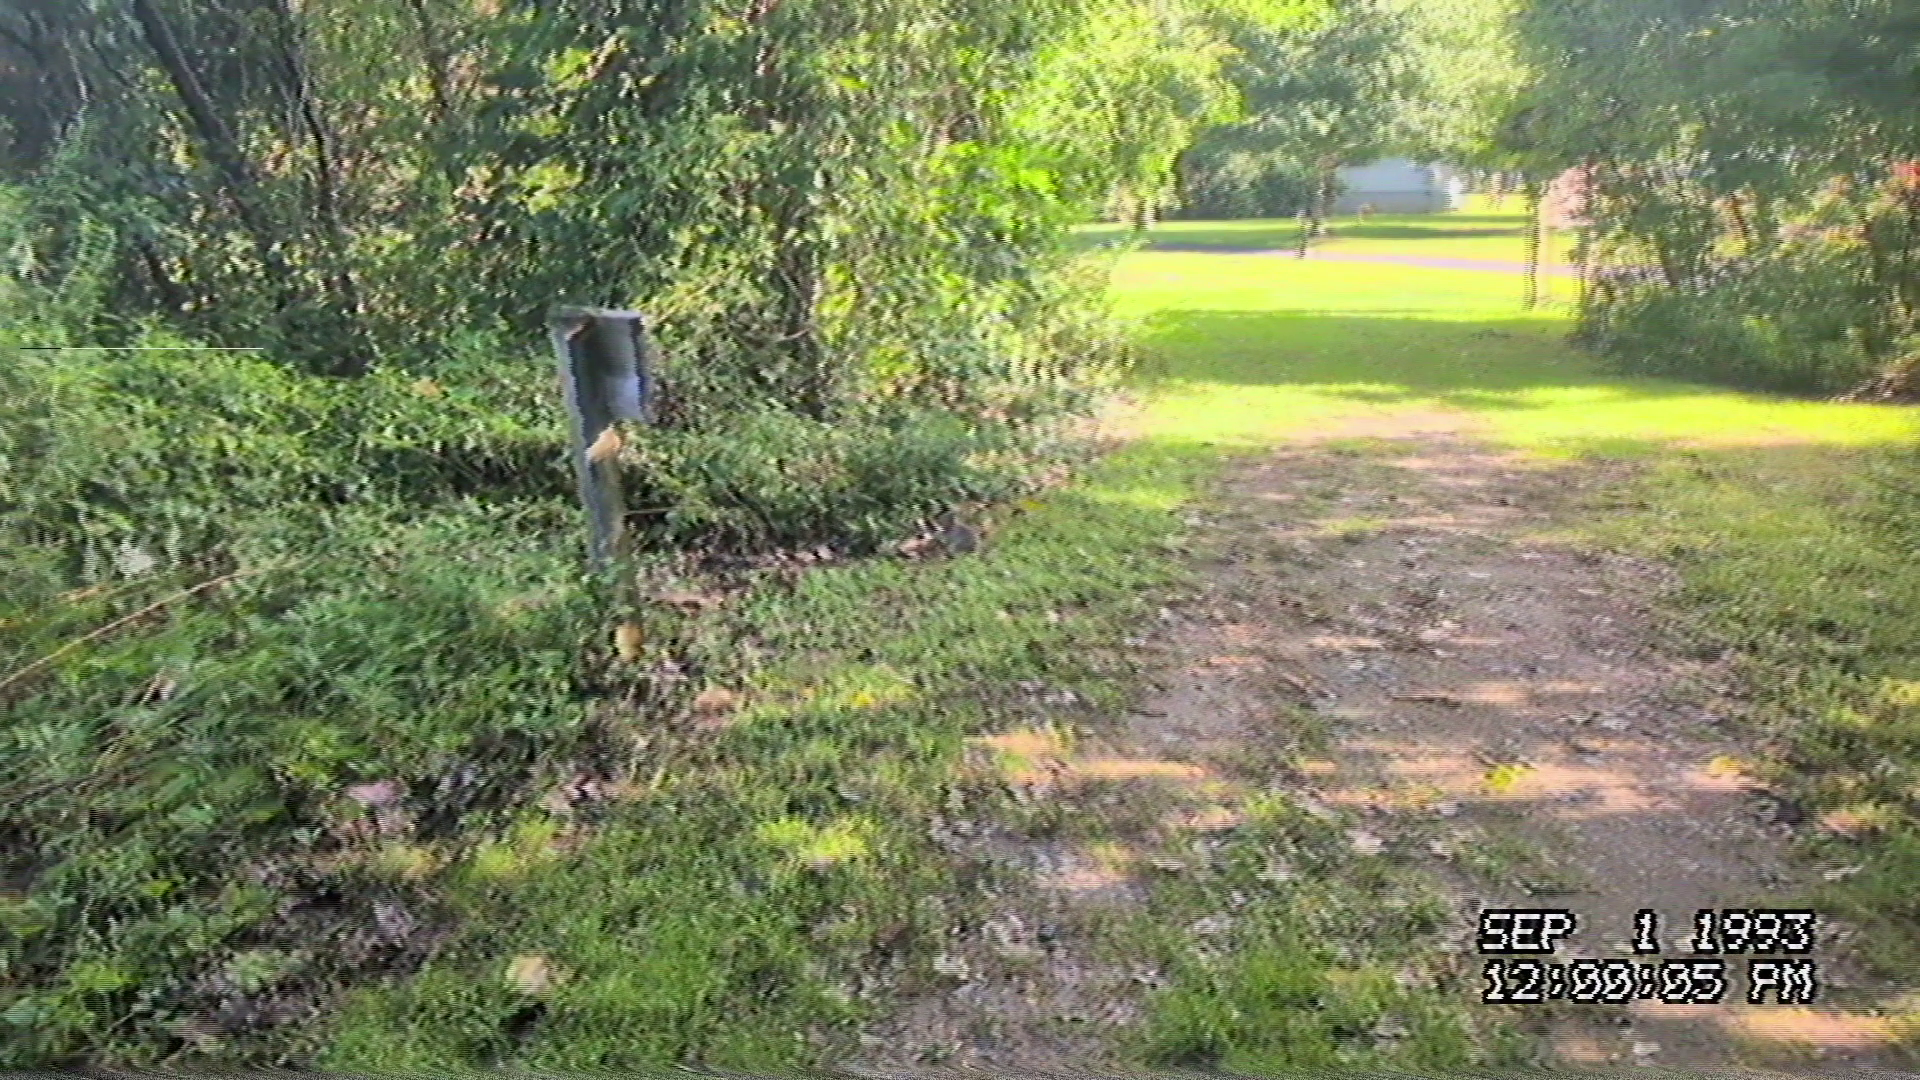
VHS-C home camcorder
This attempts to accurately recreate the awful quality of the home videos of the 1990s. Every family who could afford one had some kind of home camcorder. It did actually record video. But if you're used to the quality of a modern camera phone you are going to be sorely disappointed. I wanted to recreate this effect so I could show kids just how awful anyone's home video was in the 1990s if it wasn't done by a professional.
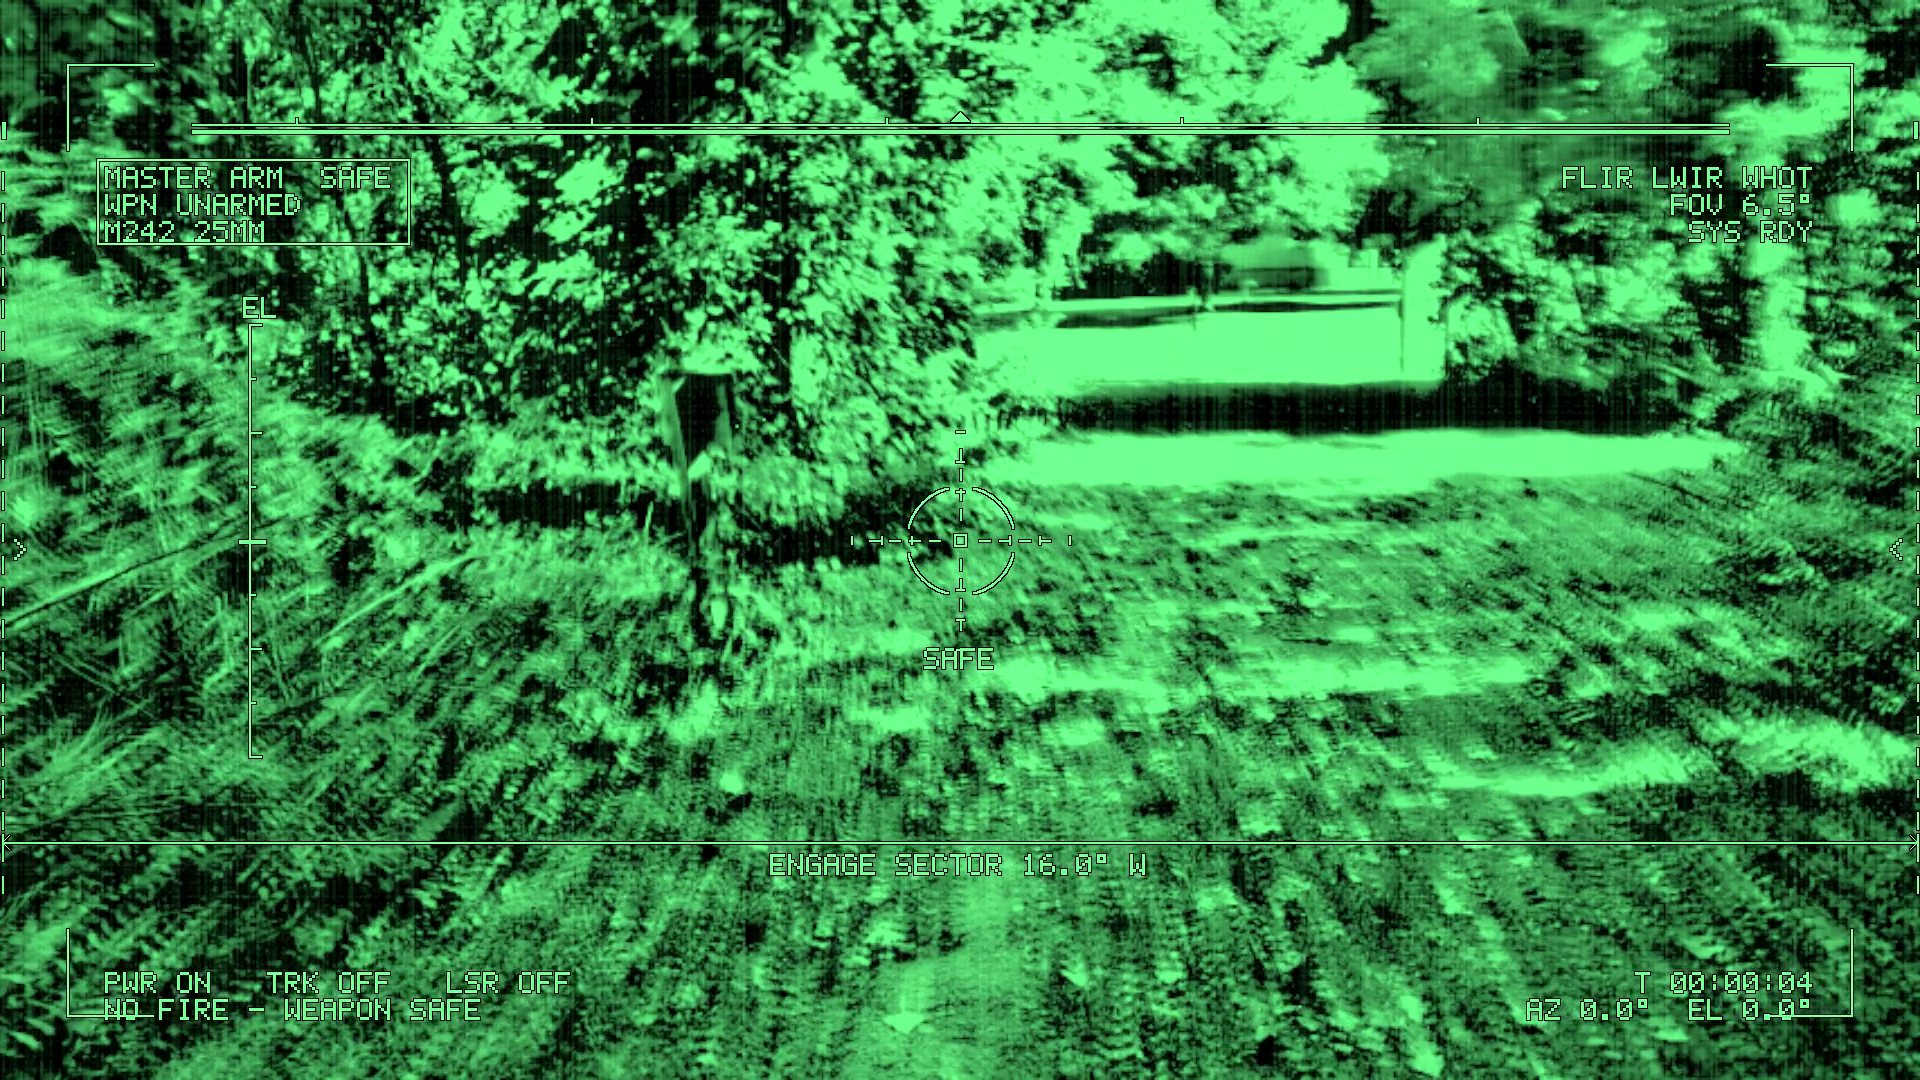
Infrared targeting
Infrared footage is common and inherently is monochrome. It's always converted to a single color in the visible spectrum as a result. It's really hard to fake this kind of thing because normal footage never captures the infrared spectrum. But it is possible to generate something that looks convincing at a glance. One thing I thought was neat about this is the ability of Claude to simulate the unevenness of commercial infrared sensors. This usually shows up as blocks or chunks in the video.
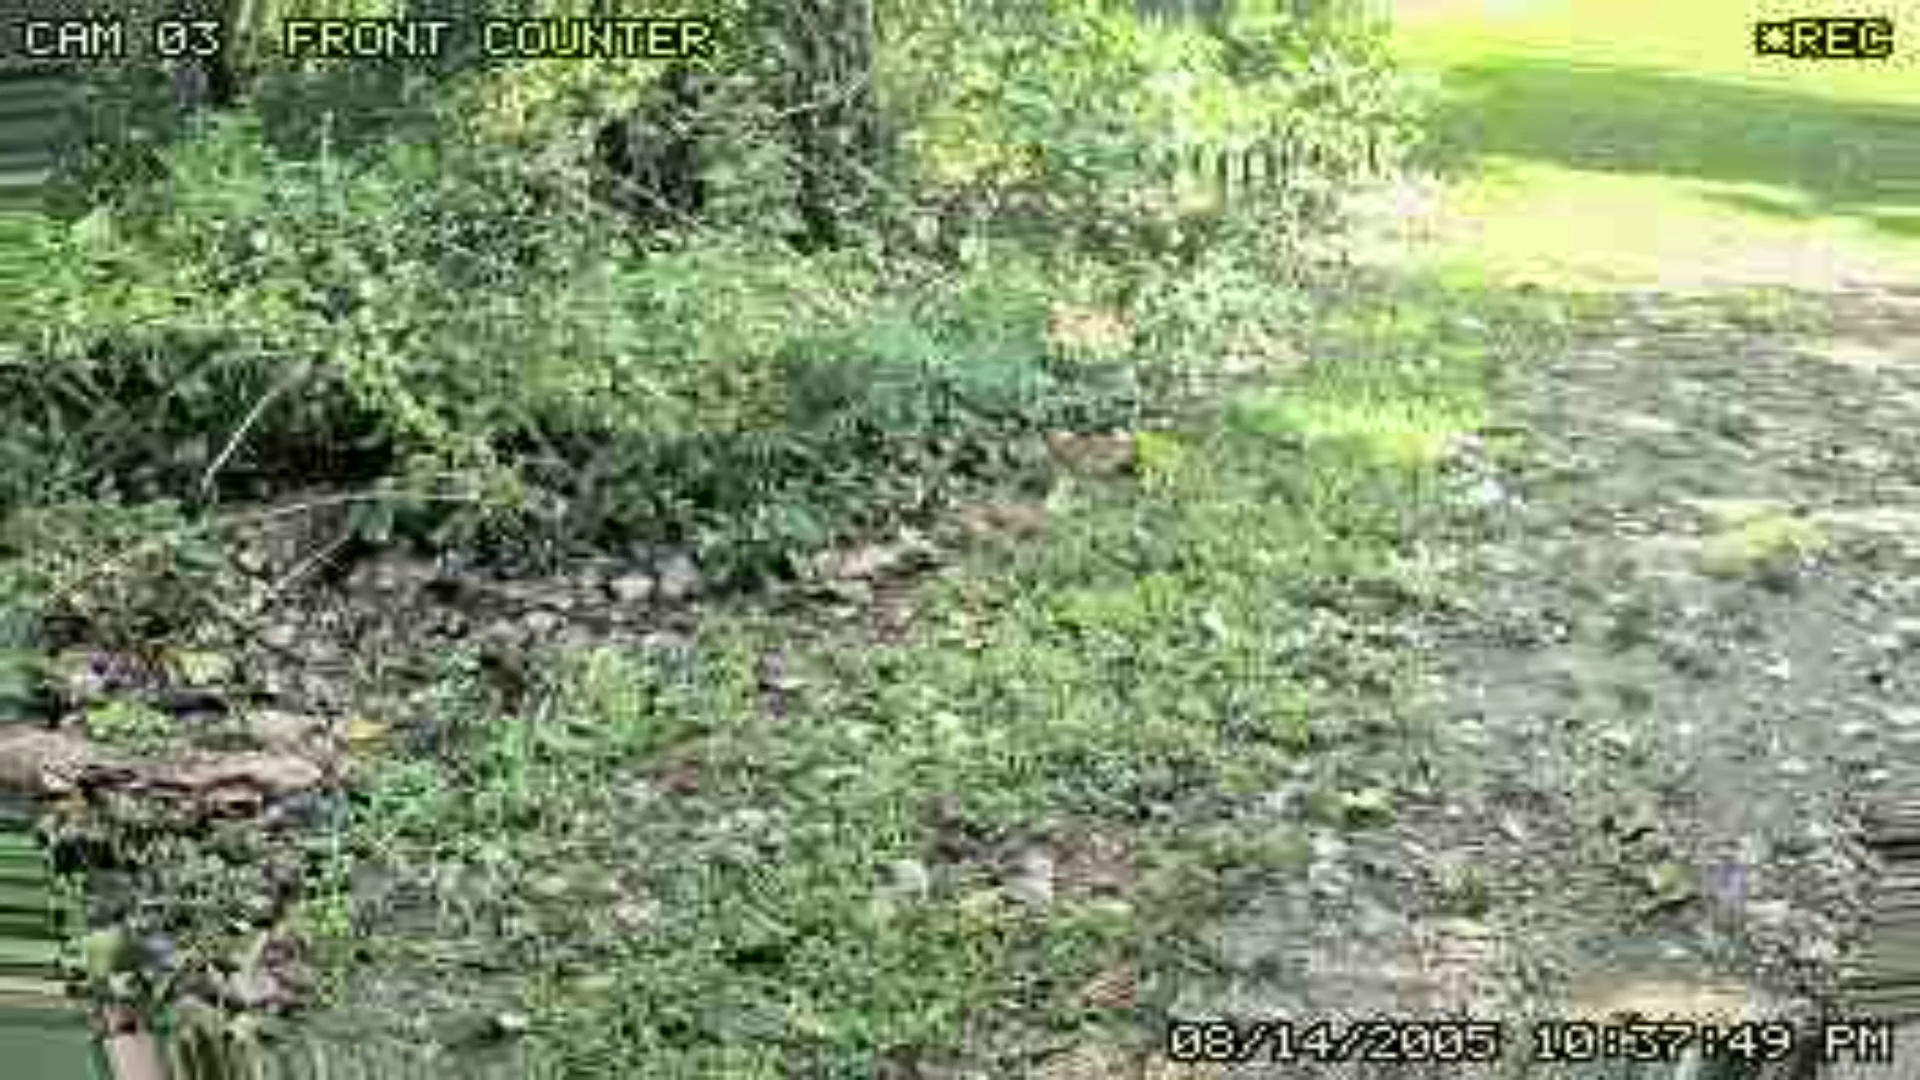
Surveillance camera
One of the impressive things of the 21st century is that surveillance cameras became very common. There seems to be some unwritten law of the universe that a surveillance camera is not permitted to capture an image useful enough to identify someone. This filter aims to simulate that effect.
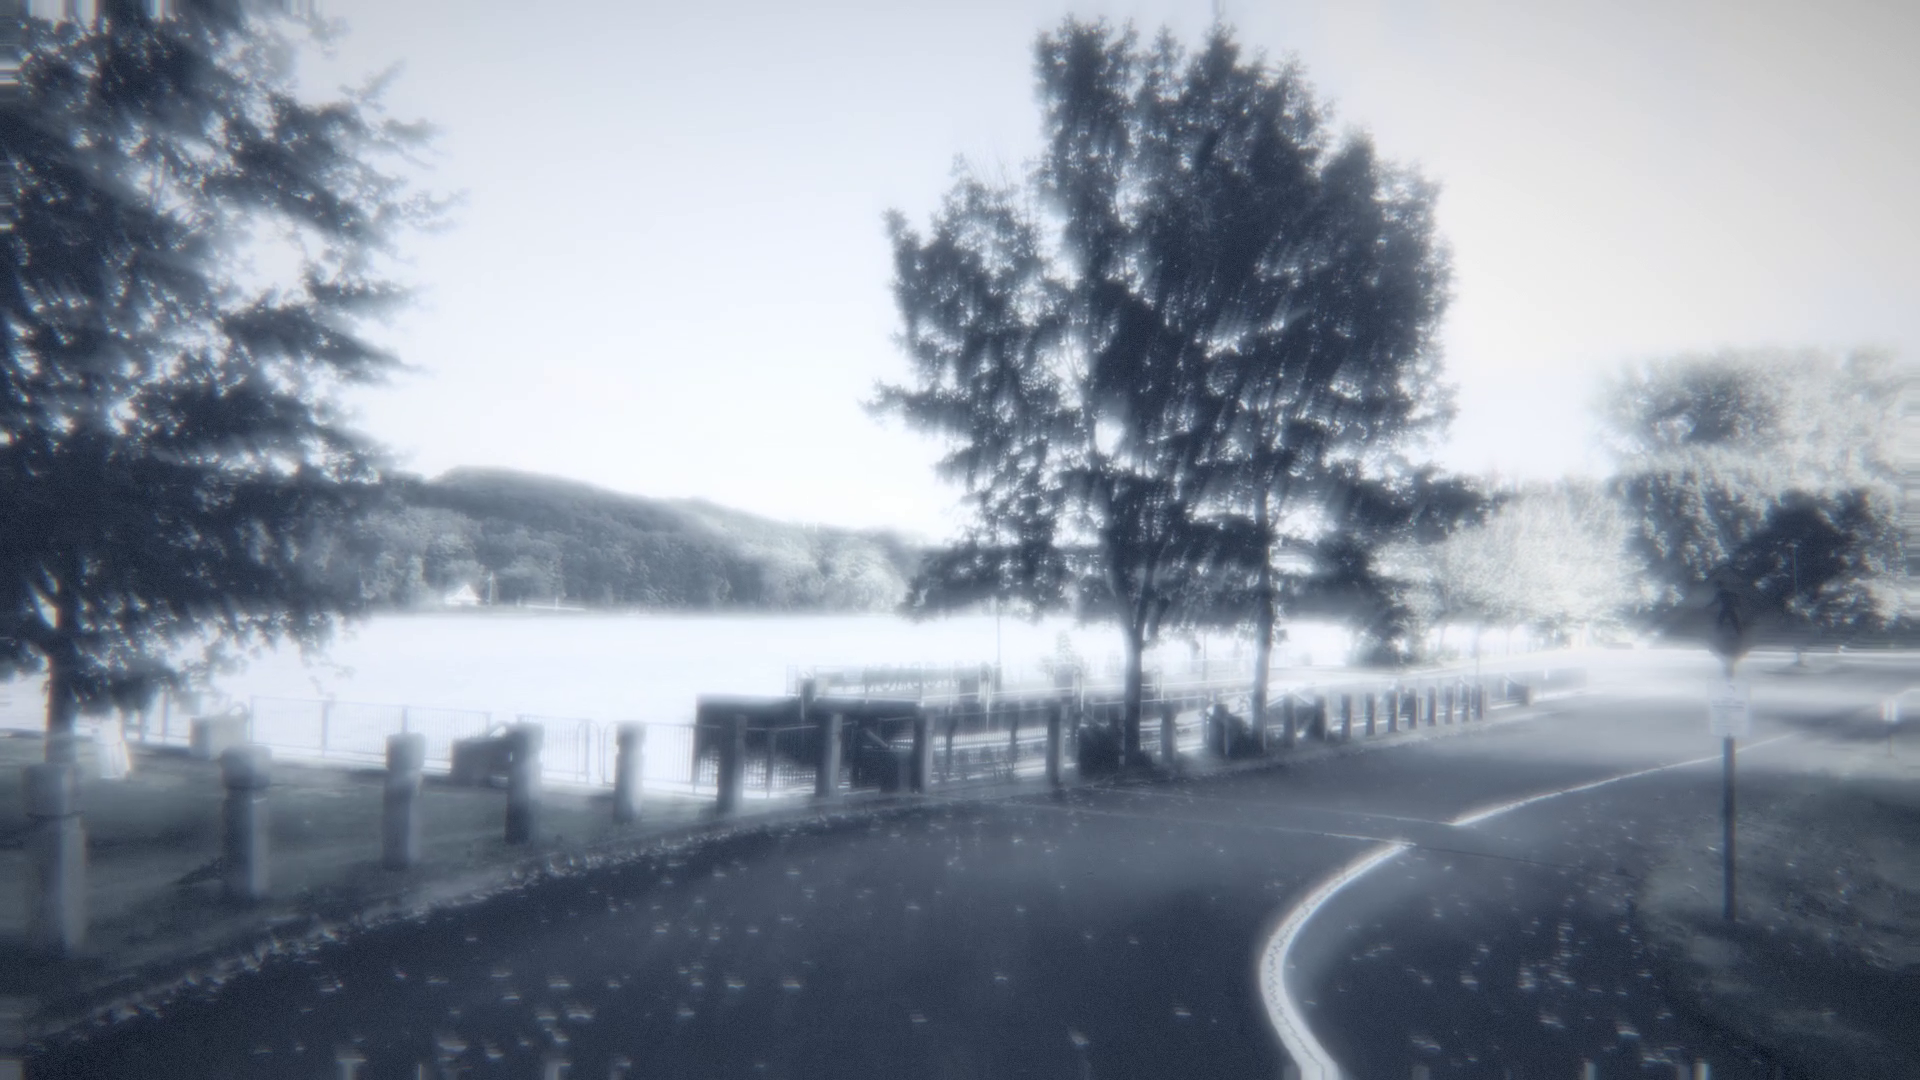
Wraith world
If you've watched Peter Jackson's Lord of the Rings films then you'll be familiar with this effect. This is a fairly poor analogue, but it is still neat.
AVX usage
I told Claude to use vectorized instructions where possible based off the capabilities of my Intel N150. For the VHS-C camcorder filter Claude needed to convincingly simulate the signal degradation that occurs when video footage is encoded to the format used on VHS tape. This actually is subpar even to regular broadcast NTSC from what I understand. I am not going to review all the code, but here is a chunk of C++ from src/vhs.cpp
void VhsFilter::lumaNoiseAndDropouts(int64_t frame) {
    const int amp = static_cast<int>(std::lround(std::clamp(cfg_.lumaNoise, 0.0, 1.0) * 32767.0));
    if (amp > 0) {
        const __m256i qa = _mm256_set1_epi16(static_cast<int16_t>(amp));
        pool_.run(nbands(h_), [&](int b, int) {
            const int y0 = b * kBand, y1 = std::min(y0 + kBand, h_);
            for (int y = y0; y < y1; ++y) {
                __m256i st = seedRow(cfg_.seed, frame, y, 0x4E4F495345ull);
                int16_t* s = y_.row(y);
                int x = 0;
                for (; x + 16 <= w_; x += 16) {
                    __m256i n = _mm256_mulhrs_epi16(noise16(st), qa);
                    __m256i vv = _mm256_loadu_si256(reinterpret_cast<const __m256i*>(s + x));
                    _mm256_storeu_si256(reinterpret_cast<__m256i*>(s + x),
                                        _mm256_max_epi16(_mm256_adds_epi16(vv, n), _mm256_setzero_si256()));
                }
                uint32_t rs = static_cast<uint32_t>(hash64(cfg_.seed ^ static_cast<uint64_t>(y)));
                for (; x < w_; ++x)
                    s[x] = static_cast<int16_t>(clampY(s[x] + static_cast<int>(gauss(rs) * amp)));
            }
        });
    }
This C++ function uses GCC intrinsics to call AVX intrinsics. It starts by calling _mm256_set1_epi16 which takes a 16-bit signed integer and applies it to all the values in the vector. This is named qa. Inside the loop, the intrinsic _mm256_mulhrs_epi16 is used. This function is complex. It takes two vectors and multiplies each of their 16-bit components together. This produces 32-bit intermediate results, of which the 18 most significant bits are taken. The value 1 is then added to this, then bits [16:1] are stored into the destination. This scales noise up without using floating point operations. The actual usage of _mm256_mulhrs_epi16(noise16(st), qa) applies a noise vector to the existing vector qa. The overall effect of this is to process 16 values at a time using AVX. This inner loop is where this happens
for (; x + 16 <= w_; x += 16) {
    __m256i n = _mm256_mulhrs_epi16(noise16(st), qa);
    __m256i vv = _mm256_loadu_si256(reinterpret_cast<const __m256i*>(s + x));
    _mm256_storeu_si256(reinterpret_cast<__m256i*>(s + x),
                        _mm256_max_epi16(_mm256_adds_epi16(vv, n), _mm256_setzero_si256()));
}
This loop itself steps 16 values at a time. The value s is just a pointer to the type int16_t. So invoking _mm256_loadu_si256 with a pointer value of s + x just steps over an array of integers, 16 at a time. While this code is neat to study, I don't know if this is optimal usage of AVX. You can look up the instruction references from Intel. With significant time investment I think I could produce a better solution. Evaluating this code based off the time and money invested into creating it, I believe this is useful.
Digital mode SDR for amateur radio
I've been an amateur radio operator for a long time. I've tinkered with different SDR projects for a while. I asked Claude to build me what is commonly called a "soundcard mode". This means a regular amateur radio meant for voice transmissions is connected to the soundcard. This is also called "digital" amongst other things. Normal radios transmit a narrow range of audio. In this scenario, what is transmitted and received is just different waveforms used to represent data. The connections to the radio are straightforward: the microphone of the computer hooks to the audio output line of the radio and the speaker of the computer hooks to the audio input line of the radio. This turns your computer's soundcard into a half-duplex transmitter and receiver.
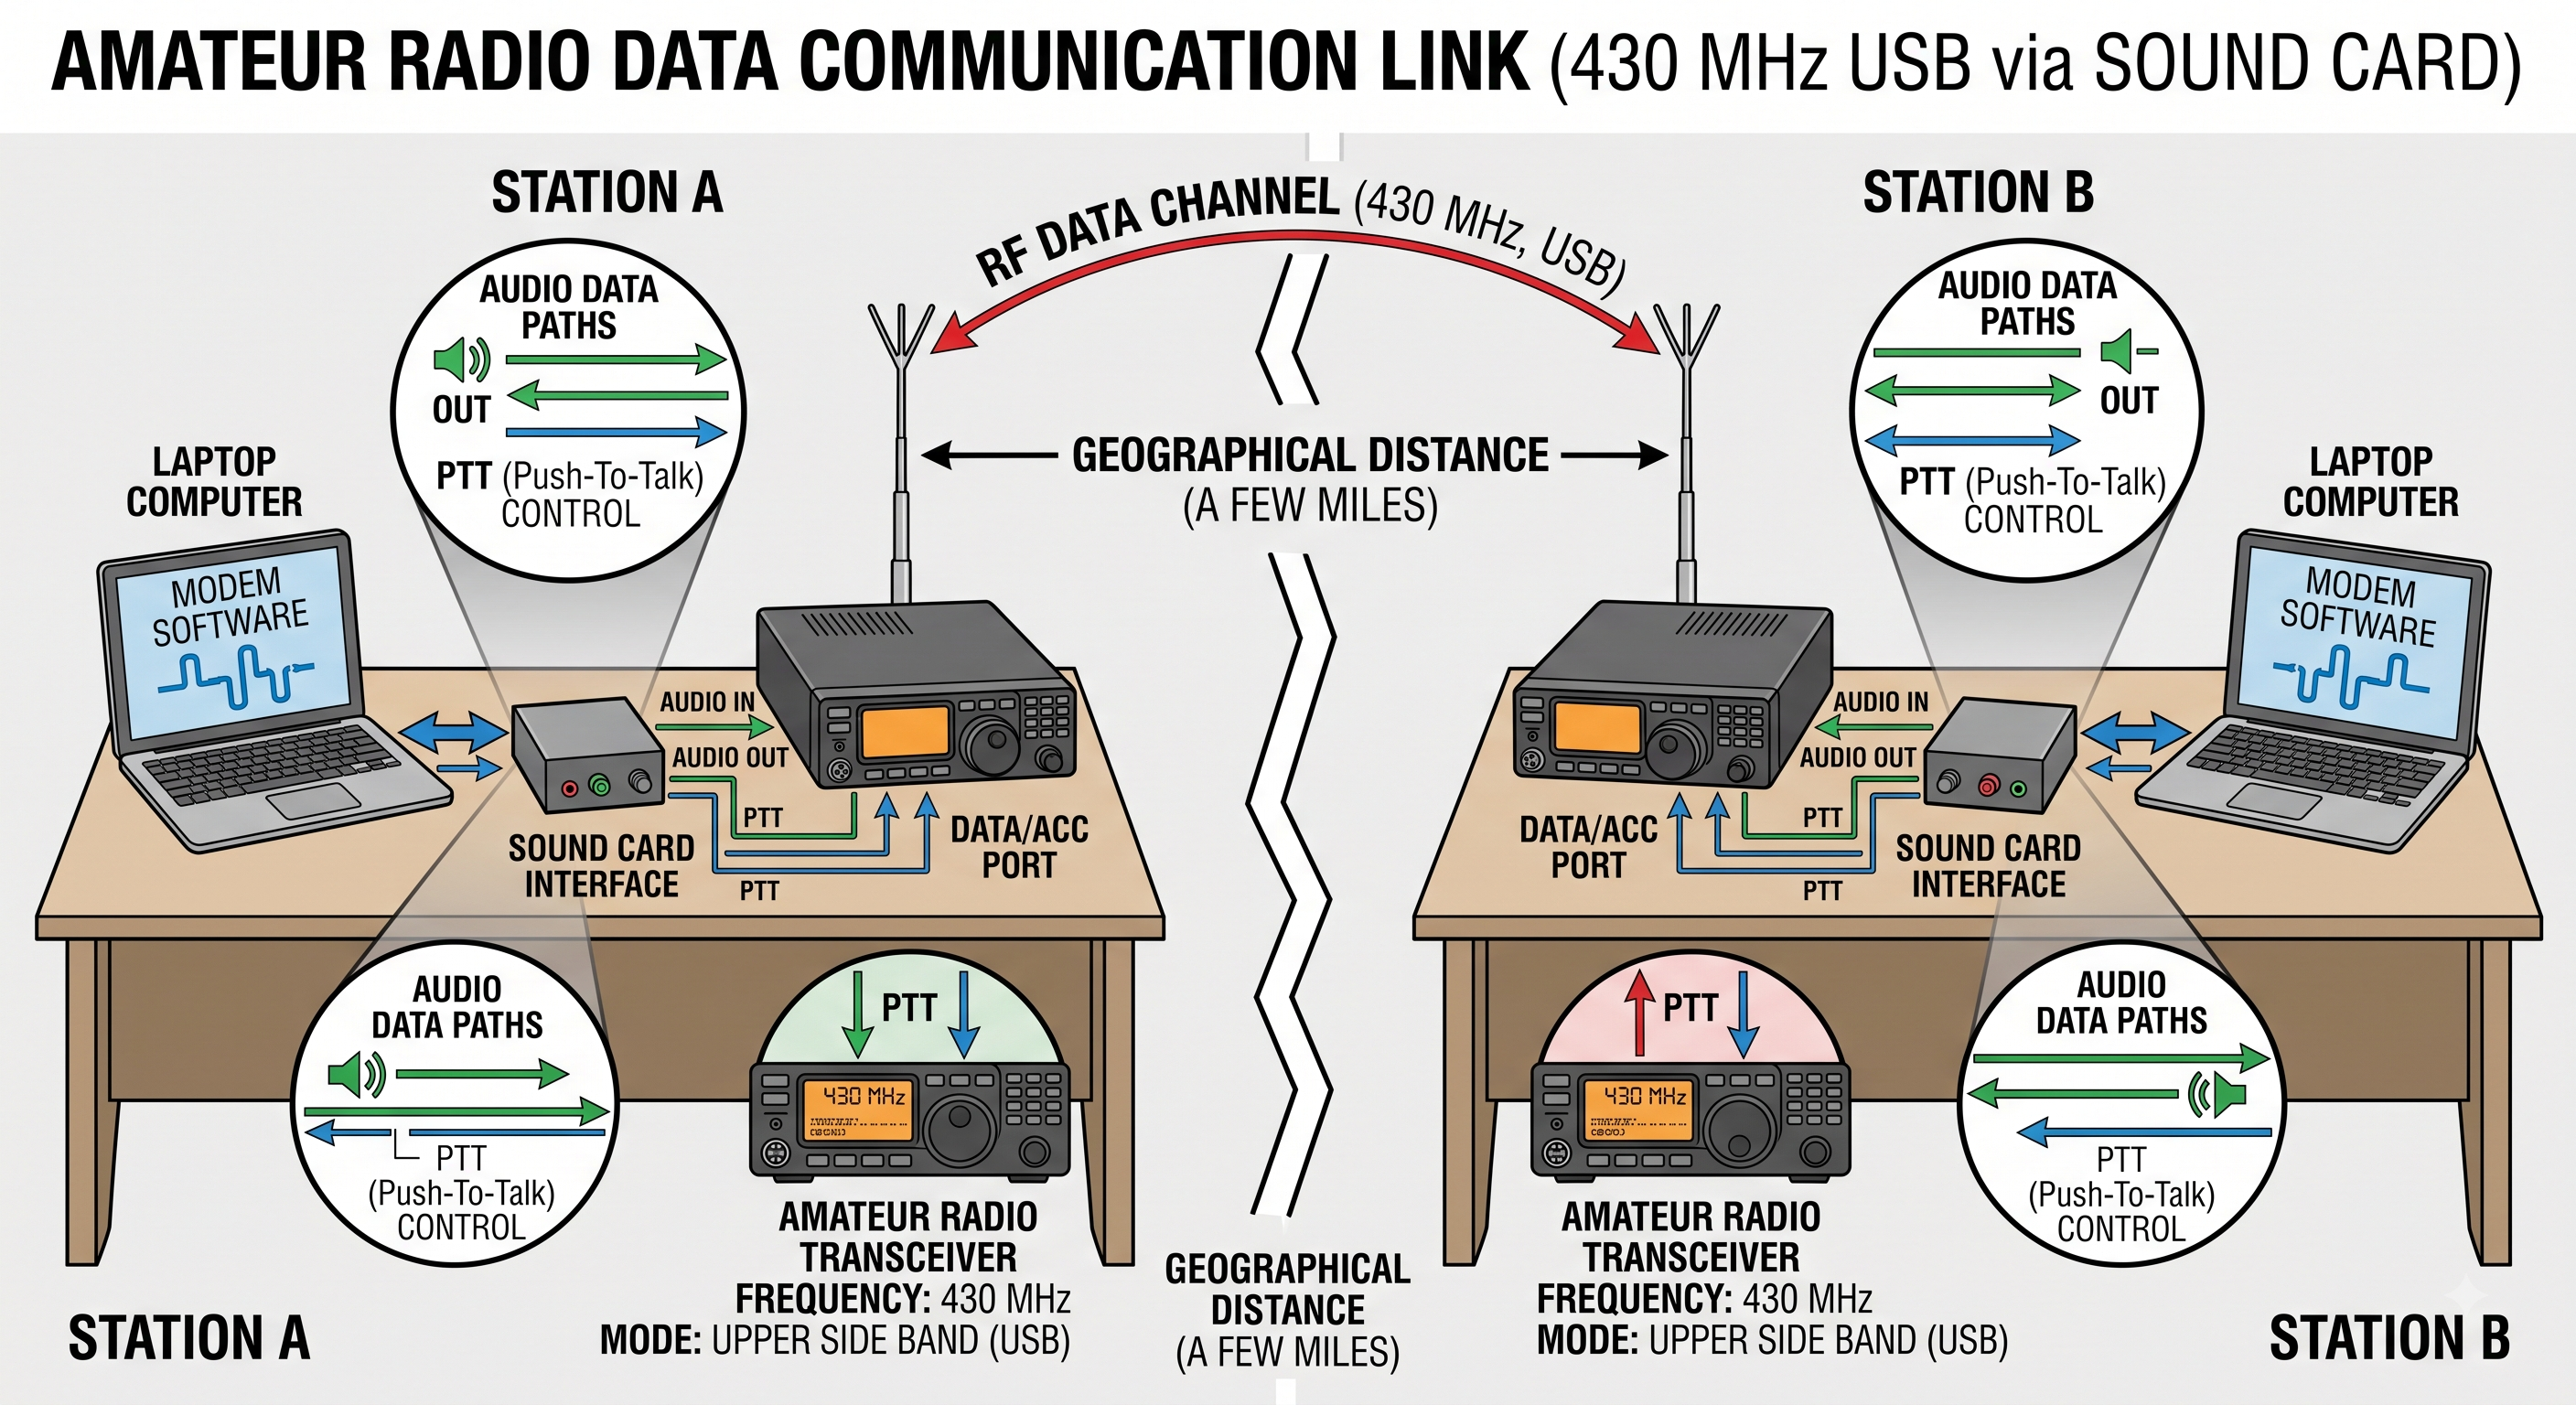
This diagram roughly shows how this works
Claude generated a pretty reasonable attempt for this, but I also knew what to ask for since I have some professional experience in this field. The solution uses Frequency-shift keying with Forward Error Correction. Surprisingly, Claude helped me identify a number of other problems unrelated to the actual software it created. Those were:
- one of my radios has some kind of transmit problem
- the audio isolation transformers I was using have a horrible bandpass effect
- all of the radios I have feature a much narrower audio transmission than I expected
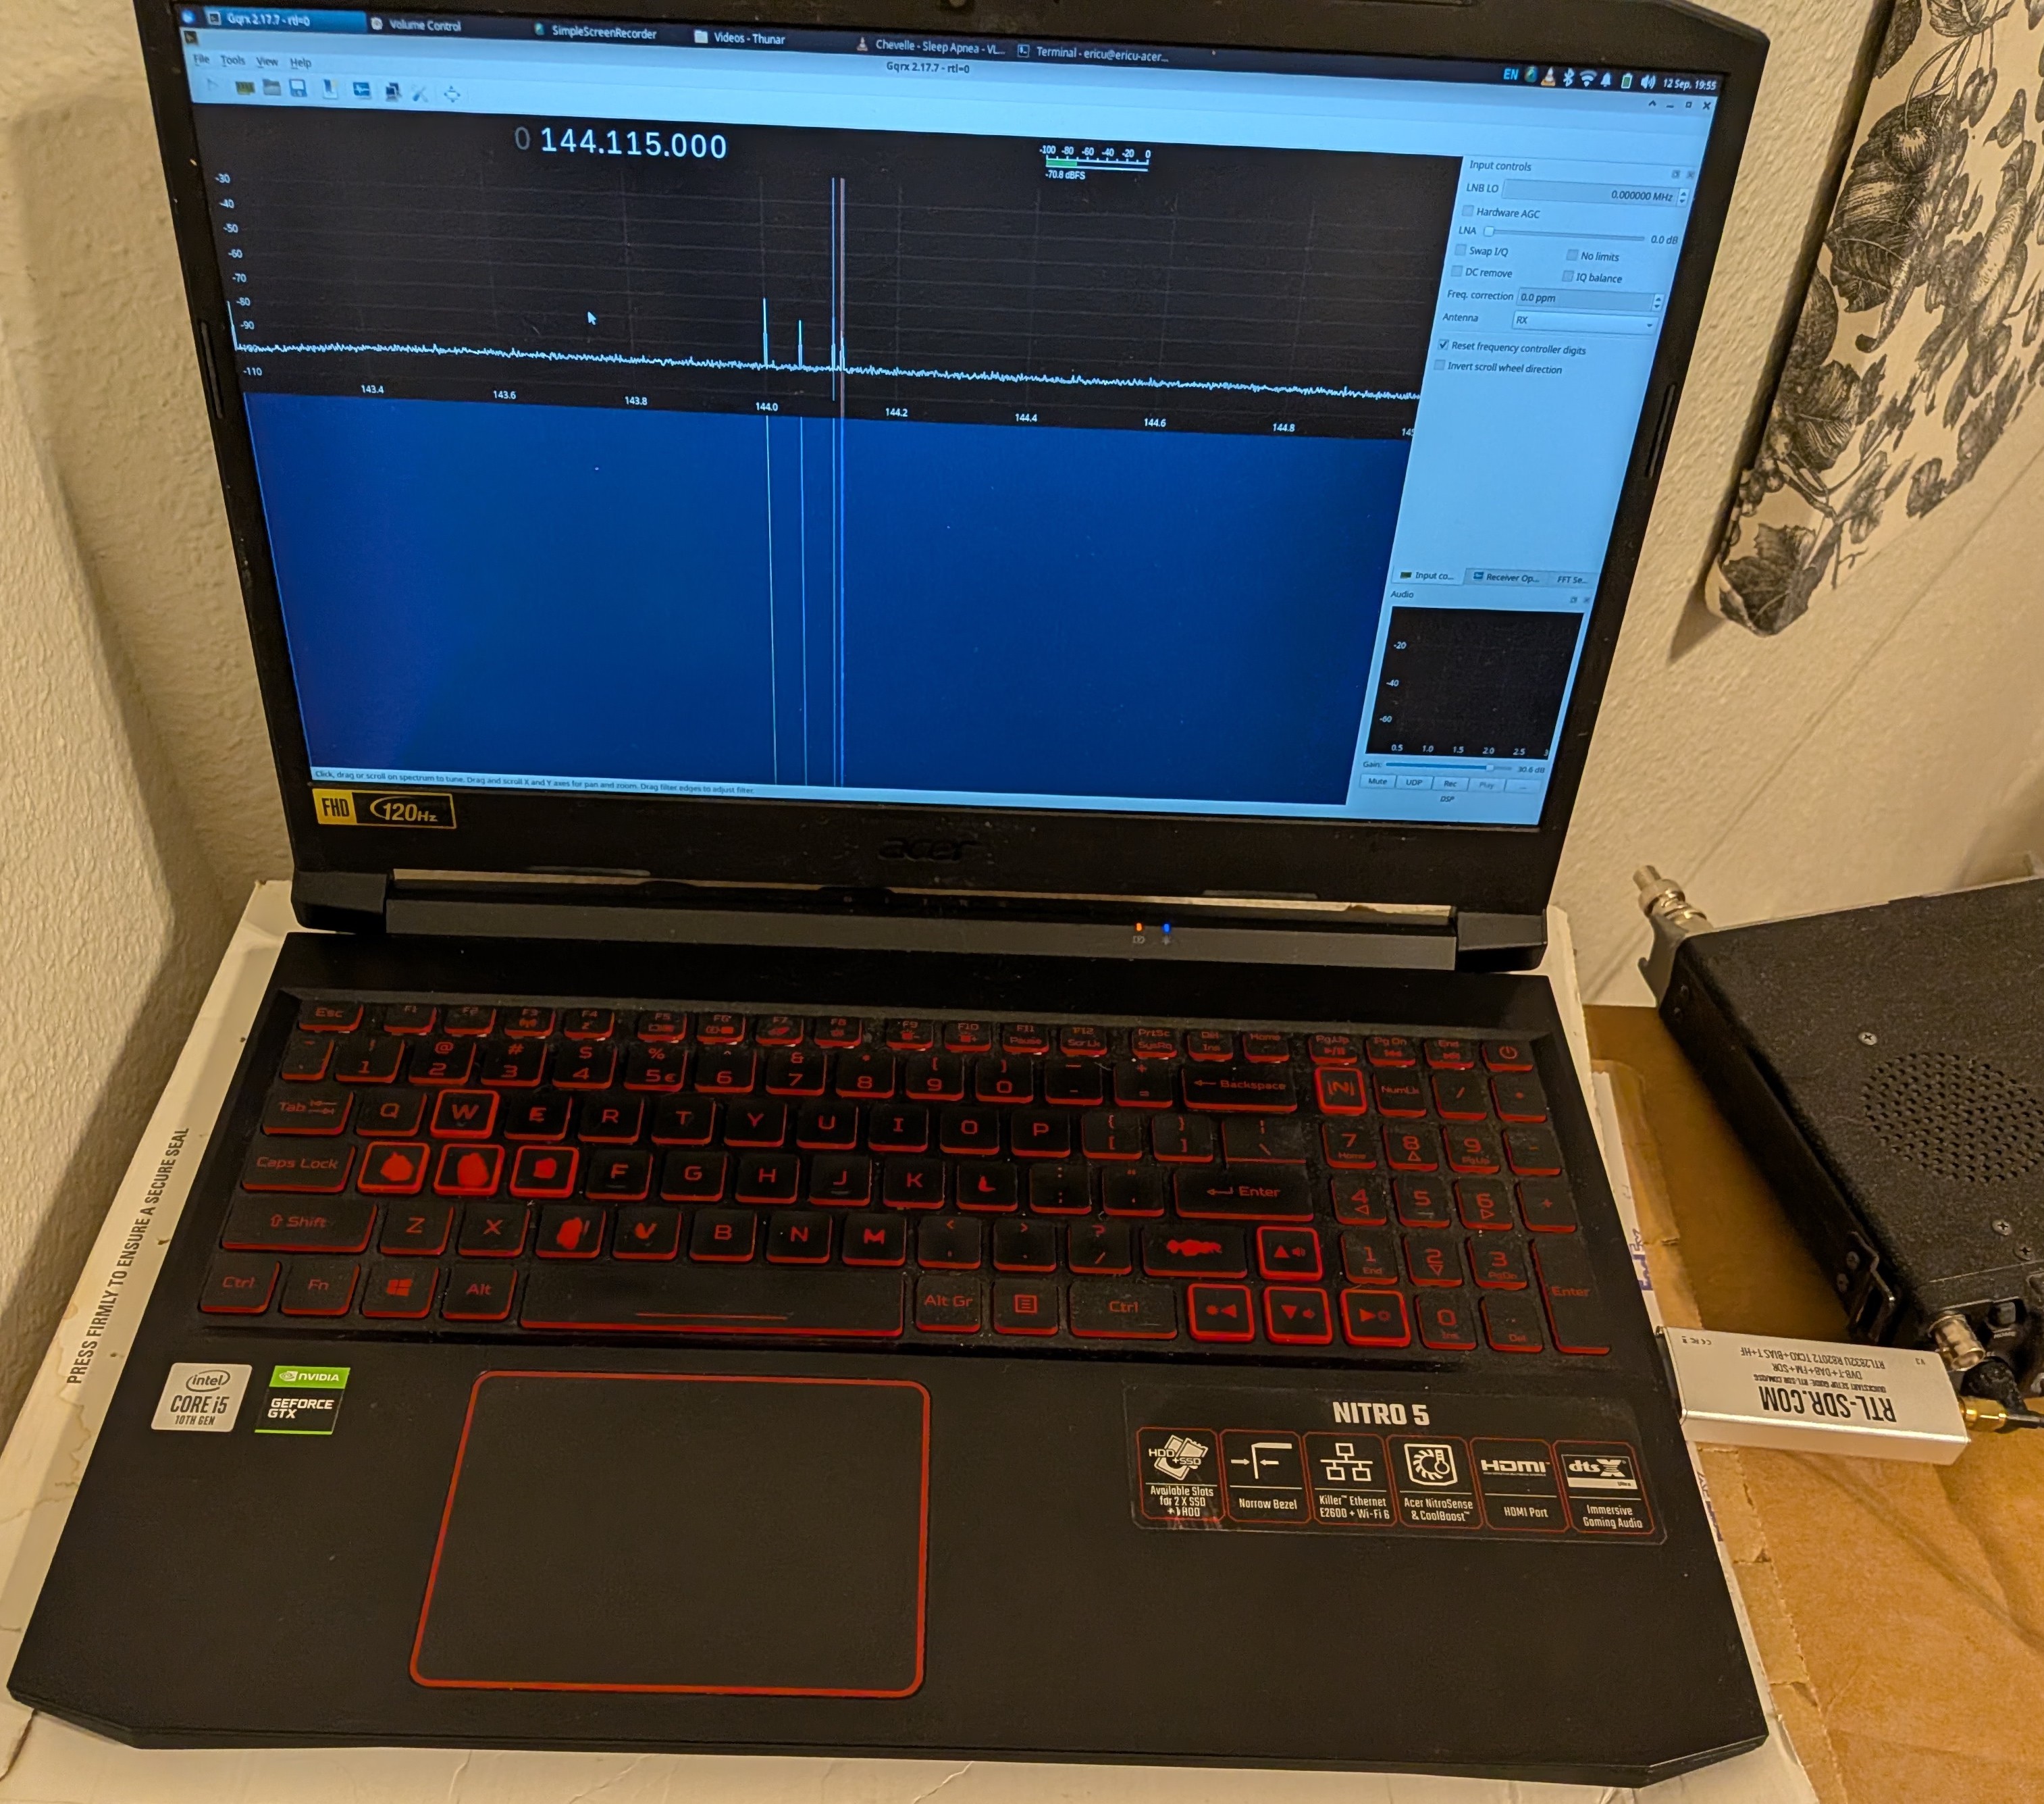
After the problems were sorted out, I was able to send and receive data transmissions. I had one laptop connected to a Yaesu FT-817 acting as a transmitter. Another laptop had an RTL SDR v3 using GQRX as the receiver. This transmitted signals over a short range in my house on 144.115 MHz. Again, there is software that does this that I am familiar with. I'm more interested in pushing the limits of what Claude can generate here. I also found out Claude is really good at taking feedback from the code it generates.
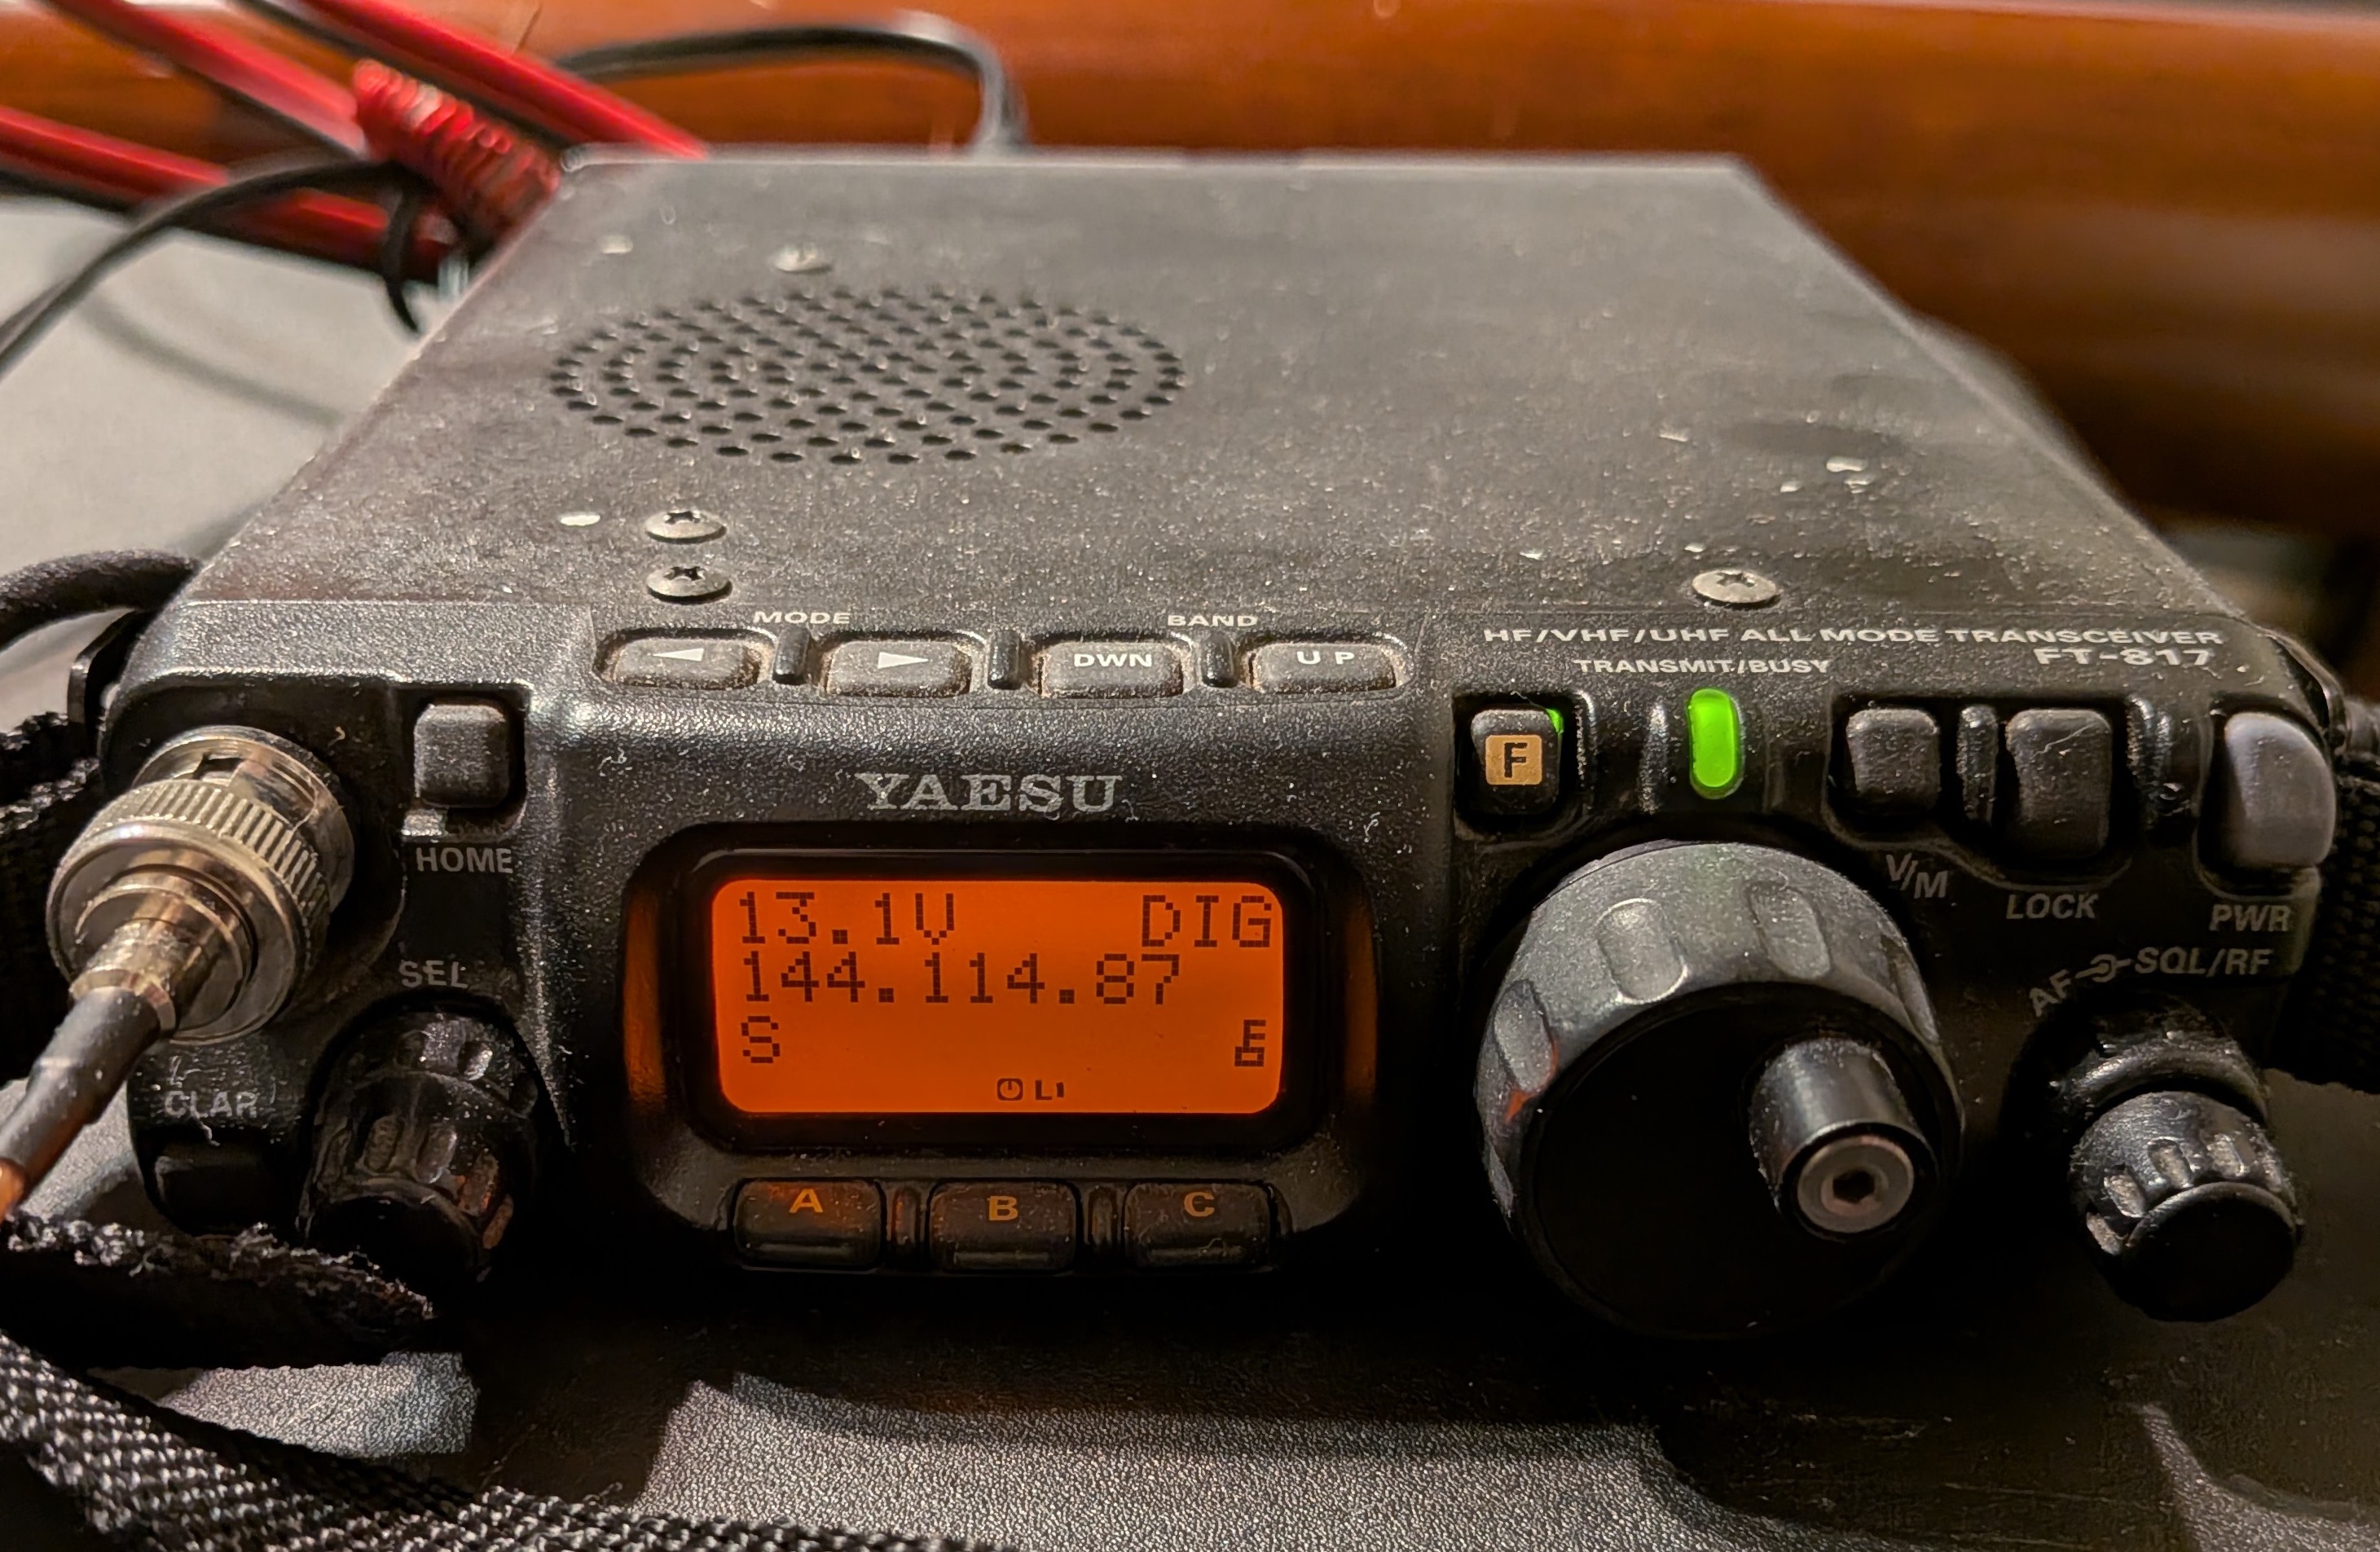
The transmitting radio is a Yaesu FT-817 producing 500 milliwatts of output power
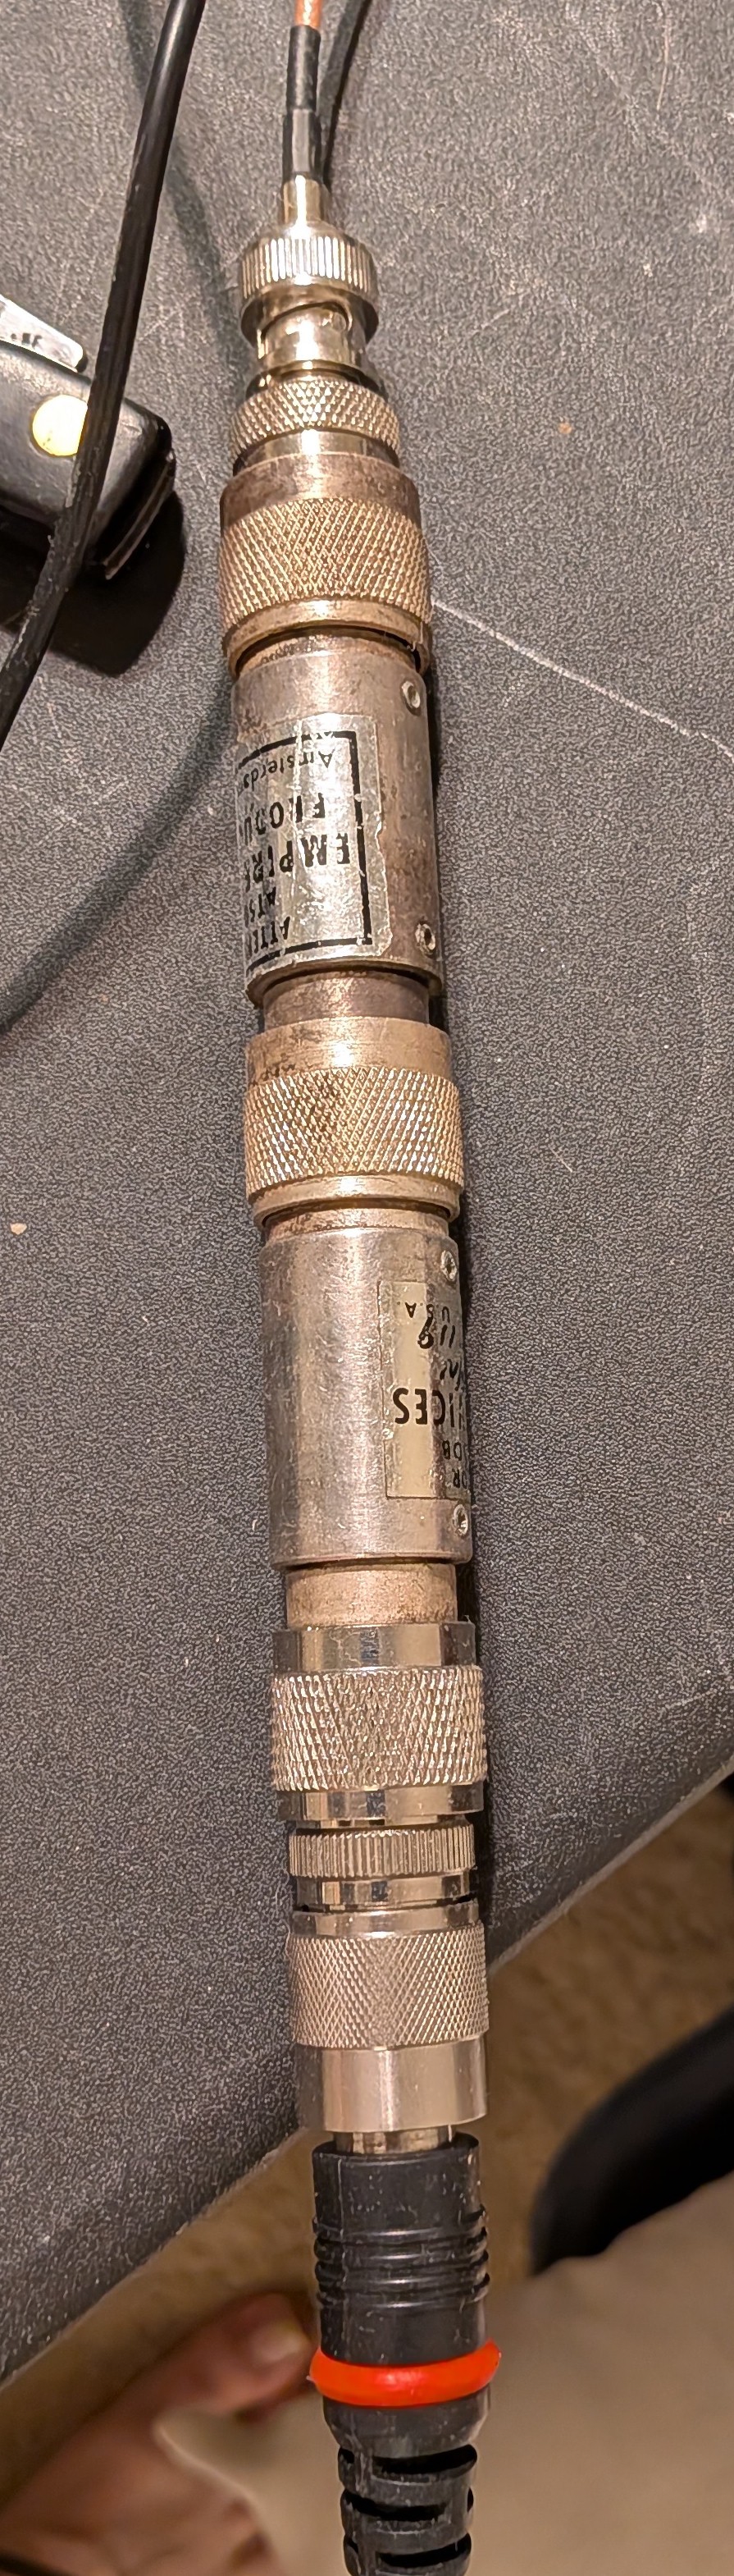
This is two 3 dB pads in series. This reduces the radio output power from 500 milliwatts to around 125 milliwatts
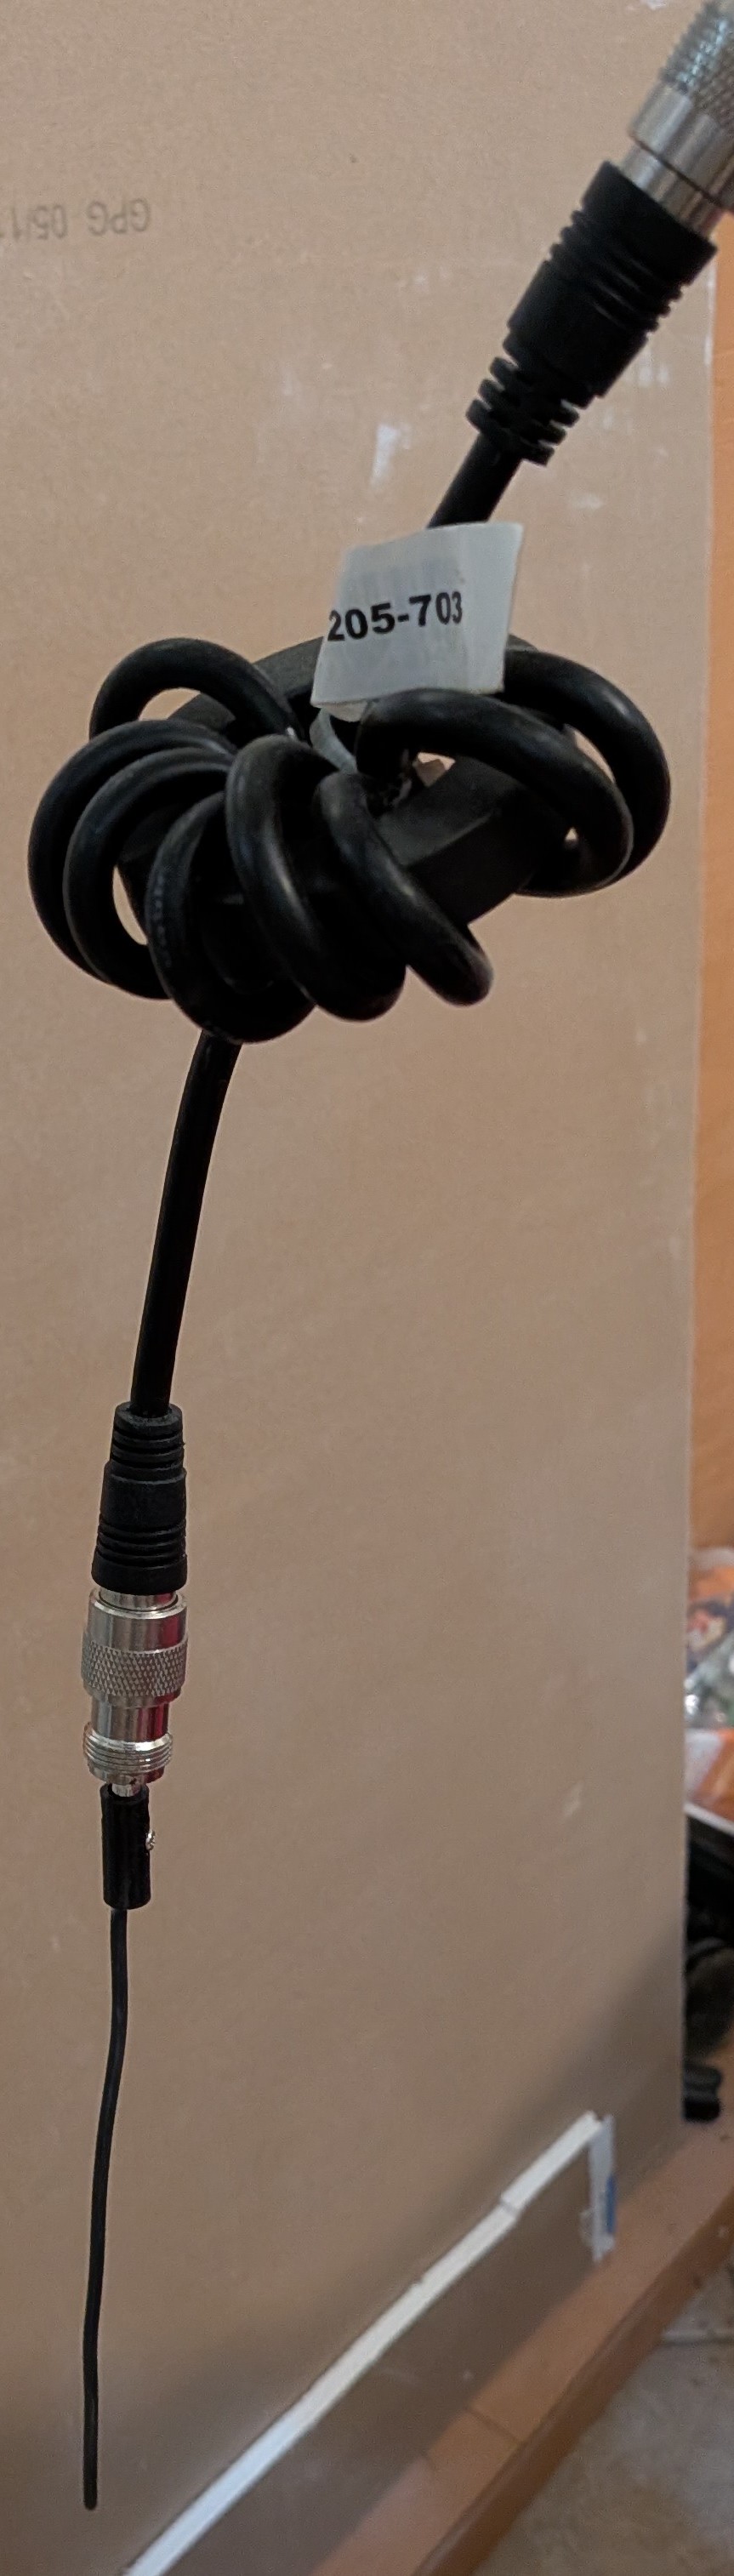
The test antenna is an RF choke and a short length of wire
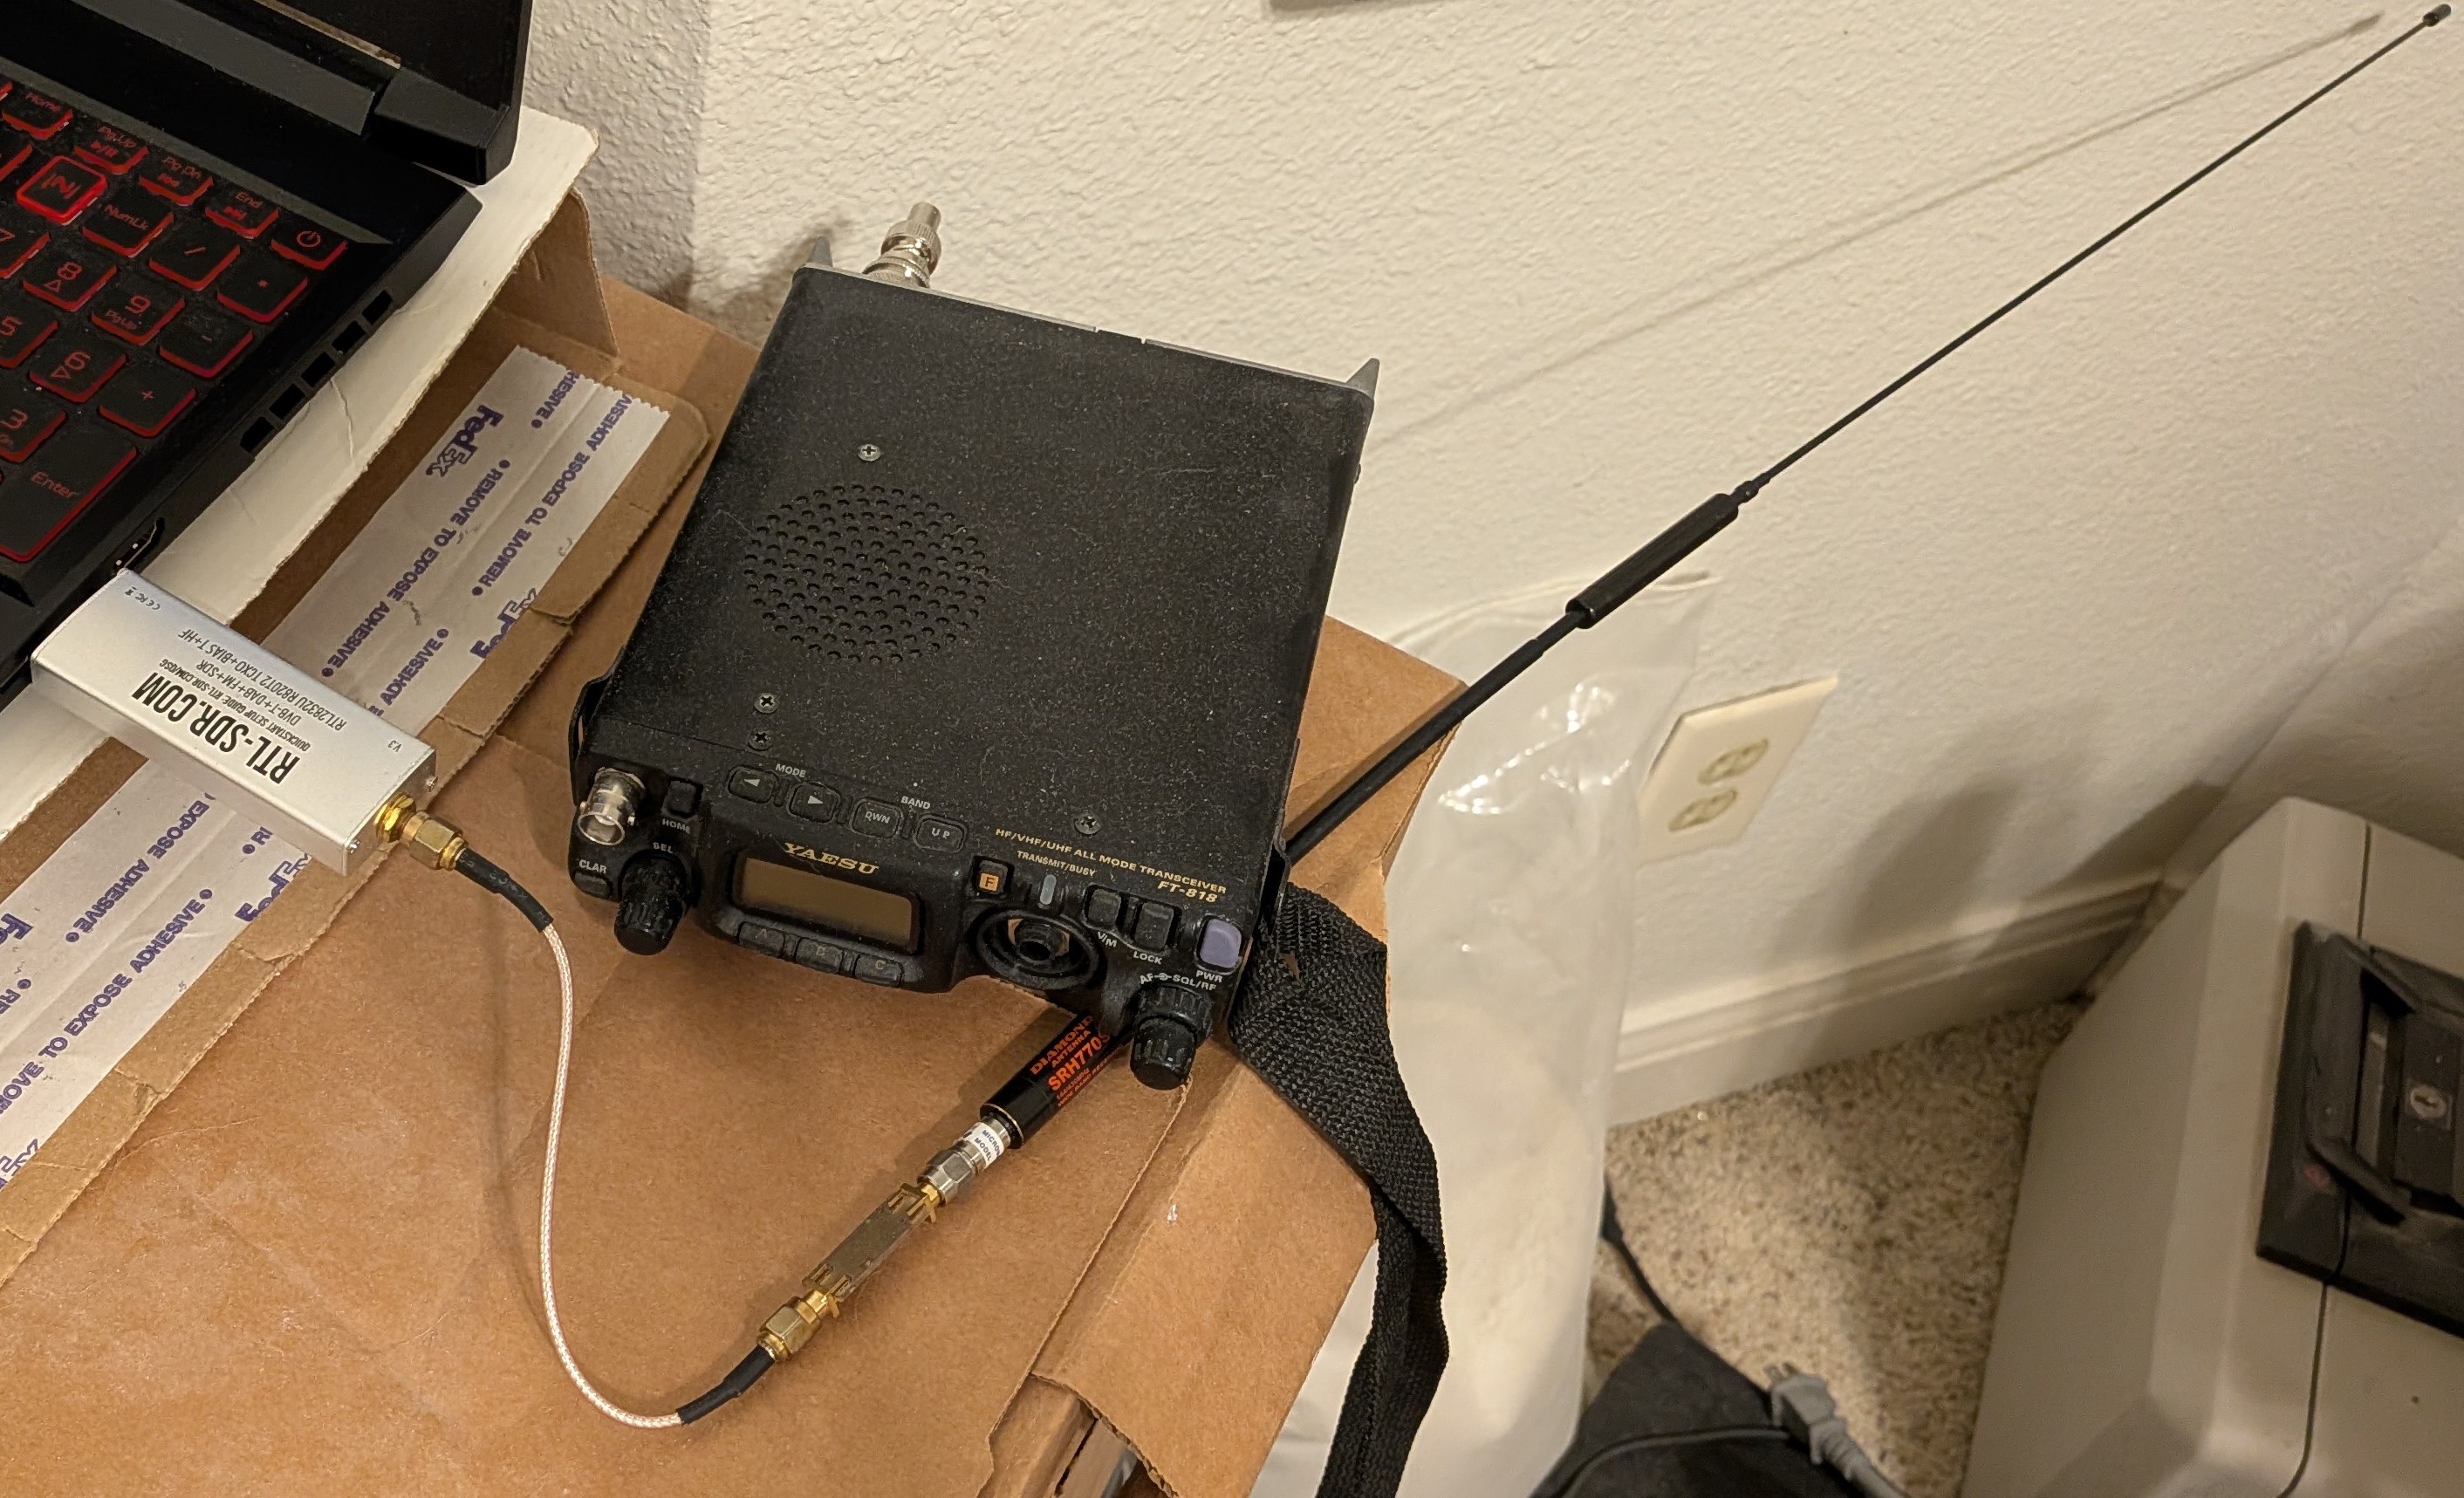
The receiver is an RTL-SDR v3 connected to a commercial handie talkie antenna. The other radio is not used
Transmission problem
The audio that the software needs to send is basically just a series of tones that are switched at high speed. This is called frequency shift keying or FSK. It is extremely important that when a specific one is sent out only that tone be transmitted. Any time I tried to transmit, I usually got a transmitted RF spectrum that looked like this. While transmitting a pure sine wave I got that plus a bunch of evenly spaced tones at lower power levels.
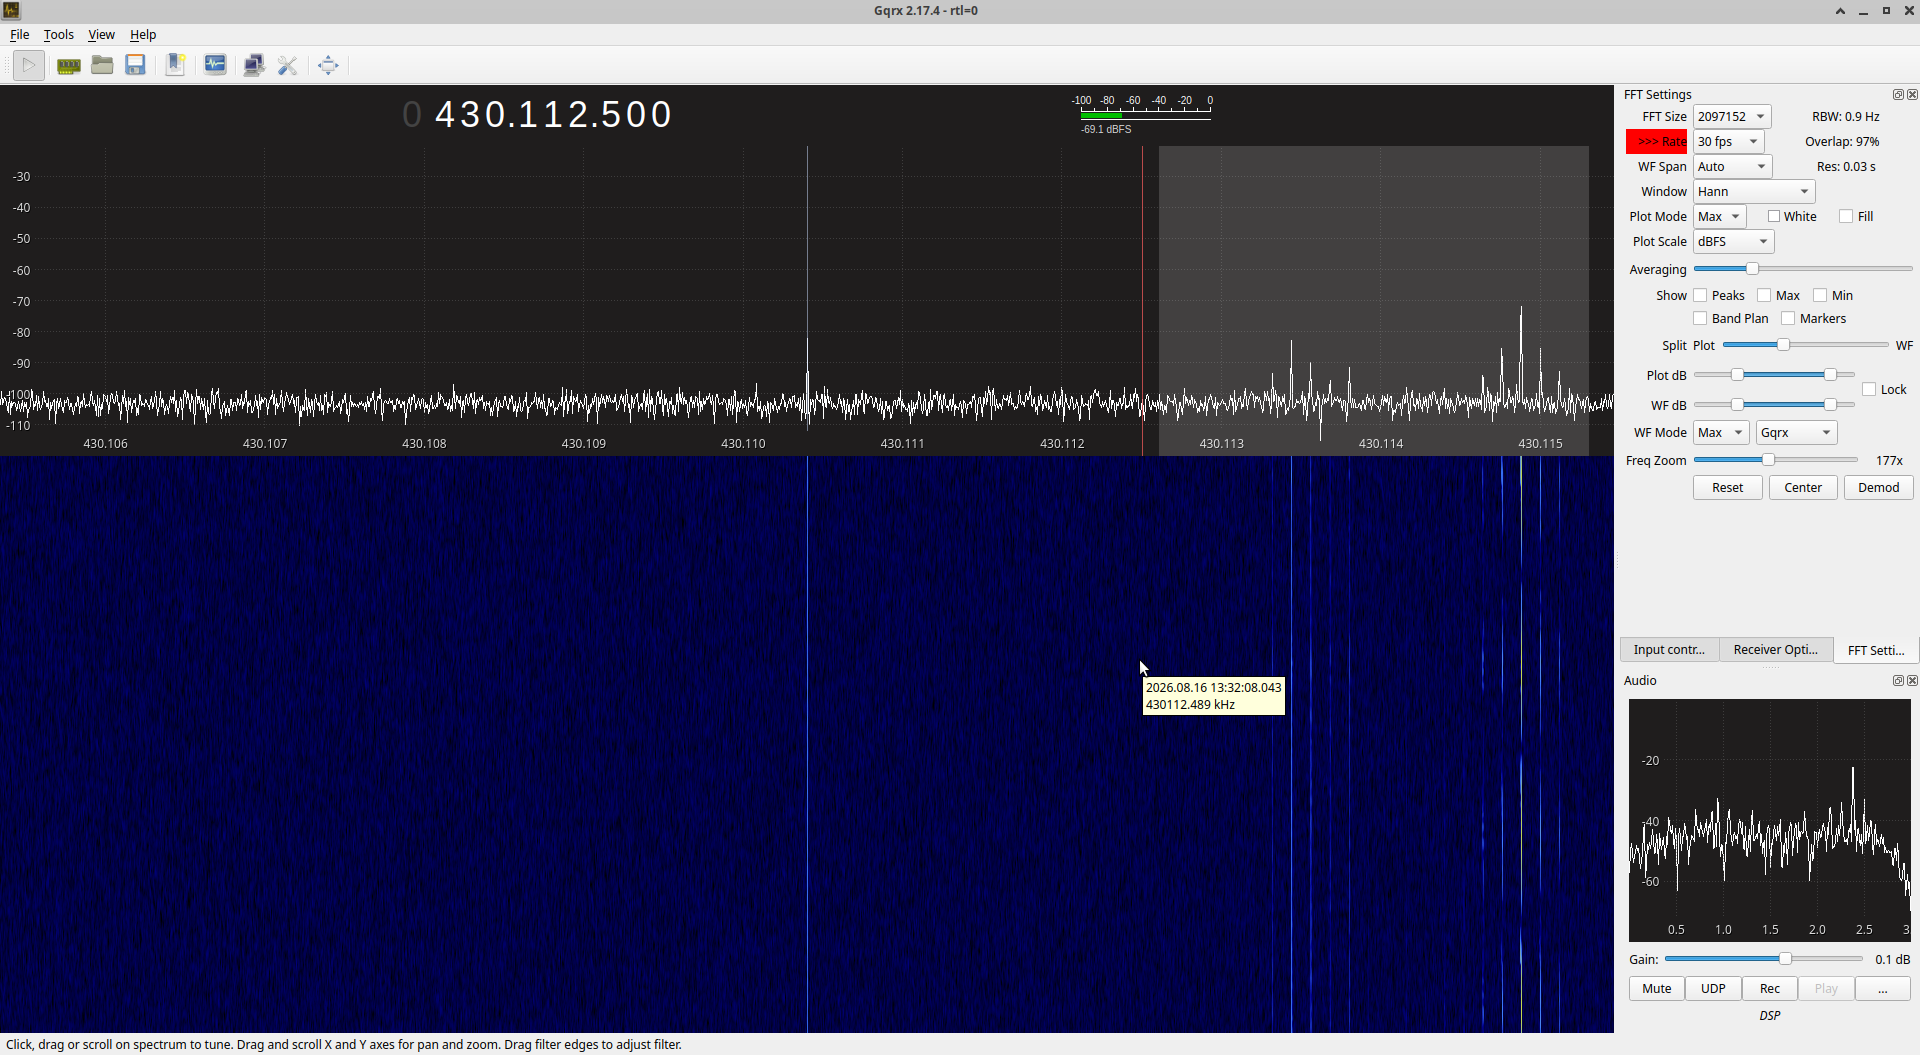
I spent a long time working with Claude to adjust audio levels to try and understand this. I thought the problem was the audio drive level was too high. The actual problem turned out to just be this radio has a malfunction on transmit. I had purchased it used and never noticed this at all. I don't understand what is wrong here with this radio. But after swapping it for a good one, the problem went away immediately.
An unexpected capability
As part of working on this, I fed Claude back a huge amount of data from the output of the program. This turned out to be hugely useful. At the end of this I wound up with a full-on test harness. Since I had two laptops running this software I could orchestrate this all from my desktop computer. What I did was have Claude create a command-line version of the software in addition to the graphical version. I invoked this to transmit and just had the graphical version running ready to decode on the other computer. Anything it decoded was captured and then saved to a file. I sent Claude a complete set of what I transmitted and what I received. This worked pretty well except it was actually very slow. So I had Claude expand the command-line version to also decode. Then I recorded some transmissions. After that I was able to run with different decoding parameters "instantly" over the same group of files. Then I just sent the output of that process to Claude.
Up until this point, I had thought of LLMs as just a tool to spit out huge amounts of hopefully functional source code. The final exchange I made with Claude sent in the results of 15 decoding attempts and had Claude summarize the results. This allowed Claude to optimize one of the decoding parameters. It replied back with a bunch of conclusions, one of which was this:
Zero false locks at every setting from 4 upward. Not "few" — zero header failures across 181 transmissions and roughly 30 minutes of audio. The thrashing that was costing you most of your decodes is gone entirely. The optimum is a broad plateau from 4 to 8, so the choice isn't delicate. I'd move the default from 6.0 to 5.0 — one line in Demodulator.h (threshold_{5.0}) and the matching CLI/GUI defaults. Marginal, but it's the measured peak and it sits mid-plateau.
What I ended up learning in this process is that feeding data back into Claude is far more effective than I ever suspected. Claude has access to tools it can run, but it certainly cannot directly access an entire radio transmitter and receiver.
Audio isolation transformer response
Items 2 and 3 on my list are related. When I interconnected the computer soundcard and the radio I used cheap audio isolation transformers from Amazon. The power output level from your soundcard is tiny, so I assumed anything would work. It turns out it has a horrible bandpass effect. Claude helped me transmit a signal with the radio and receive it. This signal was just a sweeping tone at a constant amplitude. The radio transmitter's response is approximately flat across a wide range of frequencies. From this Claude was able to determine how much attenuation this transformer was causing
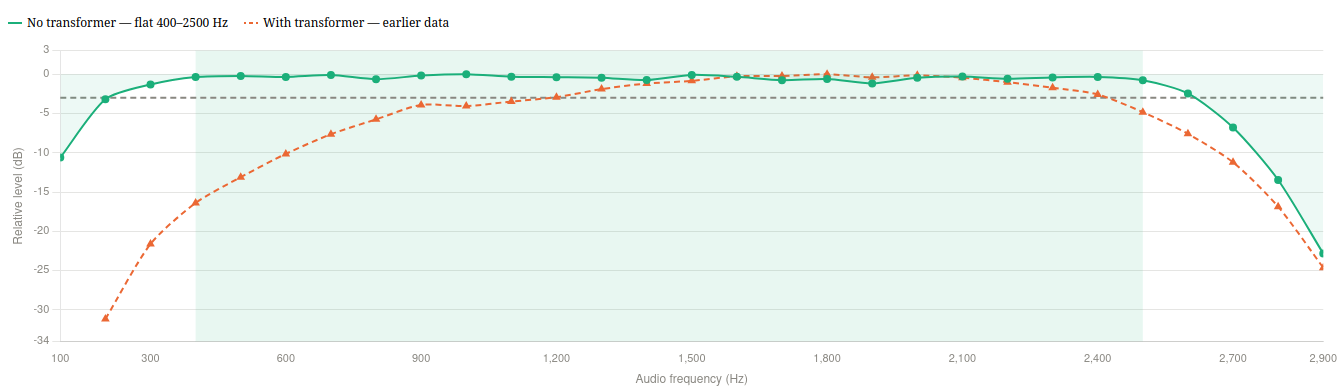
The red line is with the audio isolation transformer. The green line is with it removed. What the audio isolation transformer had the effect of doing is attenuating audio signals below 800 Hz severely. I was trying to use audio as low as 400 Hz in my transmissions. This meant that the lower frequencies were effectively lopped off by the audio isolation transformer. At 400 Hz this is greater than 15 dB of attenuation. In a typical radio transmission, a signal might only have 3 dB signal strength compared to the noise floor. A loss of 15 dB effectively means the signal is not identifiable at the receiver because it would appear at -12 dB below the noise floor. This is one of the cases where Claude is helpful, but I also knew to point Claude in this direction. Anytime a frequency response issue is suspected in an analog system the next step is usually to sweep it.
The 400 Hz minimum frequency actually comes from the radio's specification sheet. I had never considered this until running these tests. But even on a radio meant for voice transmissions, there is significant audio attenuation (around 3 dB) at lower frequencies. This isn't hugely noticeable for human voice. But for digital modes it means I have to restrict my effective range between 400 Hz and 2500 Hz.
Build systems work
Not only can Claude generate build systems, they are actually useful. With Gemini I told it to just ignore this. The build system was usually just wasted tokens. The train warfare video game has a large dependency tree consisting of Magnum, Corrade, Jolt, SDL2. The generated CMakeLists.txt is able to handle pulling in all those dependencies. This excerpt is from that project
FetchContent_Declare(corrade
    GIT_REPOSITORY https://github.com/mosra/corrade.git
    GIT_TAG        master
    GIT_SHALLOW    ON)
FetchContent_MakeAvailable(corrade)
This has the CMake file perform a shallow git clone of the project and use it directly.
Conclusion
Building software with Claude Opus 5 is incredibly low effort from my perspective. This remains my biased account as it is relatively easy for me to guide Claude away from rabbit holes and towards useful generated code. Decades of software experience have already left me with extensive troubleshooting skills. Claude makes reaching the 80% mark incredibly easy. I can then apply my troubleshooting knowledge and work with Claude to get the remaining 20%.
My knee-jerk reaction is to try and hand Claude Opus 5 to someone with little to no experience in software development and see if they can produce something useful to them. But my next step is just going to be setting up a full agentic environment in a virtual machine using an LLM. The nice thing about this is that it is transferrable. Once I have an agent setup that I can use to produce useful results, I can hand that off to anyone.