First hour with the Atomic Pi
- Monday May 27 2019
- sbc
I recently picked up the Atomic Pi from Amazon. I have several Raspberry Pi's and Orange Pi products which I have used for various projects. I actually do quite a bit of development work on a Raspberry Pi 3 Model B+ when I'm writing code for Atmega microcontrollers. This works out pretty well because I am able to have an entire computer on my workbench without really taking up much space or it costing me much money. It can run tools like avr-gcc and avrdude just fine. But an Intel based board for the low price of $38 with 2GB of memory was too appealing for me to pass up. My intention with this is to replace the Raspberry Pi, thus freeing up the Raspberry pi for other projects. The Atomic Pi arrived much earlier than the expected date, so I also grabbed the following from Amazon as well
- ICZI USB 3.0 Hub with 4 USB 3.0 Ports, Data Hub for Mac, Surface 3, Surface Pro 3, Surface Pro 4, New Surface Pro 2017 and Other Laptops
- Anker USB 3.0 to SATA Portable Adapter, Supports UASP SATA I II III for 2.5 inch HDD and SSD
- Crucial BX500 240GB 3D NAND SATA 2.5-Inch Internal SSD - CT240BX500SSD1Z
Notable shortcomings
There are a couple of issues that jumped out with this board after take it out of the box.
The first issue is the battery for the onboard real time clock. It's really cool that this board has an RTC so it can keep time even when unplugged or the power is out. However, it seems they completely forgot about mounting the thing. As a result, the battery is attached via some wires only to a connector on the board. Those leads are routed through the heat sink and held in place with some tape. There is just enough slack in the wires so that every time you sit the board down the battery smacks the circuit board, which could possibly damage something. I don't know why they didn't just tape the battery to the heatsink.
The board has the HDMI connector on one side but the USB and ethernet are on the opposite side. If you're planning on mounting this into a chassis of some kind this makes it tricky. The ideal way is to have all the connectors on a single side. This would allow you to just cut holes for the connectors in one piece of material. The next best way is to have something like the Raspberry Pi layout where the connectors are on two sides of a rectangle that are perpendicular to each other. If the board is mounted in a corner, you can just cut two holes in the chassis for the connectors. This limitation won't matter much if you're incorporating this into a large piece of equipement. But I purchased this mainly just to use as a computer.
There is onboard bluetooth and WiFi, but no onboard antennas. You'll need to get antennas that have a UFL connector on them, or buy UFL to RP-SMA adapters so you can use more typical antennas.
There are all kind of headers on the board and I simply couldn't find any master document explaining them all. The header that exposes GPIO & Power is on the bottom of the board. Let's just leave this topic for the next section.
Powering it up
The only way to power this board is with a header on the bottom. This is one of the most perplexing aspects of the design of this board. The header could easily be mounted on top of the board, but instead they put it on the bottom with a female socket. So you'll need to get some male pins to power the board. Included in the boards packaging was a poor image of how the manufacturer suggested powering it up. I searched around but found absolutely no images explaining what pins were used for what. This is a really important detail as applying power to the wrong pins will certainly destroy the board. So here is an image of the Atomic pi header pinout I made.

After figuring out what pins were suitable to use for powering the board, I grabbed a buck converter I already had purchased off AliExpress a while back. According to the manufacturer you need to connect 5 volts DC to two of the pins indicated for +5 volts and ground to two of the pins marked ground. The optional 12 volts DC connection is to run an amplifier for the speaker outputs.
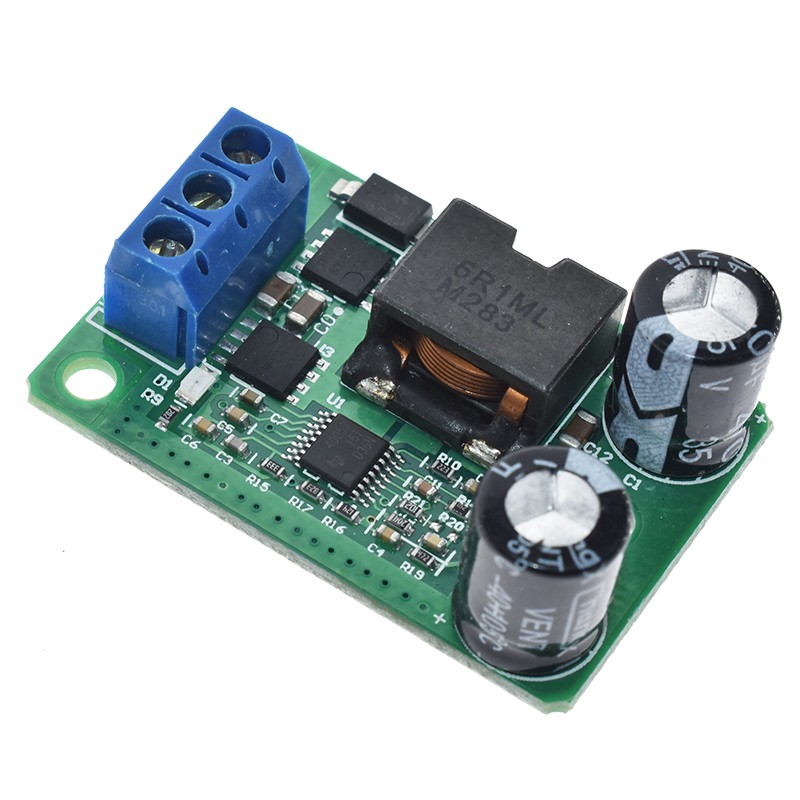
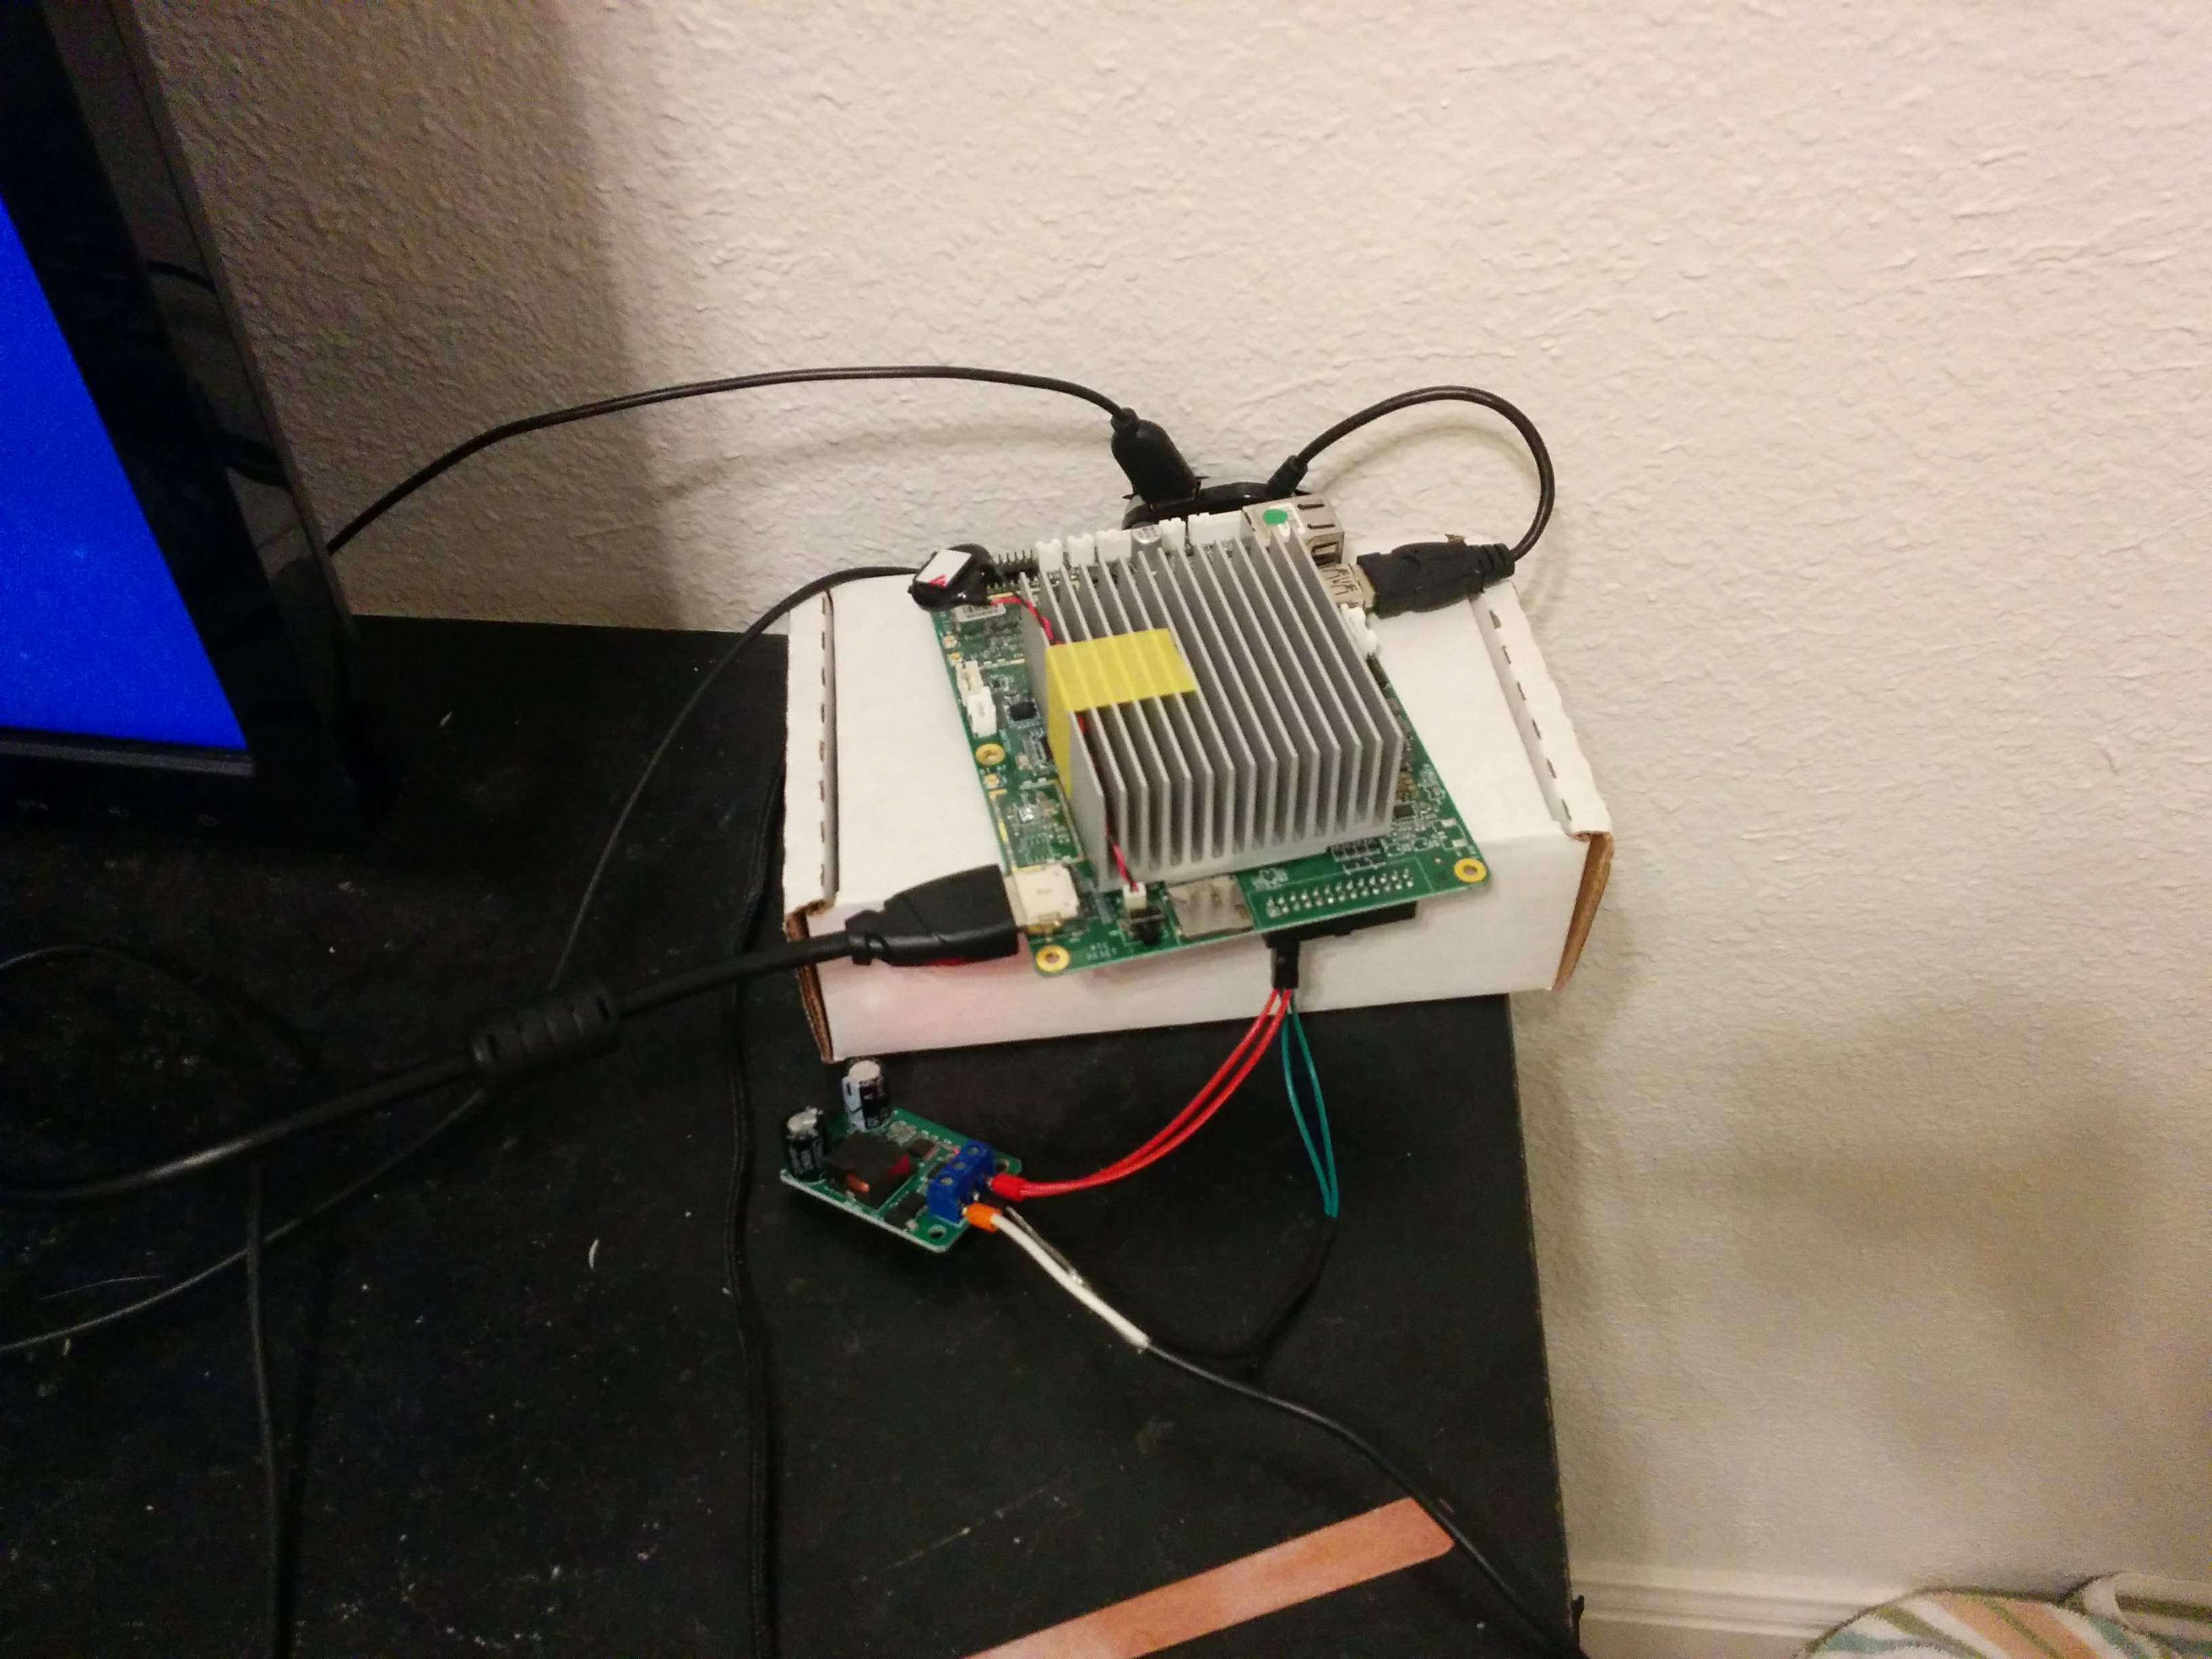
The buck converter is a device can be fed with a much higher voltage which it converts into 5 volts DC which can power the Atomic Pi. They are actually pretty common, most motherboards use a device like this to lower the voltage to create the desired operating voltage for the memory, CPU, etc. I supplied this buck converter with 19 volts DC from an old laptop power supply. The output of the buck converter was connected to some male pins which I can insert into the header on the Atomic pi. With the problem of power sorted out, I then I had to figure out how I was going to manage to put the pins in the bottom of a board sitting on my desk. It turned out the best way to do this was to sit the board on the box it came in. This allows the header to hang over the side.
If you want to spend the time with a soldering iron, you probably could desolder the existing header and install a male header on the top of the board.
Getting to the BIOS screen
To get to the bios screen, the manufacturer's website has the following suggestion
1. Press Del at the AAeon BIOS Splash screen

2. Press the Tab key at the AAeon BIOS Splash.
This brings up the familiar AMI-type BIOS display and then you can press Esc or Del.

3. If using a mouse and you're fast enough you can move the cursor to the 'Setup button'
in the upper-right corner of the screen and left-click that, but that method can be a bit
clunky on a wireless keyboard or touchpad. A real mouse works best.
These are the actual suggestions from here. I have no idea what these are instructing me to do. Do I press delete? What about tab? Maybe I should try escape? Oh but wait I've got a mouse, but I'm definitely not fast. So step 3 is not possible?
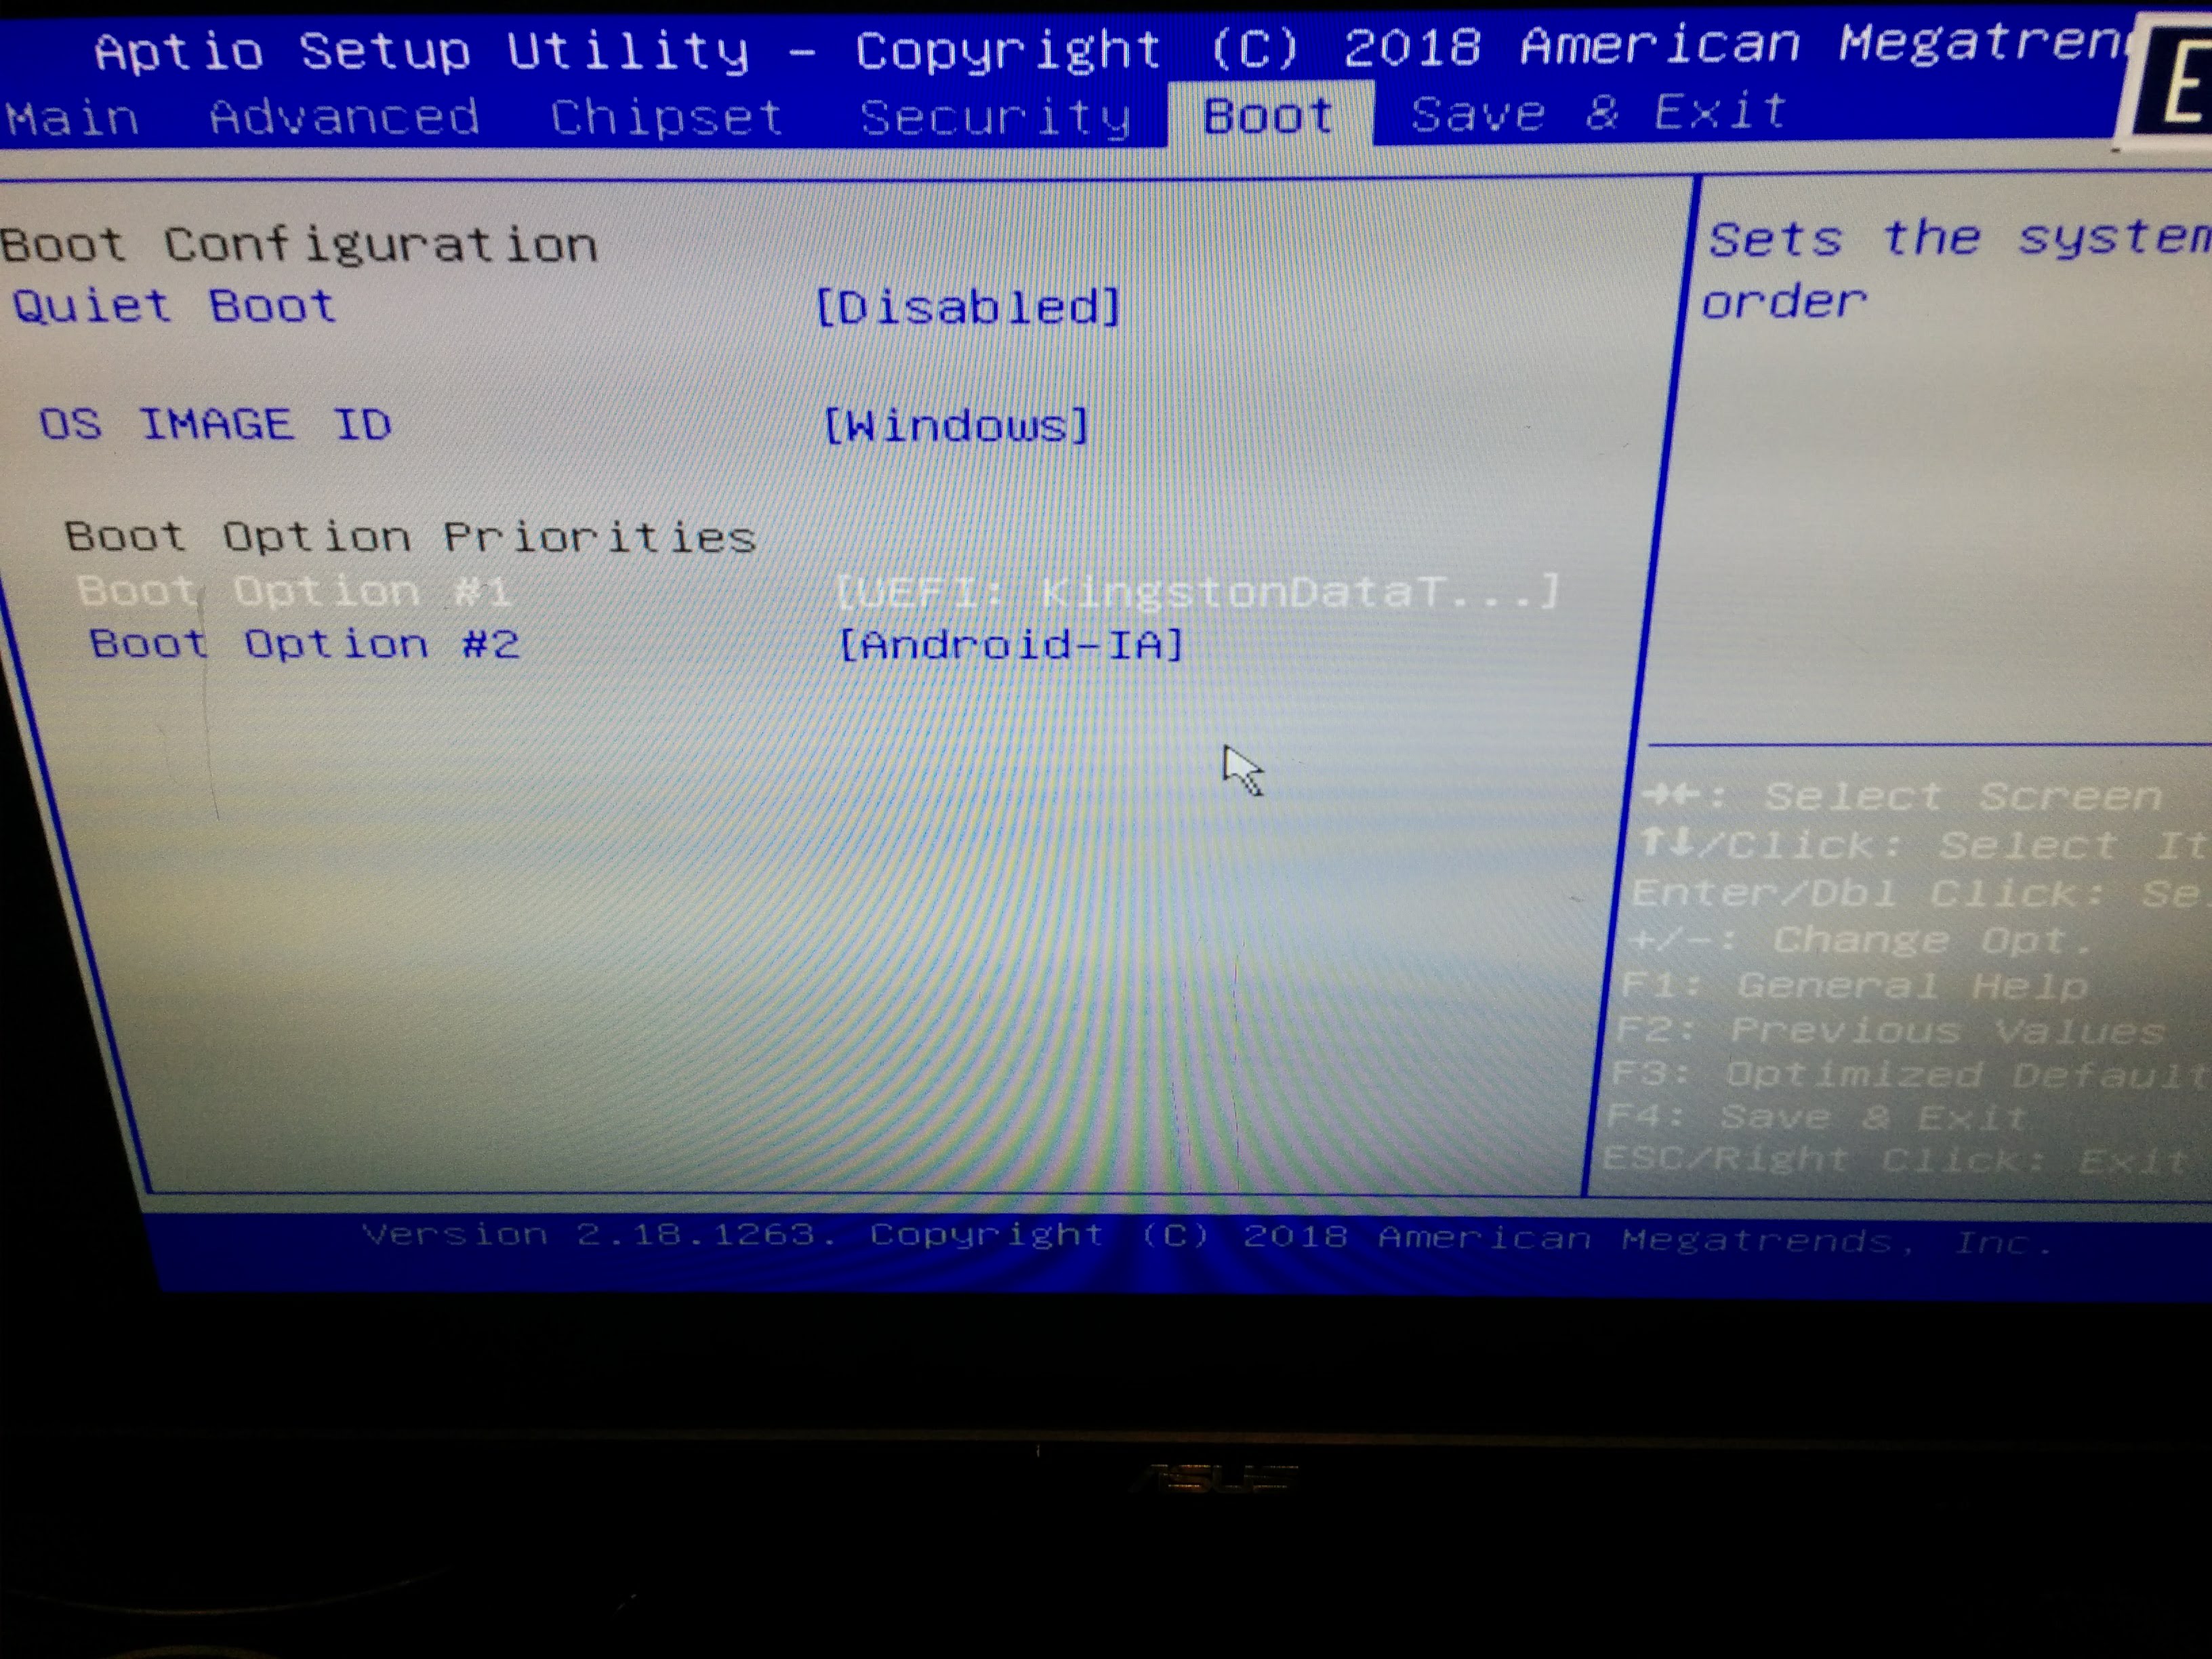
In any case, I had a USB hub plugged in with a keyboard plugged into that. I found that during boot if I rapidly pressed Tab and Escape I wound up in the BIOS menu. Eventually I also found out you can disable the splash screen by disabling "Quiet Mode". There isn't really much you can change, but you can set the boot order. One of the boot options is "Android", which I am still a confused by. I just ignored it and selected my USB stick as the boot device.
Installing Ubuntu
The board came with a preinstalled OS that is something Ubuntu based but I didn't try it out. To install to the onboard MMC drive, you need to boot from a live USB. I used UNetBootin to put Ubuntu live images on a USB stick I had. I tried installing Xubuntu 18.04 with no luck. At the same point in the installation each time, the board would seem to simply poweroff. Ubuntu 18.04.2 installed without any real problem. I did change the partitions from the default to instead have the following
- 300 megabyte EFI partition
- 1024 megabyte swap partition
- The rest was allocated the
/partition
Don't connect to a WiFi network during installation for internet. Without antennas onboard, the WiFi chip can generally see wireless networks but it can't really connect to them and download data. The easiest way to do this is just to not update during installation. You can plug in ethernet later to update the software.
Optimizing the installation
After you have Ubuntu installed, there are a few easy changes you will want to make. The first thing I did was install the package gnome-tweak-tool and use that to disable animations. I also made the dock smaller as it takes up way too much space.
The onboard MMC is 16gb. This is probably fine for some projects, but if you want to use this for more intensive tasks you'll want more disk space. I used an SSD with a USB 3.0 adapter to add another drive to this. I didn't want to move the entire install over to that. So I just partitioned and formatted the drive then mounted it at /ssd in the filesystem. I ended up with an /etc/fstab the looks like this
# <file system> <mount point>   <type>  <options>       <dump>  <pass>
# / was on /dev/mmcblk0p3 during installation
UUID=cac7b02c-0b9d-4ebc-a2a2-2f74981c11f3 /               ext4    defaults,noatime,nodiratime,discard 0       1
# /boot/efi was on /dev/mmcblk0p1 during installation
UUID=6D0A-ACC0  /boot/efi       vfat    umask=0077      0       1
# swap was on /dev/mmcblk0p2 during installation
UUID=ba463edd-2913-4110-a333-90d30b4db3f7 none            swap    sw              0       0

UUID=086205e2-8683-4346-96c8-9e6eb6bcf098 /ssd ext4 defaults,noatime,nodiratime,discard 0 1
/ssd/opt /opt none bind 0 0
/ssd/var /var none bind 0 0
/ssd/home /home none bind 0 0
/ssd/tmp /tmp none bind 0 0
This moves the /tmp,/var/,/opt, and /home mountpoints over to the other drive. This may have made a slight performance improvement, but it was mostly just to allow me to have enough space to do small projects without filling the onboard MMC.
Subjective testing
These are just my subjective observations with less than an hour of actual usage.
The GNOME interface
Once animations are disabled, the GNOME interface seems to actually perform pretty well. The one puzzling thing I can't understand is the behavior of the cursor over the dock. If I move the mouse quickly in the center of the screen everyhing is normal and fluid. If I move cursor over to the dock on the left and quickly move it things act weird. Everything still works but the cursor movement is not shown smoothly on the screen. It is very jerky and difficult to look at.
Boot up performance
I don't understand why, but the boot performance of this board is very poor. It seems to spend a long time waiting on the UEFI BIOS to hand things over to the boot device. I measured it at 50.325 seconds from the time I powered it on to the time the Ubuntu showed me the login screen. Every single SBC I've used prior, including the incredibly cheap Orange Pi One boots almost instantly to whatever OS I have installed.
Upgrading packages
The performance of this system is really shown to be slow when upgrading and installing new packages with apt-get. It can take a very long time to install even a single package. This is probably the onboard MMC being slow. This is typical of most SBC's in my opinion. Most run off an SD card, which is not going to be very fast.
Thermal performance
I ran stress -c 3 -m 1 which loads the CPU and also utilizes the memory. This ran for 10 minutes to let the temperature equalize. The value reported by the sensors command was 55 degrees celsius. This is hardly warm in CPU terms, so my conclusion the passive cooling works well enough.
Firefox
Out of the box, Firefox is almost unusable. It can take multiple seconds for text to appear in the address bar or to spawn a new tab. After disabling suggested search, the "Pocket" suggestions (does anyone really like this feature?), smooth scrolling, and almost everything else I could get my hands on Firefox was indeed usable. I was actually able to play YouTube videos full screen in 1080p without any frame dropping. It is perfectly usable, but if you have more than a few tabs running some Javascript it really starts to negatively impact system performance.
Google Chrome
Google Chrome seems to work fine. The performance is noticably better than Firefox.
Conclusion
This board is an interesting addition to the crowded SBC space. My intentions are to try and use this for some basic stuff like viewing part documentation while I'm building things on my electronics workbench. It's $38 and has a tiny power draw, so it really is the perfect device for putting somewhere you can't justify having a whole PC or laptop. You could probably get away with this device as an everyday desktop if you have very basic needs like just browsing the web and YouTube. I imagine software development work actually is doable. But you'd need to avoid heavyweight IDEs like Eclipse. Java applications also probably would probably be difficult to develop on this device, as I typically like to run with at least 1 gigabyte of heap for development work. That would be half the available system RAM on this board.
Interestingly the onboard CPU actually supports virtualization. With only 2 gigabytes of system RAM available you aren't really going to be running much in the way of virtual machines however.
Overall this board isn't really recommended unless you need x86. My impression of this device is there are actually equivalent or faster ARM based boards out there for a similar price point. It's not a bad board, but it doesn't stand out in anyway. My reasoning is this
- The cost of adding antennas isn't zero
- The cost of adding a case. There are no commercially available ones. Meanwhile a Raspberry Pi case is $7
- It's got 2 GB of memory, but plenty of ARM based SBCs offer 2GB of memory now
- The weird header on the bottom of the board for power. I'm still confused by this
If you absolutely need an x86 SBC for some reason, get it. Otherwise hold off.
References
I found these webpages useful while setting up the Atomic Pi