Using the Raspberry Pi as a USB storage drive
I primarily write software for a living. Recently I've also needed to verify that software on different pieces of hardware. This usually consists of using SFTP to copy the most recent build to a test system. Sometimes I need to reinstall the operating system or recover a system that no longer boots. I can already access the console of those system via serial ports. But in order to boot into installation media or recovery environment I would need to physically insert USB thumb drives. This works but adds a decent amount of time to the process. What I have sought to do is eliminate this manual step in the process. Although the Raspberry Pi is mostly thought of as a computer with a small footprint, they can actually be configured as a USB device as well.
After researching this a bit I found out there are a decent number of communities dedicated to doing this with varying levels of documentation. In my case I just need to have the ability to select an ISO image from the Raspberry Pi filesystem and make it appear that the USB storage device contains that ISO. One critical distinction here is that this does not share the file system of the Raspberry Pi with that of another computer. You can configure the Raspberry Pi to share an image of a filesystem to the other computer, but it is nowhere near as simple as sharing files over a network. The USB drive appears as a block device just like any other.
The Raspberry Pi Zero, the Raspberry Pi 4 & the Raspberry Pi 5 all have the correct hardware to support this. Since I want to do this remotely I need to be able to access the Raspberry Pi remotely. The Raspberry Pi Zero models do not have ethernet, so I ended up getting Raspberry Pi 4's. The Raspberry Pi 5 should work the same, but I did not try it. I ordered the 1 GB memory model, as there is no real resource pressure in this usage.
How this works on the Raspberry Pi 4 hardware
The only port on the Raspberry Pi 4 that can act as a device is the USB-C port. This port is usually used to power the Raspberry Pi 4. While this could work in some scenarios I personally do not find it practical. The simplest way to do this is to power the Raspberry Pi 4 via a 5 volts DC power supply connected to the GPIO header. Pins 2 & 4 are connected to 5 volts DC. Pins 6 & 14 are connected to the ground of the power supply. This frees up the USB-C connector to be used for the purpose of acting like a USB device.
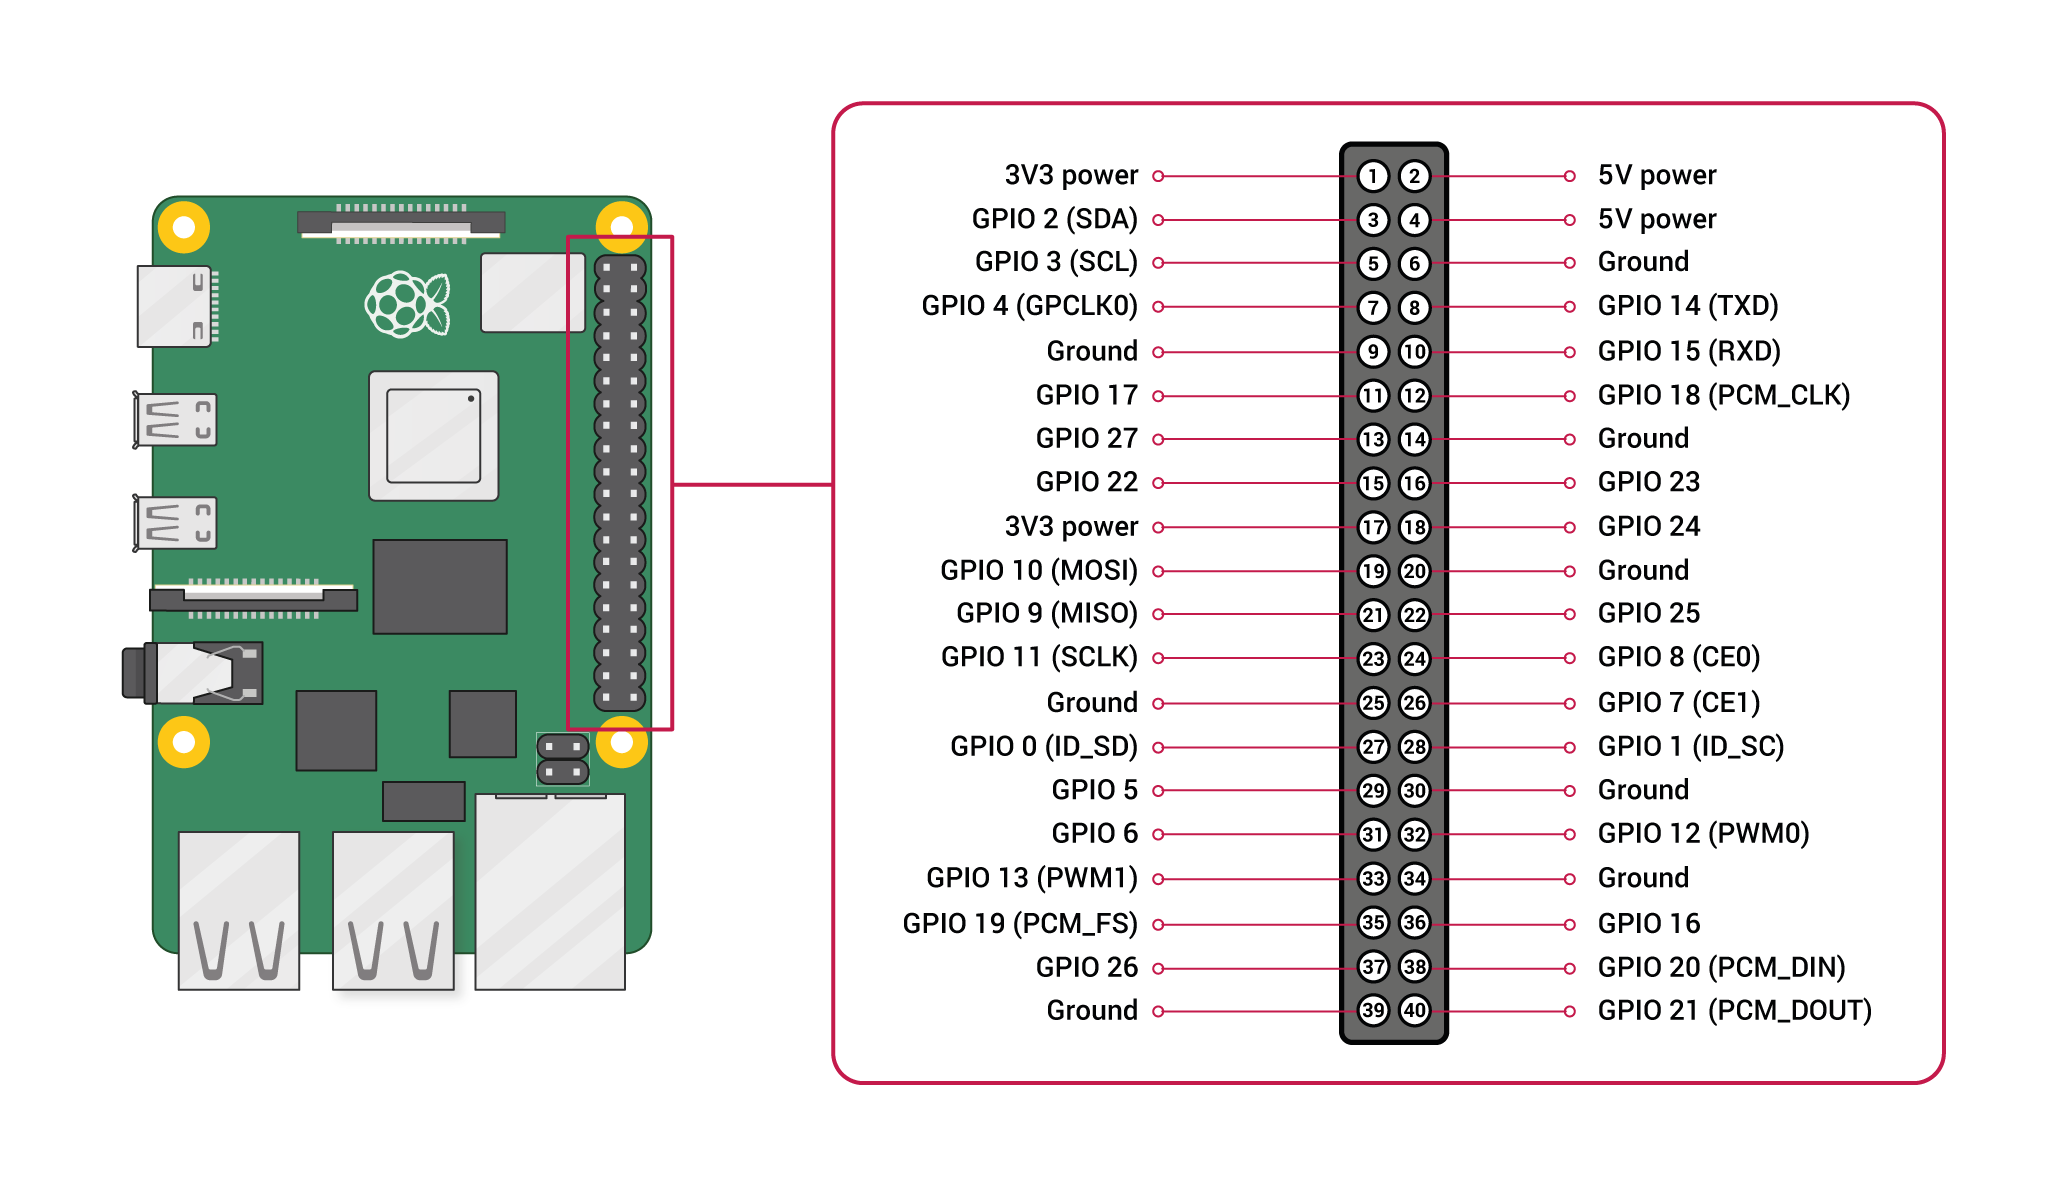
Pins 2, 4, 6, and 14 are used to power the board. The USB C port is used to connect to another computer
The software on the Raspberry Pi 4
To get the Raspberry Pi 4 to act as a USB storage device we need to make the appropriate software configuration changes. The most direct way to do this is to start with Raspberry Pi OS (64-bit) lite. In my case I started with the version 2024-11-19-raspios-bookworm-arm64-lite.img.xz. This needs to be copied to an SD card via the normal steps for setting up a Raspberry Pi. If you're doing the same thing I am doing you may want to get a large enough SD card to store multiple ISO images on it.
Once this is installed and running we need to make changes to the boot time configuration of the Raspberry Pi OS. This is done by editing the file /boot/firmware/config.txt as root. At the end of that file you add the following lines
[all]
dtoverlay=dwc2,dr_mode=peripheral
Actually explaining how this works is quite involved. In the most direct terms this applies a device tree overlay configuring one of the USB ports a peripheral. On the Raspberry Pi 4 that is always the USB-C port. If you don't understand what all of this means, that's fine. We also need the Raspberry Pi 4 to load the libcomposite kernel module on startup. To do this just edit /etc/modules as root then add this line to the end
libcomposite
You'll need to restart your Raspberry Pi 4 to pickup these changes.
Copy over an ISO file
You need to copy an ISO file to the Raspberry Pi which is going to be used as the source of data for the USB storage device. In my case I just copied the latest Alpine Linux ISO which is alpine-standard-3.21.3-x86_64.iso. I made a directory /opt/iso on the Raspberry Pi and copied it there.
Configuring libcomposite
The Linux kernel module libcomposite is used to configure the mode of the device that the Raspberry Pi pretends to be. There are a large number of things to do, but only 1 step really needs any consideration. These are the commands you need to run as root. The command in step 17 beginning with echo /opt/iso needs to be replaced with the path to an ISO file
mkdir -p /sys/kernel/config/usb_gadget/mygadget- create a directory for your "gadget"cd /sys/kernel/config/usb_gadget/mygadget- change to that directoryecho 0x1d6b > idVendor- configure the USB vendor IDecho 0x0104 > idProduct- configure the USB product IDecho 0x0100 > bcdDevice- configure the USB device IDecho 0x0200 > bcdUSB- configure the USB versionmkdir -p strings/0x409- create the strings for the USB deviceecho "1234567890" > strings/0x409/serialnumber- configure the device serial numberecho "hydrogen18" > strings/0x409/manufacturer- configure the device manufacturerecho "My USB Device" > strings/0x409/product- configure the device product namemkdir -p configs/c.1/strings/0x409echo "Config 1: Mass Storage" > configs/c.1/strings/0x409/configurationecho 250 > configs/c.1/MaxPowermkdir -p functions/mass_storage.usb0echo 0 > functions/mass_storage.usb0/lun.0/cdromecho 0 > functions/mass_storage.usb0/lun.0/roecho /opt/iso/alpine-standard-3.21.3-x86_64.iso > functions/mass_storage.usb0/lun.0/fileln -s functions/mass_storage.usb0 configs/c.1/ls /sys/class/udc > UDC
You can run all of those manually if you'd like, but I also put this together in a script you can use. The first argument to the script is the path to the ISO you want to use. This is invoked as sudo ./configure_pi_as_usb_drive.sh /storage/iso/alpine-standard-3.21.3-x86_64.iso or similar depending on where your ISO files are stored.
configure_pi_as_usb_drive.sh 893 Bytes
#!/bin/bash
# available under this license https://opensource.org/license/isc-license-txt
set -euo pipefail
isopath="$1"
stat "$isopath" 1>/dev/null

mkdir -p /sys/kernel/config/usb_gadget/mygadget
cd /sys/kernel/config/usb_gadget/mygadget
echo 0x1d6b > idVendor
echo 0x0104 > idProduct
echo 0x0100 > bcdDevice
echo 0x0200 > bcdUSB
mkdir -p strings/0x409
echo "1234567890" > strings/0x409/serialnumber
echo "hydrogen18" > strings/0x409/manufacturer
echo "My USB Device" > strings/0x409/product
mkdir -p configs/c.1/strings/0x409
echo "Config 1: Mass Storage" > configs/c.1/strings/0x409/configuration
echo 250 > configs/c.1/MaxPower
mkdir -p functions/mass_storage.usb0
echo 0 > functions/mass_storage.usb0/lun.0/cdrom
echo 0 > functions/mass_storage.usb0/lun.0/ro
echo "$isopath" > functions/mass_storage.usb0/lun.0/file
ln -s functions/mass_storage.usb0 configs/c.1/
ls /sys/class/udc > UDC
Connecting the Raspberry Pi 4 as a device
When the USB-C port is connected to a regular computer, that computer sees the device as a USB storage device that it can boot from. To do this I used a regular USB-A to USB-C cable. You don't need any special cabling to make this work.
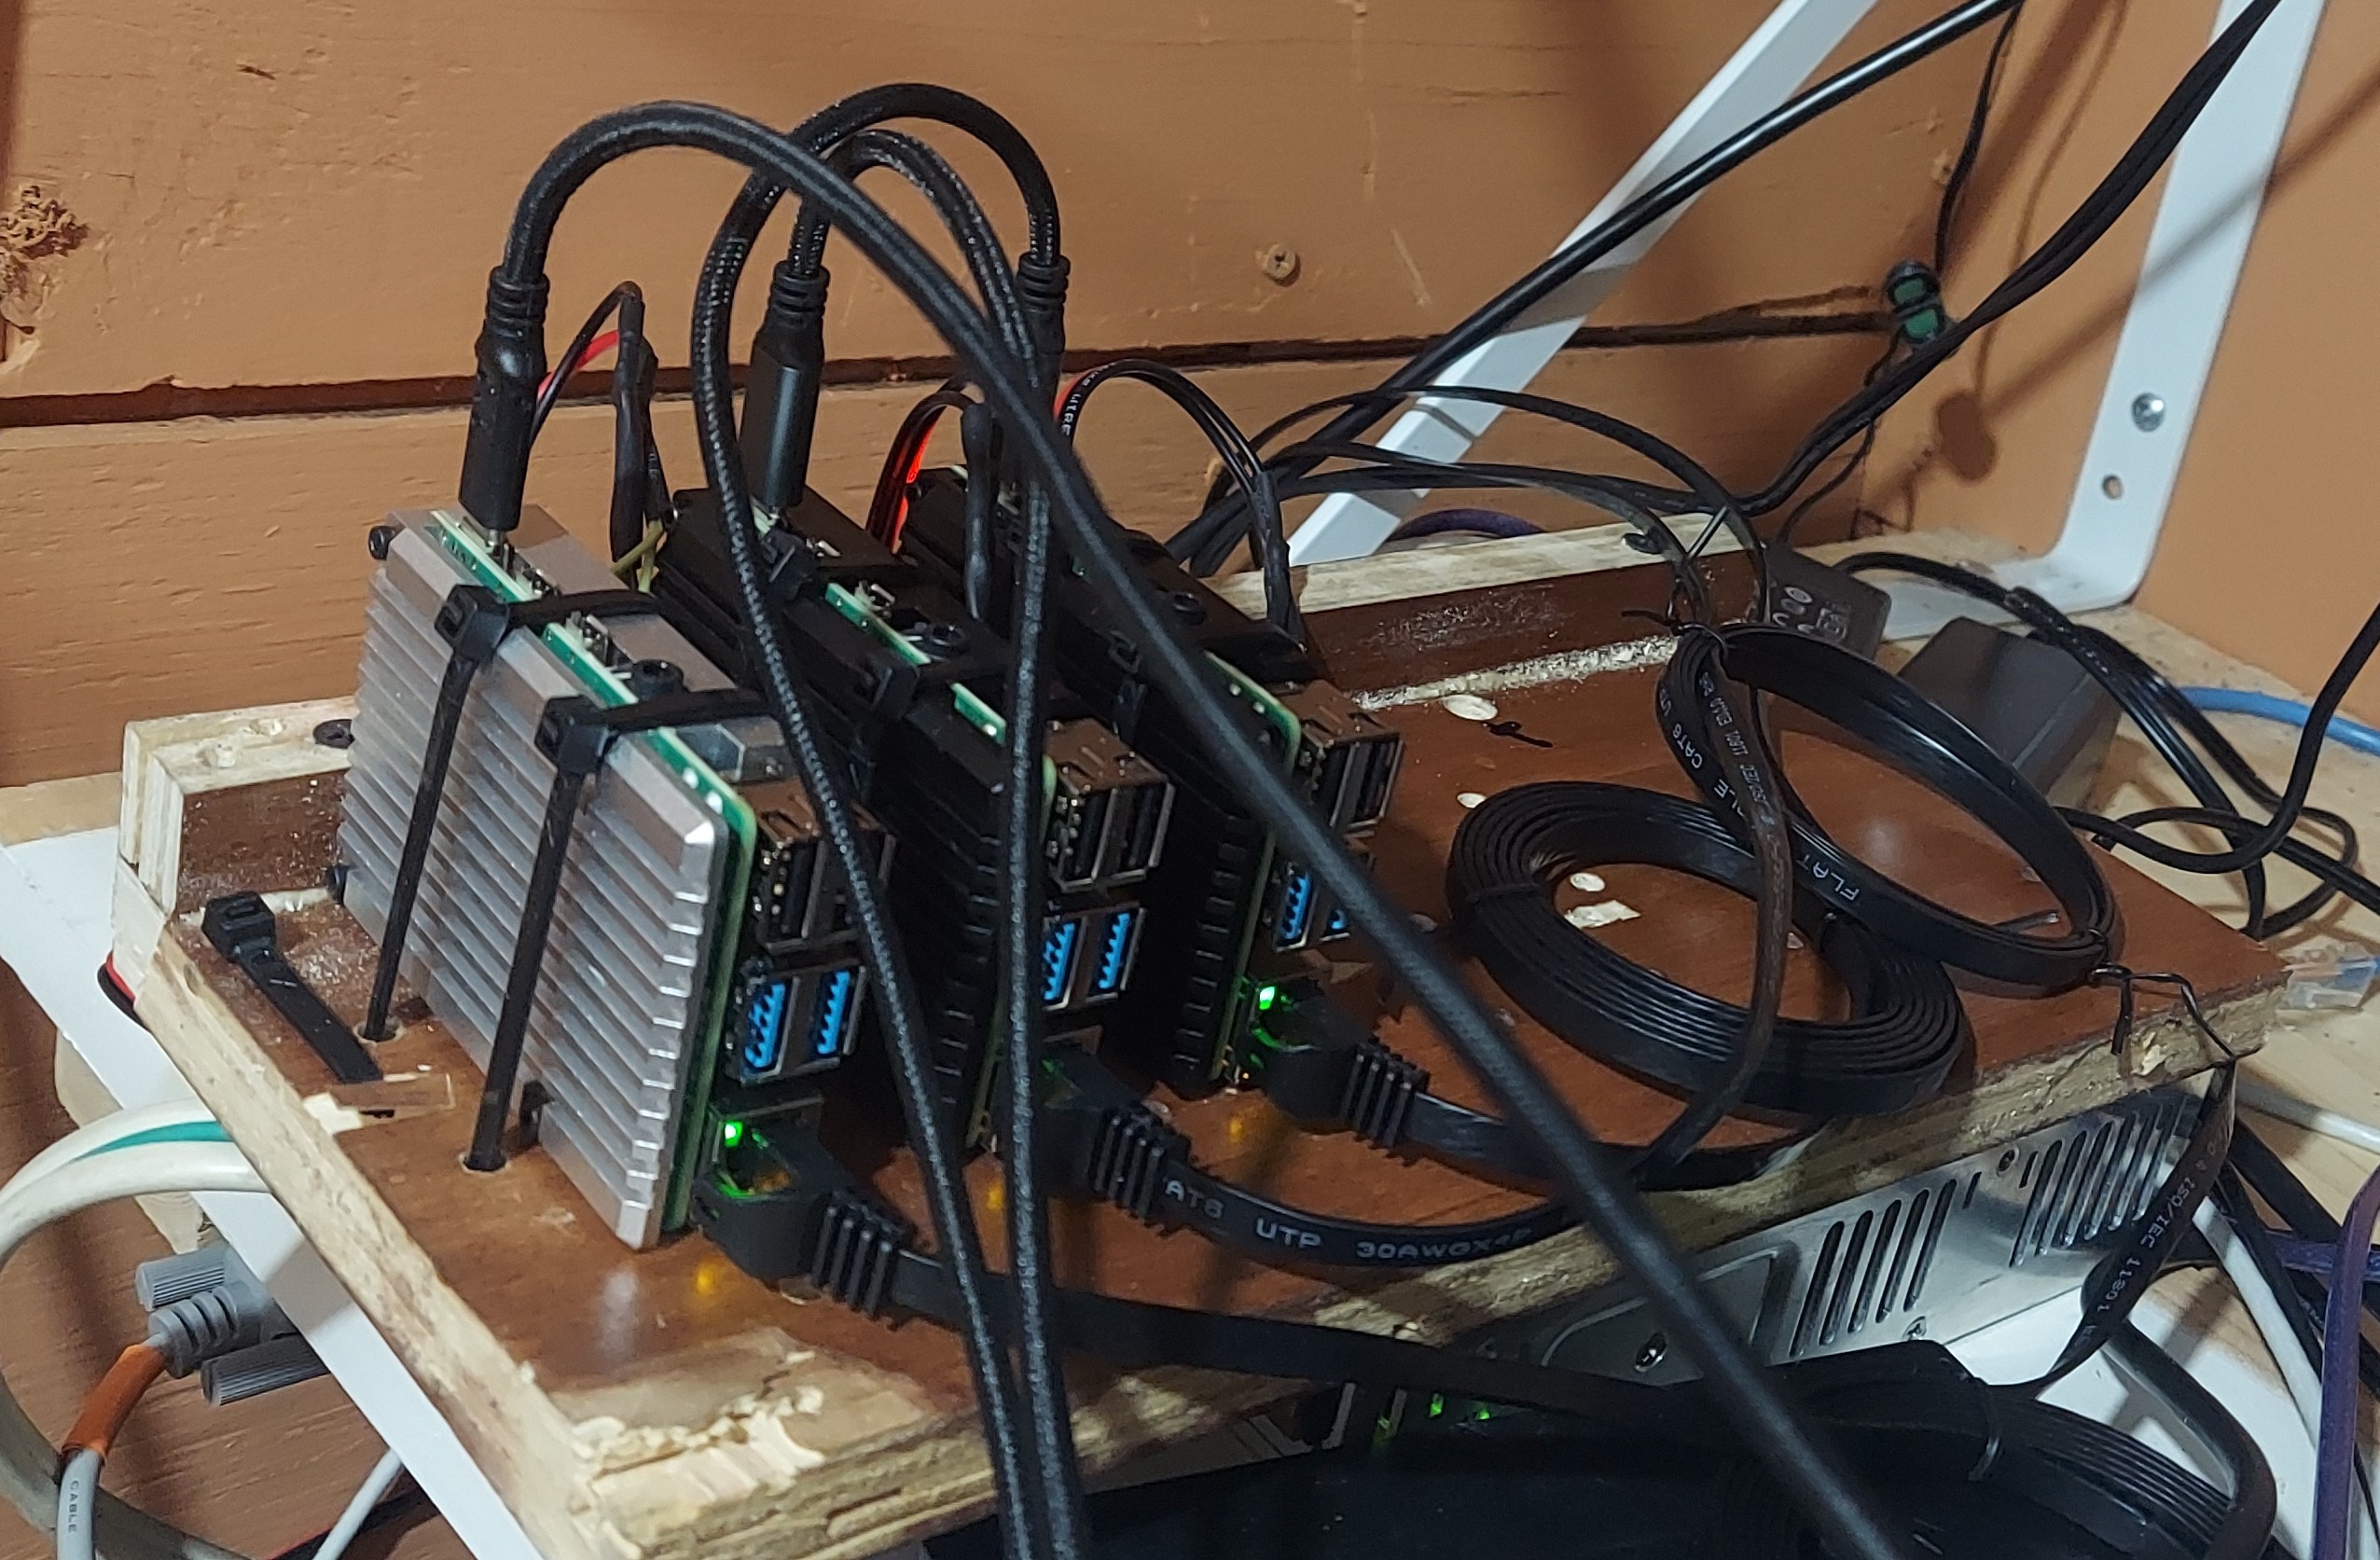
I assembled multiple Raspberry Pi 4's together onto a single chassis. Each USB-C to USB-A cable runs to a different physical computer. The Raspberry Pi 4 takes the role of a USB drive plugged into each computer.
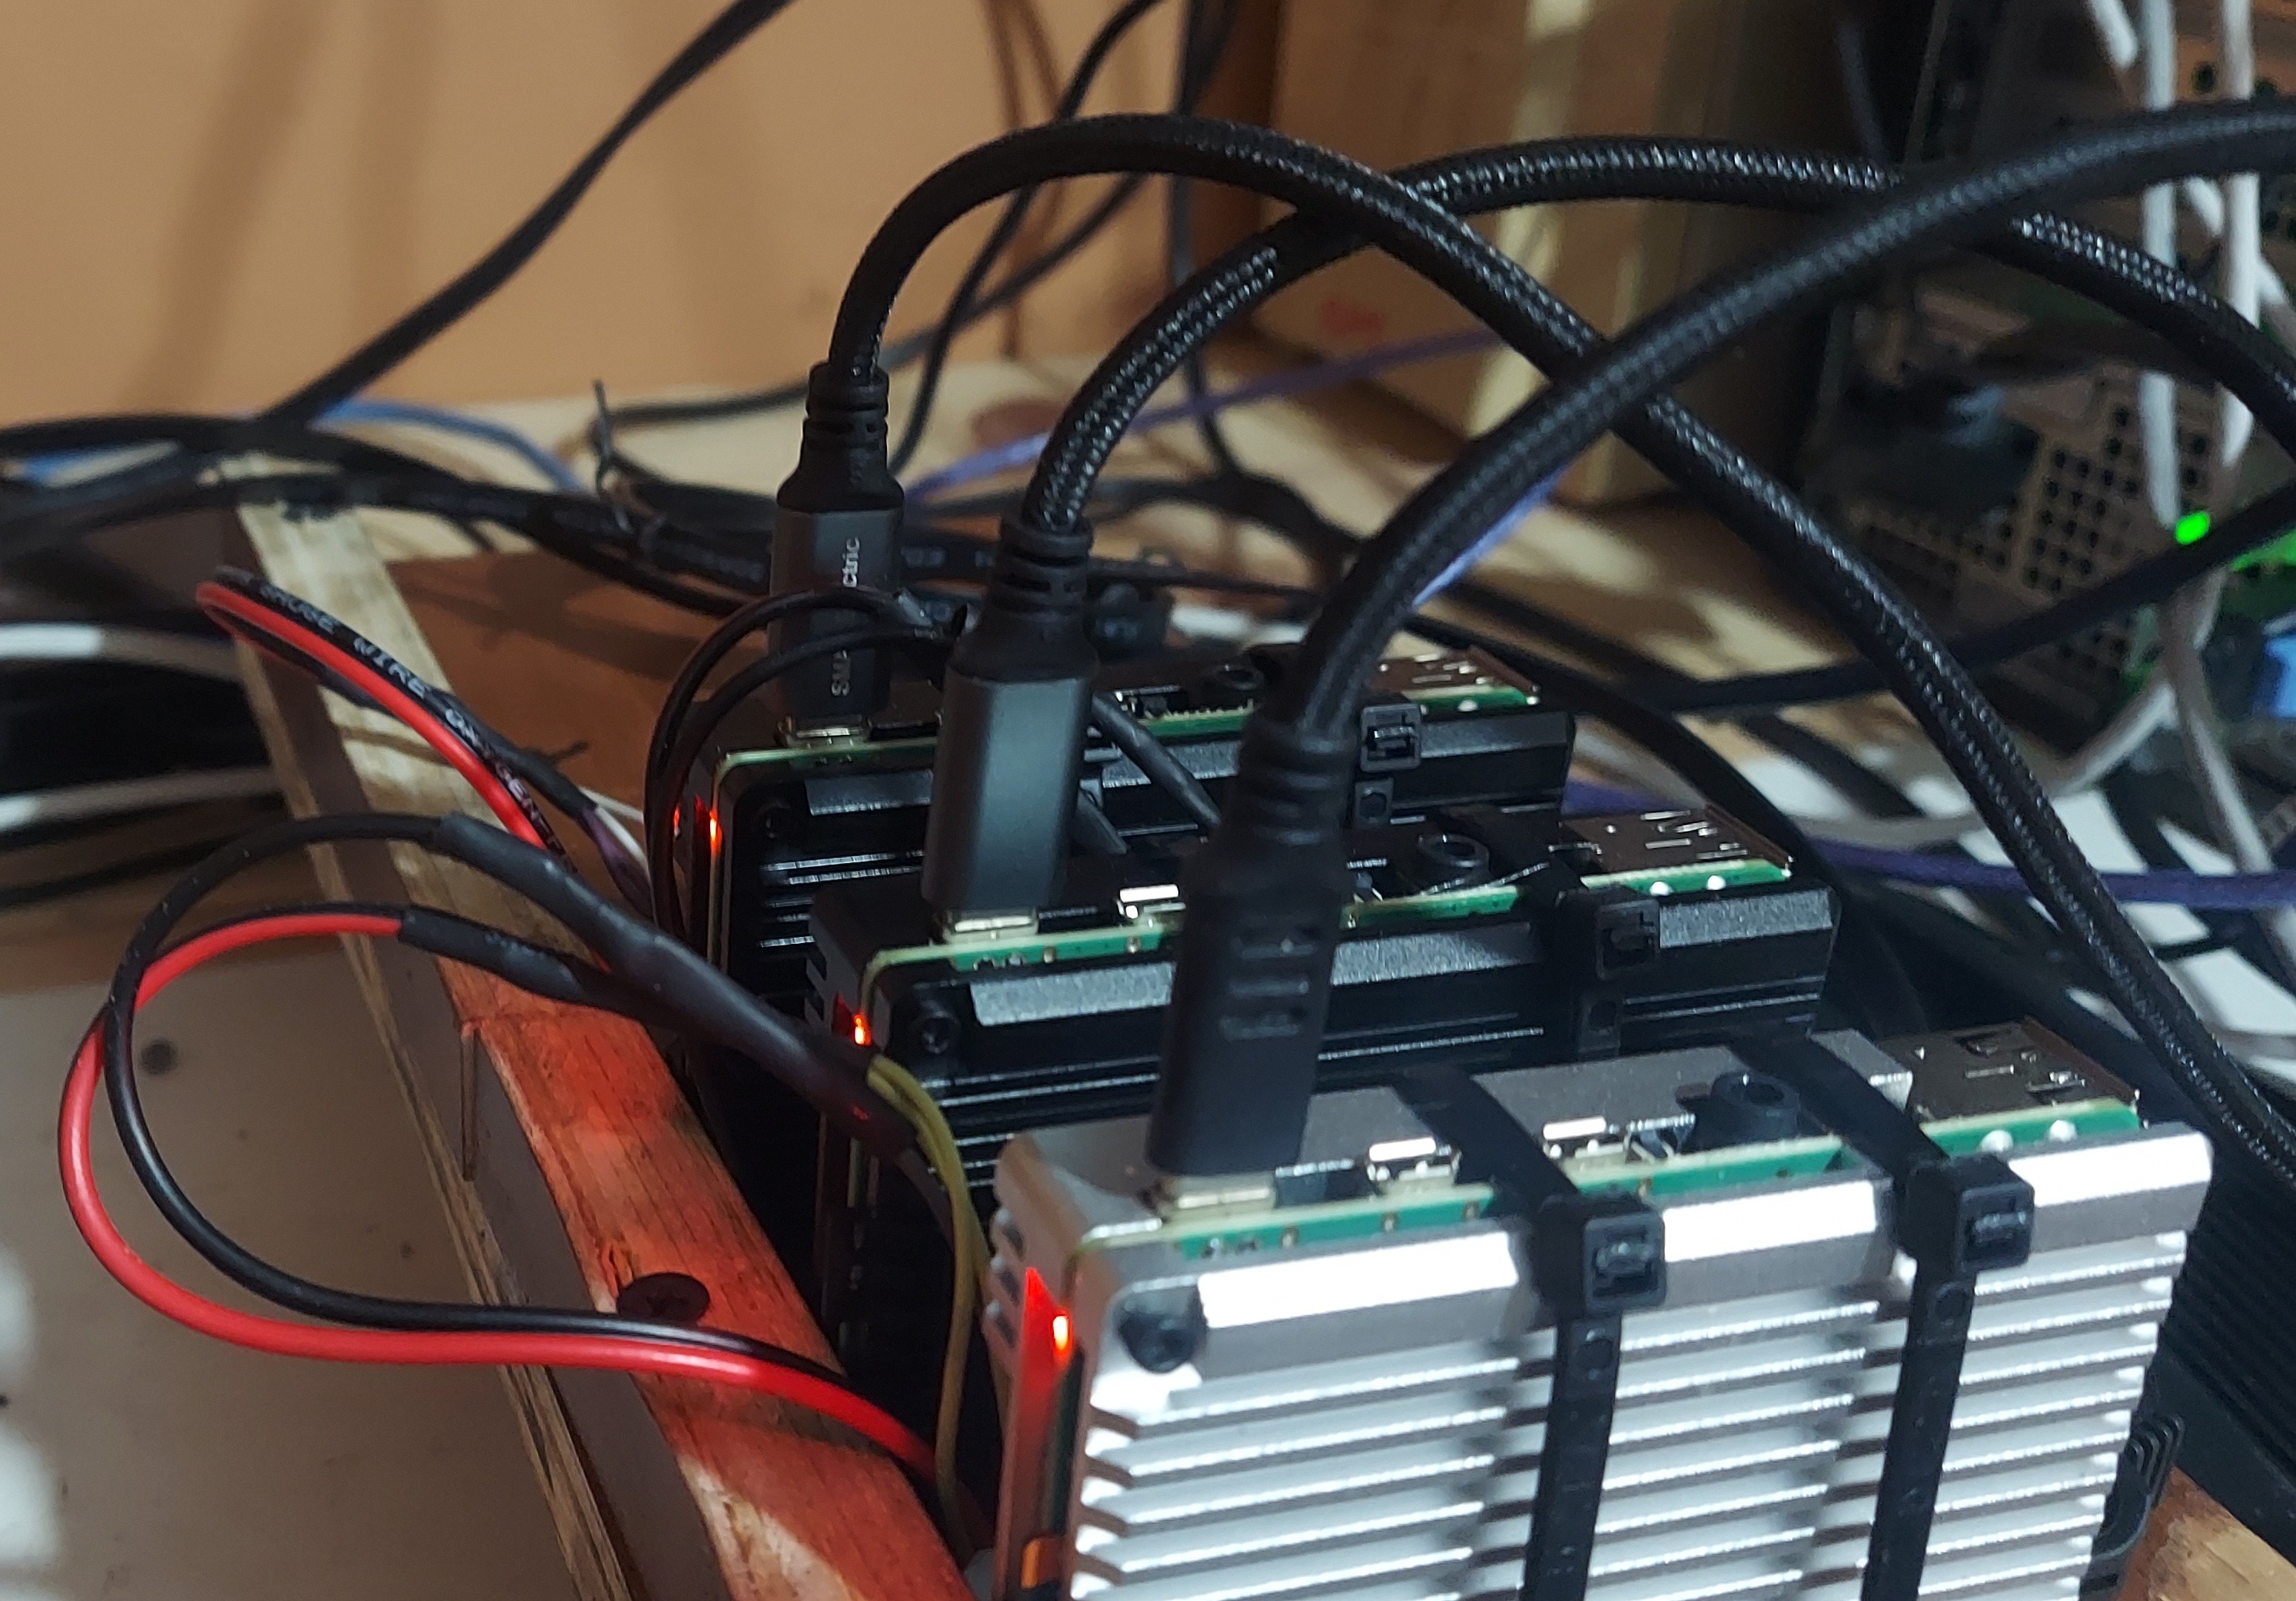
Closeup showing how each Pi is connected to power and USB
Tackling the power problem
By connecting the 5 volt power supply to the Raspberry Pi header, I managed to ensure that the Pi has a stable source of power. The unexpected consequence of this is that since the USB-C header can be used to power the Pi, it also means the Pi cannot be shut off if it is plugged into a computer that is also on. This may not matter to you, but in my case I leave the Raspberry Pi plugged into the computer all the time. This means that when I power on that computer, the Pi unexpectedly boots.
So what I needed was some way to prevent power from flowing from the computer to the Pi. There are dozens of cheap products that interrupt the data wires of a USB cable. But I only found 1 product on Amazon that interrupted the power wires. These actually turned out to be quite expensive and sold in a 2 pack. Installing these in line does in fact work, but I think you could get the same effect by cutting up a USB cable and clipping the power wires if you wanted to save money.
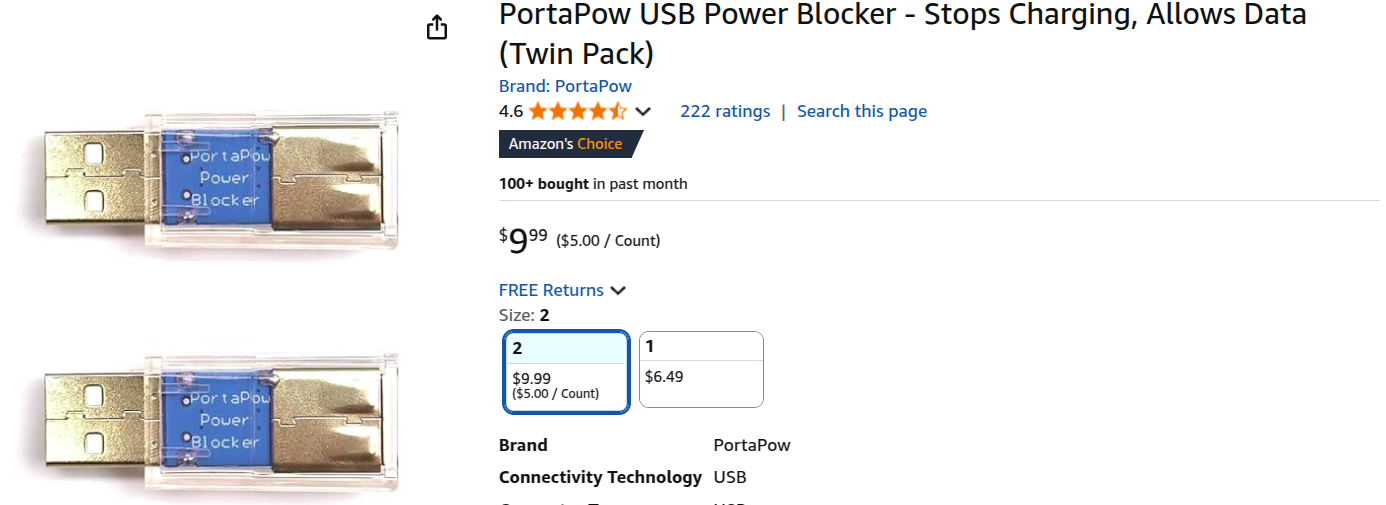
The only product I could find that interrupts the power pins on a USB connector
The power blocker installed in the USB 3.0 port of a computer
Using the Pi as a writable storage device
In my normal use case I only really need to have the Pi appear as a readable USB storage device. I was curious to see if this could be used as a writable USB device. There are in fact a number of reasons why this probably should not be done, but apparently at least one application for this manages to use it practically. One thing to realize is that the Pi emulates a USB 2.0 device. So while it is fast, it is nowhere near as fast as even a cheap USB 3.0 thumb drive.
I decided to try this, so I came up with this script. What this script does is configure the Raspberry Pi as two different USB storage devices simultaneously. One is a read only device that uses the Alpine 3.21 ISO as its source. The other uses a file /opt/storage/install.img as its backing store and is read-write capable. You will need to create a file with fallocate for this purpose.
usb_install_media_and_destination_drive.sh 1.2 kB
#!/bin/bash
# available under this license https://opensource.org/license/isc-license-txt
set -euo pipefail
# ref: https://www.reddit.com/r/linux4noobs/comments/1h8xcfb/libcomposite_mass_storage_with_2_luns/
mkdir -p /sys/kernel/config/usb_gadget/mygadget
cd /sys/kernel/config/usb_gadget/mygadget
echo 0x1d6b > idVendor
echo 0x0104 > idProduct
echo 0x0100 > bcdDevice
echo 0x0200 > bcdUSB
mkdir -p strings/0x409
echo "1234567890" > strings/0x409/serialnumber
echo "hydrogen18" > strings/0x409/manufacturer
echo "device1" > strings/0x409/product
mkdir -p configs/c.1/strings/0x409
echo "Config 1: Mass Storage" > configs/c.1/strings/0x409/configuration
echo 250 > configs/c.1/MaxPower

# lun0 is read only for the ISO file
mkdir -p functions/mass_storage.usb0
echo 0 > functions/mass_storage.usb0/lun.0/cdrom
echo 0 > functions/mass_storage.usb0/lun.0/ro
echo /opt/iso/alpine-standard-3.21.3-x86_64.iso > functions/mass_storage.usb0/lun.0/file

# lun1 is read-write for the install target
echo 1 > functions/mass_storage.usb0/lun.1/cdrom
echo 1 > functions/mass_storage.usb0/lun.1/ro
echo /opt/storage/install.img > functions/mass_storage.usb0/lun.1/file

ls /sys/class/udc > UDC
Using a single Raspberry Pi 4 as a system boot drive turns out to be more of a curiosity than a practical usage. It's so slow as to be incredibly painful to do anything on a modern operating system.
References
Most of the steps I used to do this were found in this guide.